

Table of Contents Show
A straight weave can make getting ready much easier, but choosing a style that looks polished without feeling plain is not always simple.
The good news is that straight extensions can be shaped into sleek ponytails, soft layered looks, neat updos, and elegant everyday styles.
These classy straight weave hairstyles will help you find a look that feels smooth, flattering, and suitable for work, dinners, celebrations, or any day when you want your hair to look put together.
1. Sleek Middle-Part Waist-Length Weave
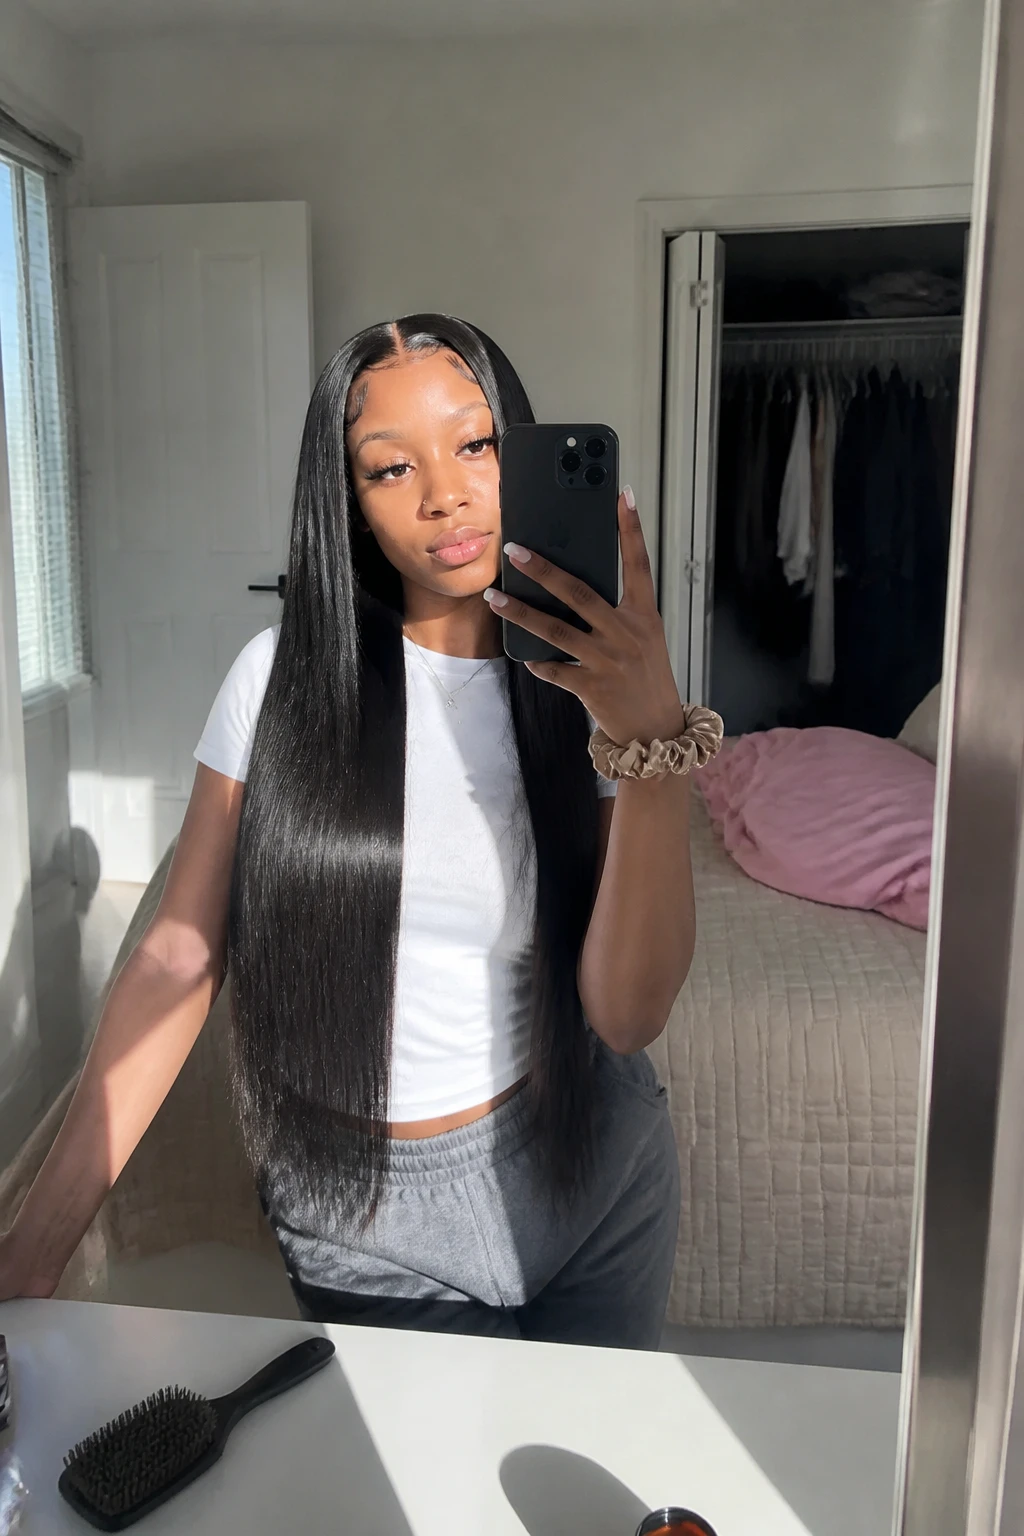
This smooth waist-length weave creates a clean, confident look with a sharp middle part and a glossy finish. It works especially well for women who enjoy long hair but still want a simple style that looks elegant rather than overly dramatic. Wear it for dinners, formal events, date nights, or polished everyday outfits.
What you need
- Rat-tail comb for creating a precise middle part
- Heat protectant to reduce damage from hot tools
- Flat iron for smoothing the lengths
- Lightweight hair serum for a glossy finish
- Edge brush for neatening the hairline
How to style it
- Brush through the weave and apply a light layer of heat protectant from the middle lengths to the ends.
- Use a rat-tail comb to create a straight middle part, then flat-iron the hair in small sections.
- Smooth the top of the weave with a wax stick or lightweight styling cream.
- Apply a small amount of serum to the ends and gently shape the edges for a neat finish.
Quick tip
Avoid applying too much serum near the roots, as this can make the weave look flat or oily.
2. Side-Part Layered Straight Weave
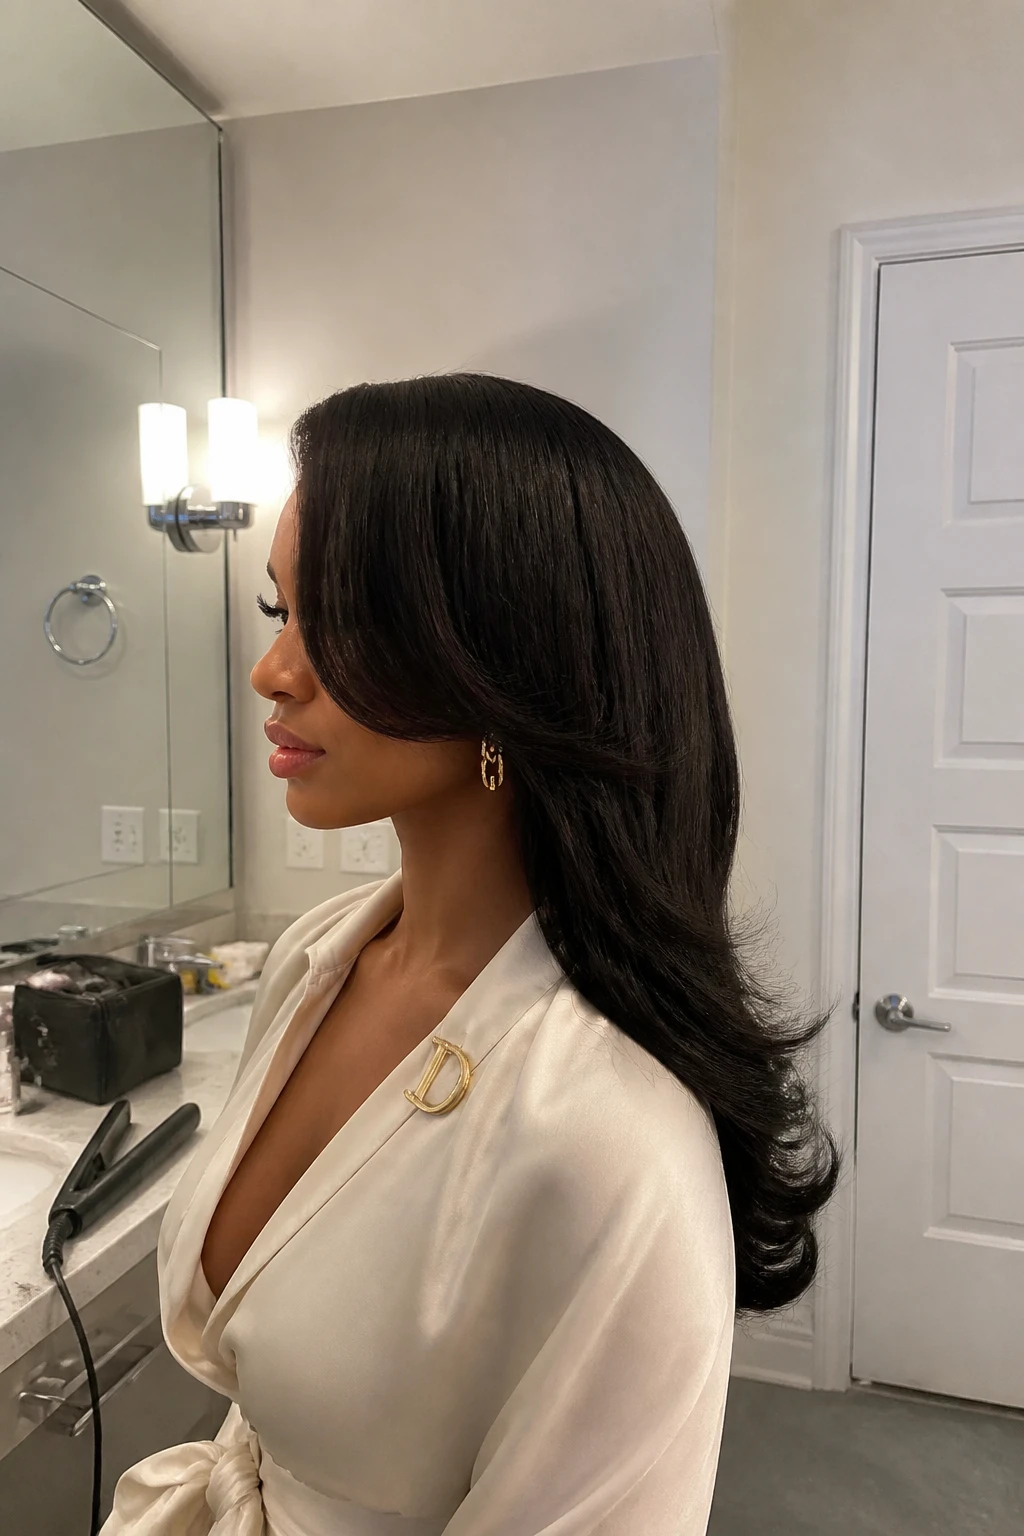
This layered straight weave has a deep side part, softly shaped ends, and face-framing pieces that give the hair natural movement. It is a flattering choice for women who want their weave to look full without feeling heavy around the face. The style is polished enough for the office but still soft enough for brunch or an evening out.
What you need
- Wide-tooth comb for gentle detangling
- Heat protectant spray for safe heat styling
- Flat iron for smoothing the layers
- Large round brush for shaping the ends
- Light-hold hairspray for flexible control
How to style it
- Detangle the weave and create a deep side part above the arch of one eyebrow.
- Straighten the hair in sections, gently curving the flat iron inward around the face-framing layers.
- Use a round brush to shape the ends and add a small amount of movement.
- Smooth the top and mist the finished style with light-hold hairspray.
Quick tip
Ask your stylist to begin the shortest layers near the cheekbones or jawline so they frame your face naturally.
3. Polished Straight Weave Bob

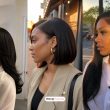
This chin-length straight weave bob looks neat, structured, and effortlessly refined. It is ideal for women who want a low-maintenance style that feels professional while still framing the face beautifully. The shorter length also makes it practical for warm weather, workdays, and busy mornings.
What you need
- Fine-tooth comb for smoothing the bob
- Flat iron for creating a straight finish
- Heat protectant to shield the hair
- Wax stick for controlling the top and part
- Shine spray for a polished appearance
How to style it
- Apply heat protectant and divide the bob into small horizontal sections.
- Flat-iron each section while slightly bending the ends inward toward the jaw.
- Smooth the part and crown with a small amount of wax stick.
- Finish with a light mist of shine spray, keeping the product away from the roots.
Quick tip
Tuck one side behind the ear and add a small earring to make the bob feel even more polished.
4. Low Straight Weave Ponytail
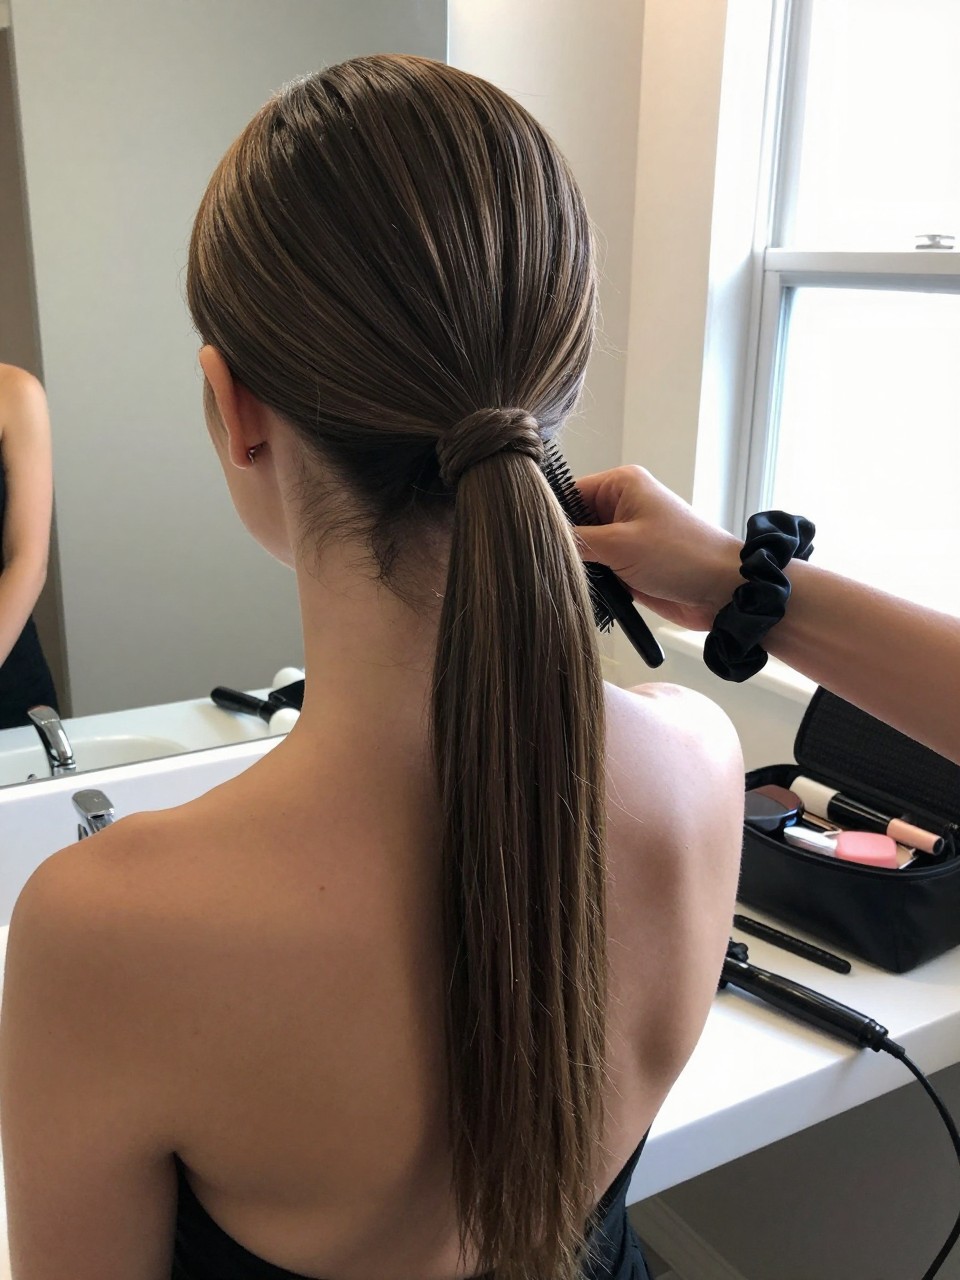
This low ponytail gathers straight weave hair neatly at the nape while keeping the finished look smooth and understated. It is especially useful for work, business meetings, dinners, or days when you want your hair away from your face without wearing a basic bun. The wrapped base gives the ponytail a clean salon-style finish.
What you need
- Paddle brush for smoothing the hair backward
- Styling gel or mousse for controlling flyaways
- Strong hair elastic for securing the ponytail
- Bobby pins for holding the wrapped section
- Lightweight hairspray for lasting neatness
How to style it
- Brush the weave back toward the nape, leaving your preferred middle or side part visible.
- Apply a small amount of gel around the top and sides, then gather the hair into a low ponytail.
- Secure it with an elastic, wrap a thin section of hair around the base, and pin it underneath.
- Straighten the ponytail if needed and finish by smoothing any flyaways.
Quick tip
Keep the ponytail directly at the nape rather than too high to maintain its elegant shape.
5. Feathered Straight Weave Lob

This collarbone-length weave features light feathered layers that sweep away from the face while keeping most of the hair straight. It is a good option for women who want movement and softness without committing to curls or a heavily layered cut. The style feels classy enough for work, special lunches, and family gatherings.
What you need
- Heat protectant for preparing the weave
- Flat iron for smoothing the hair
- Medium round brush for feathering the front
- Velcro rollers for setting the face-framing pieces
- Flexible hairspray for light hold
How to style it
- Detangle the weave and divide the front face-framing sections from the rest of the hair.
- Straighten the main lengths, slightly turning the ends inward.
- Shape the front pieces away from the face with a round brush or flat iron, then set them briefly with rollers.
- Remove the rollers, separate the layers with your fingers, and add a light mist of hairspray.
Quick tip
Use larger rollers around the front to create a softer, more modern feathered shape.
6. Half-Up Straight Weave Ponytail
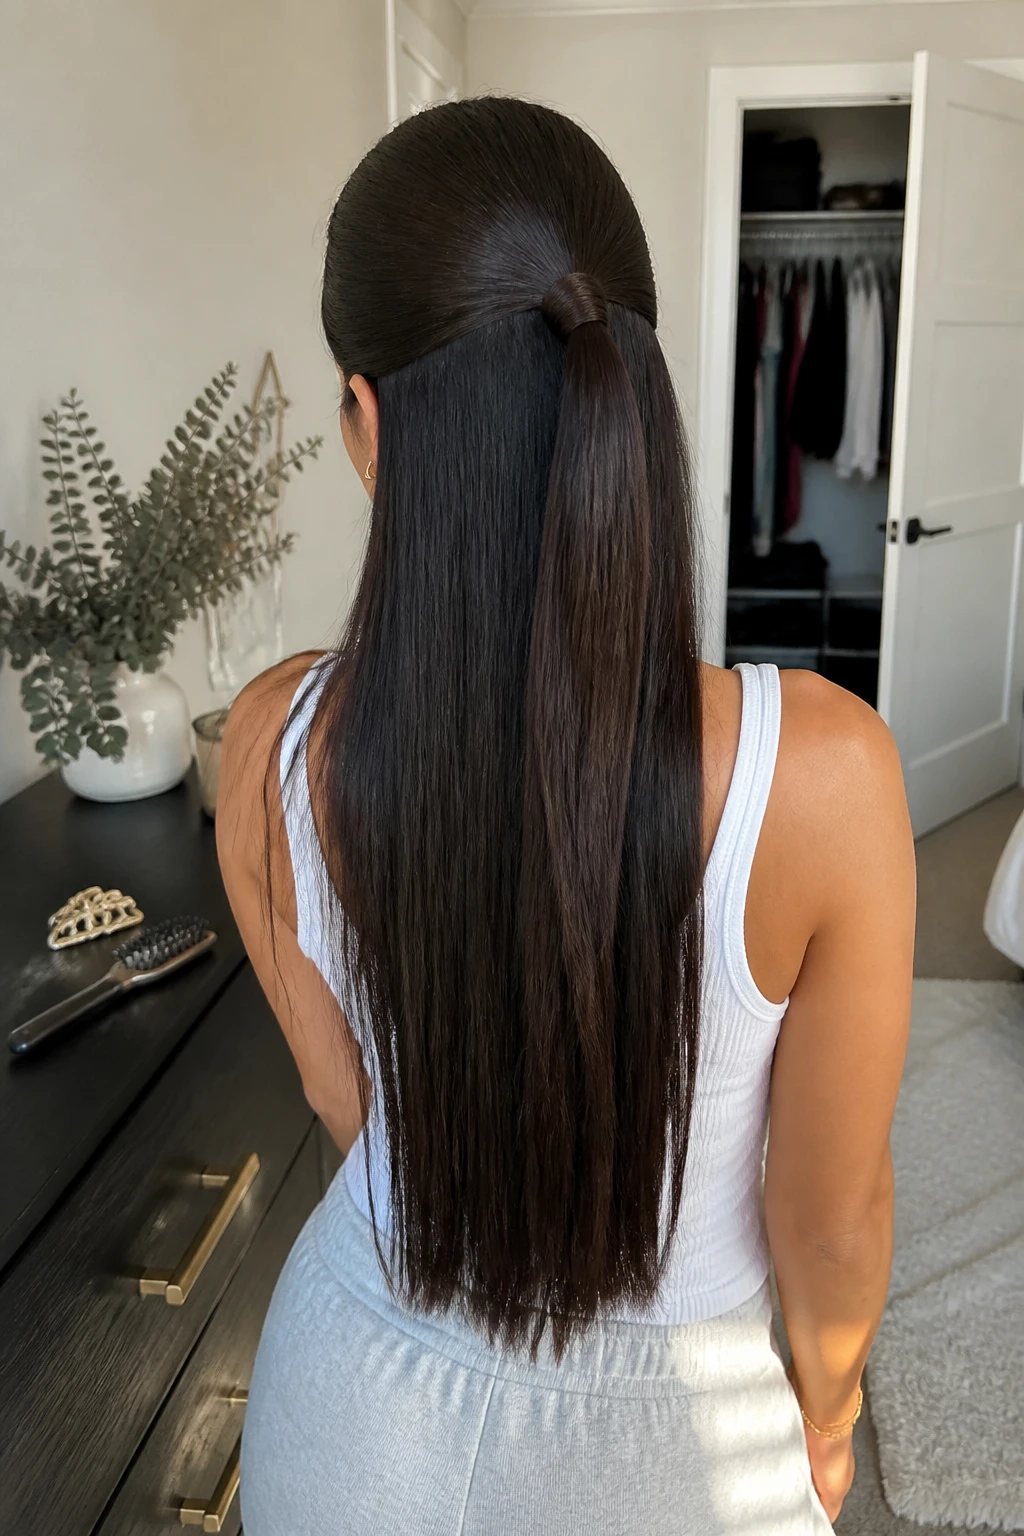
This half-up ponytail lifts the crown while allowing the remaining straight weave to fall smoothly down the back. It works well for women who want to open up the face without pulling all their hair away. The clean shape makes it suitable for birthdays, dinner dates, daytime events, and polished casual outfits.
What you need
- Tail comb for creating even sections
- Small hair elastic for securing the top half
- Edge control for smoothing the hairline
- Flat iron for refining the loose lengths
- Decorative barrette as an optional finishing touch
How to style it
- Separate the hair from the temples to the crown, keeping the part neat and balanced.
- Brush the top section backward and secure it in a small ponytail.
- Wrap a thin strand around the elastic or cover it with a simple barrette.
- Straighten the loose hair and smooth the edges for a clean finish.
Quick tip
Position the ponytail near the upper back of the head rather than directly on top to keep the look classy.
7. Blunt-Cut Straight Weave Lob
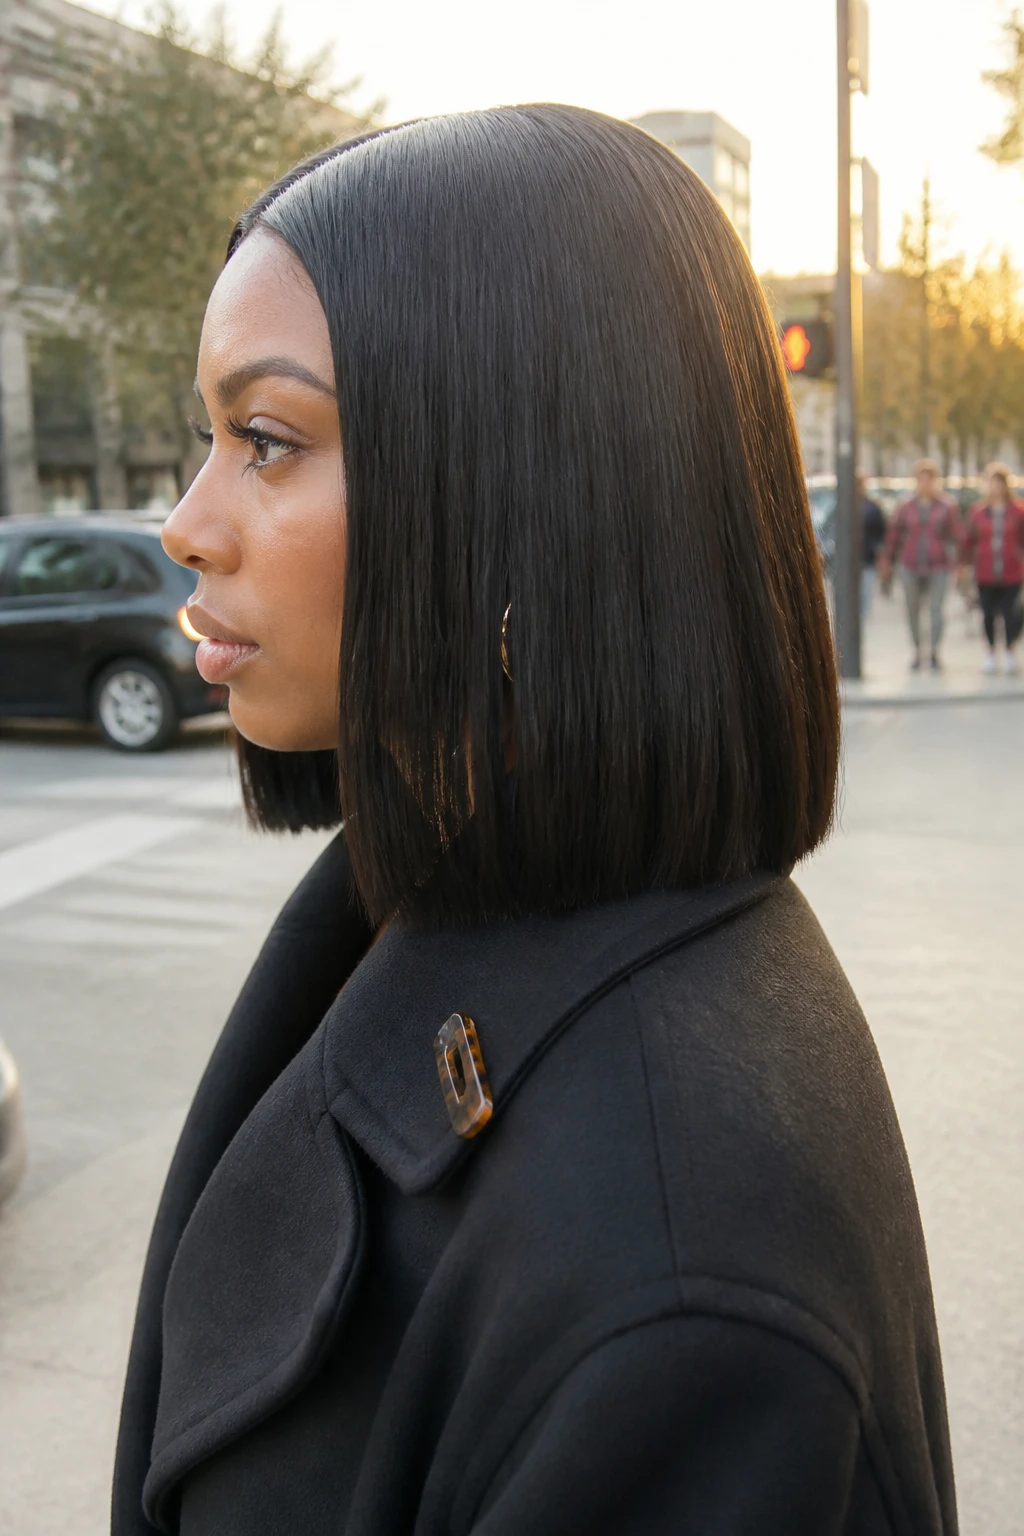
This blunt lob sits just above the shoulders with an even, sharp hemline that makes the weave appear thicker. It is a sophisticated choice for fine or medium-density extensions because the solid ends create a fuller shape. The style works well for the office, formal lunches, interviews, and minimalist outfits.
What you need
- Heat protectant spray for hair preparation
- Flat iron for creating a sleek texture
- Fine-tooth comb for keeping the ends aligned
- Smoothing cream for reducing frizz
- Shine mist for a healthy finish
How to style it
- Apply heat protectant and comb the weave into its natural fall.
- Straighten the hair in narrow sections, guiding each section downward without bending the ends.
- Smooth a small amount of cream over the surface and around the part.
- Check that the ends sit evenly, then apply a light shine mist.
Quick tip
A blunt lob looks best when the ends are trimmed regularly and kept free from thin, uneven strands.
8. Straight Weave With Soft Curtain Layers

This straight weave combines a smooth base with long curtain-style layers that frame both sides of the face. It is helpful for women who want the softness of curtain bangs without cutting a short fringe. The balanced shape makes it a lovely option for date nights, weddings, dinners, and dressier everyday plans.
What you need
- Round brush for directing the front layers
- Blow-dryer with a concentrator nozzle
- Heat protectant for reducing dryness
- Flat iron for smoothing the longer sections
- Light finishing spray for maintaining movement
How to style it
- Separate the shorter front layers and apply heat protectant throughout the weave.
- Straighten the longer sections, keeping the hair smooth from roots to ends.
- Use a round brush and blow-dryer to direct the front pieces away from the center of the face.
- Let the layers cool, then separate them gently and mist with finishing spray.
Quick tip
Do not over-curl the front sections; a light outward bend will keep the style looking straight and modern.
9. Sleek High Straight Weave Ponytail
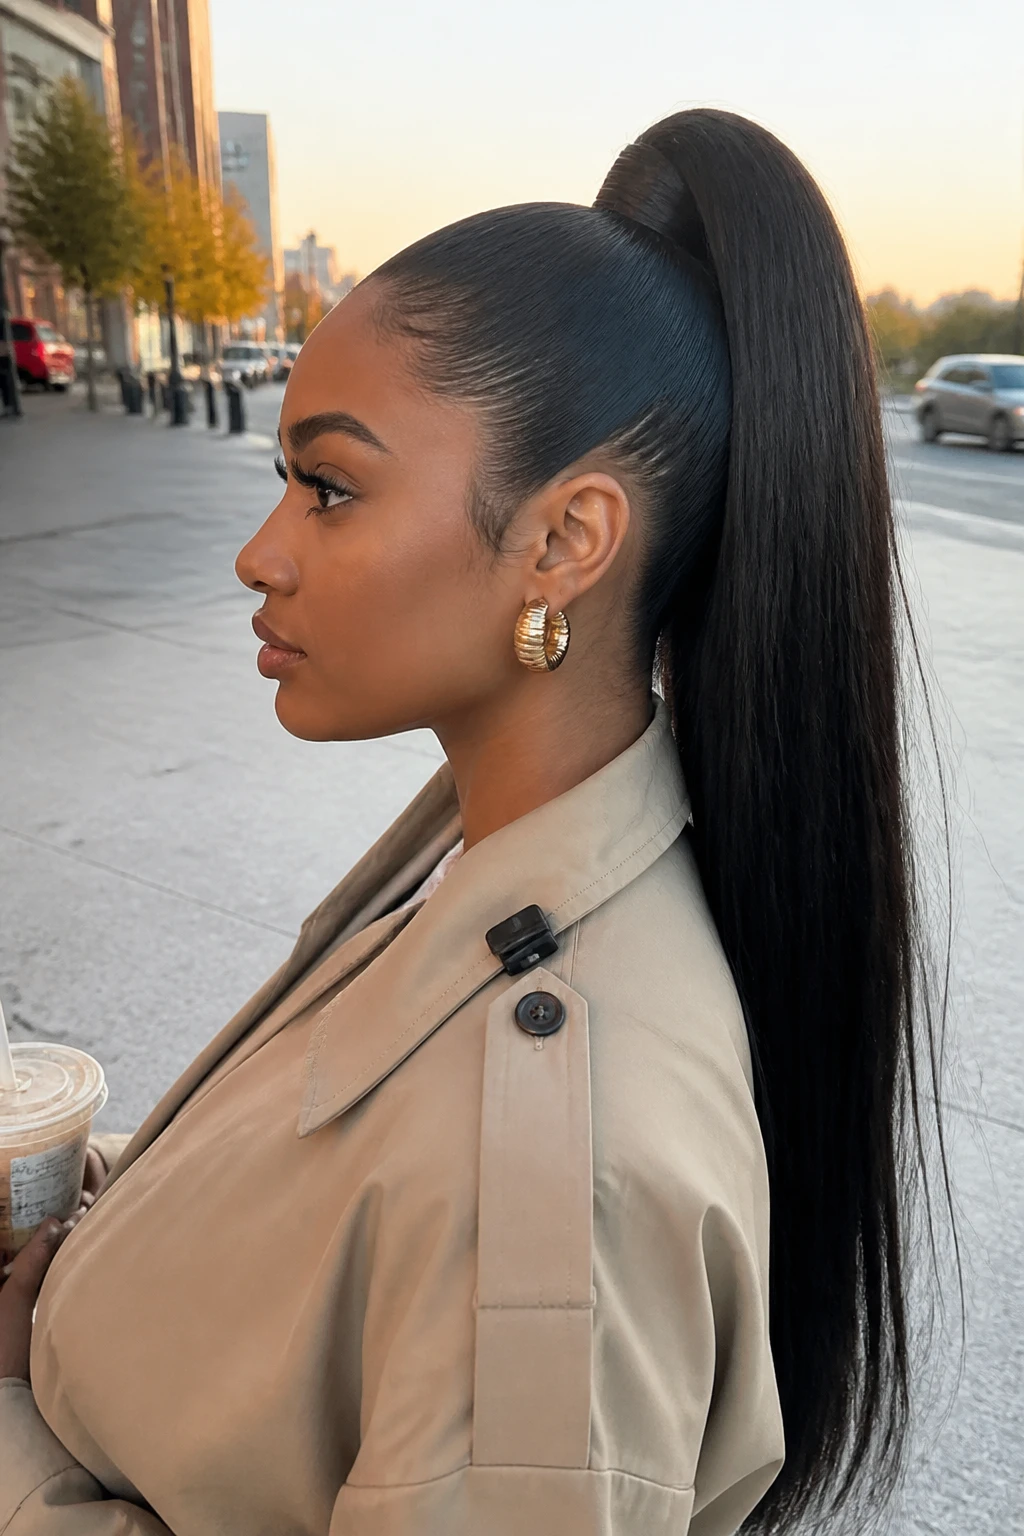
This high ponytail creates a lifted, confident look while allowing the straight weave to fall in one long, smooth line. It is best for women who want a statement hairstyle that still feels polished and controlled. Wear it to parties, birthdays, evening events, or any occasion where you want a slightly bolder finish.
What you need
- Firm paddle brush for gathering the hair
- Strong styling gel for a sleek base
- Secure hair elastic for holding the ponytail
- Bobby pins for securing the wrapped section
- Edge brush for shaping the hairline
How to style it
- Brush all the hair upward toward the crown, checking that the weave tracks remain covered.
- Apply gel around the sides and top, then secure the hair with a strong elastic.
- Wrap a narrow section around the base and hold it underneath with bobby pins.
- Flat-iron the ponytail if needed and finish by smoothing the edges and flyaways.
Quick tip
Avoid placing the ponytail too close to the forehead, as a slightly lower crown position looks more balanced and refined.
10. Straight Weave With Curved Under Ends
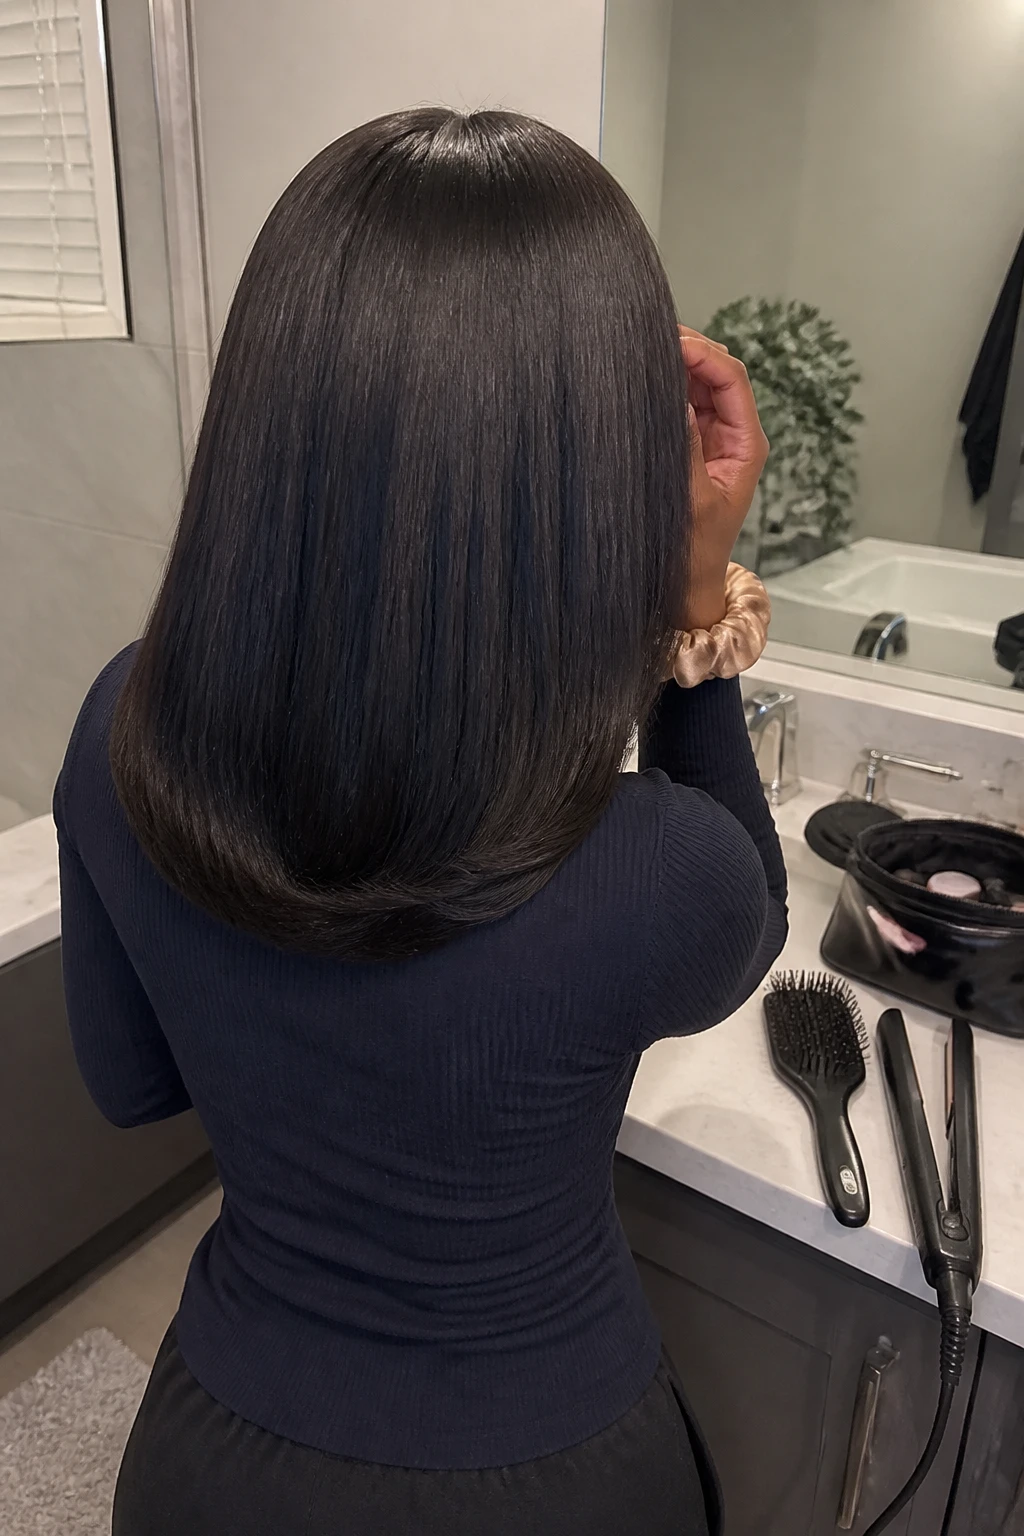
This style keeps the weave sleek through the lengths while gently curving the ends underneath for a soft, finished shape. It is a flattering choice for medium-length hair because the bend helps the ends appear neat and full. The look works beautifully for professional settings, church, dinners, or family celebrations.
What you need
- Heat protectant for preparing the hair
- Flat iron with rounded edges
- Paddle brush for smoothing the lengths
- Lightweight serum for adding shine
- Flexible hairspray for holding the curved ends
How to style it
- Apply heat protectant and brush the weave until it is completely tangle-free.
- Straighten each section, slowly turning the flat iron inward during the final few inches.
- Allow the curved ends to cool before brushing them lightly into place.
- Add a small amount of serum and mist the ends with flexible hairspray.
Quick tip
Use a gentle bend rather than a tight curl so the hairstyle still reads as straight.
11. Deep Side-Part Straight Weave With Ear Tuck
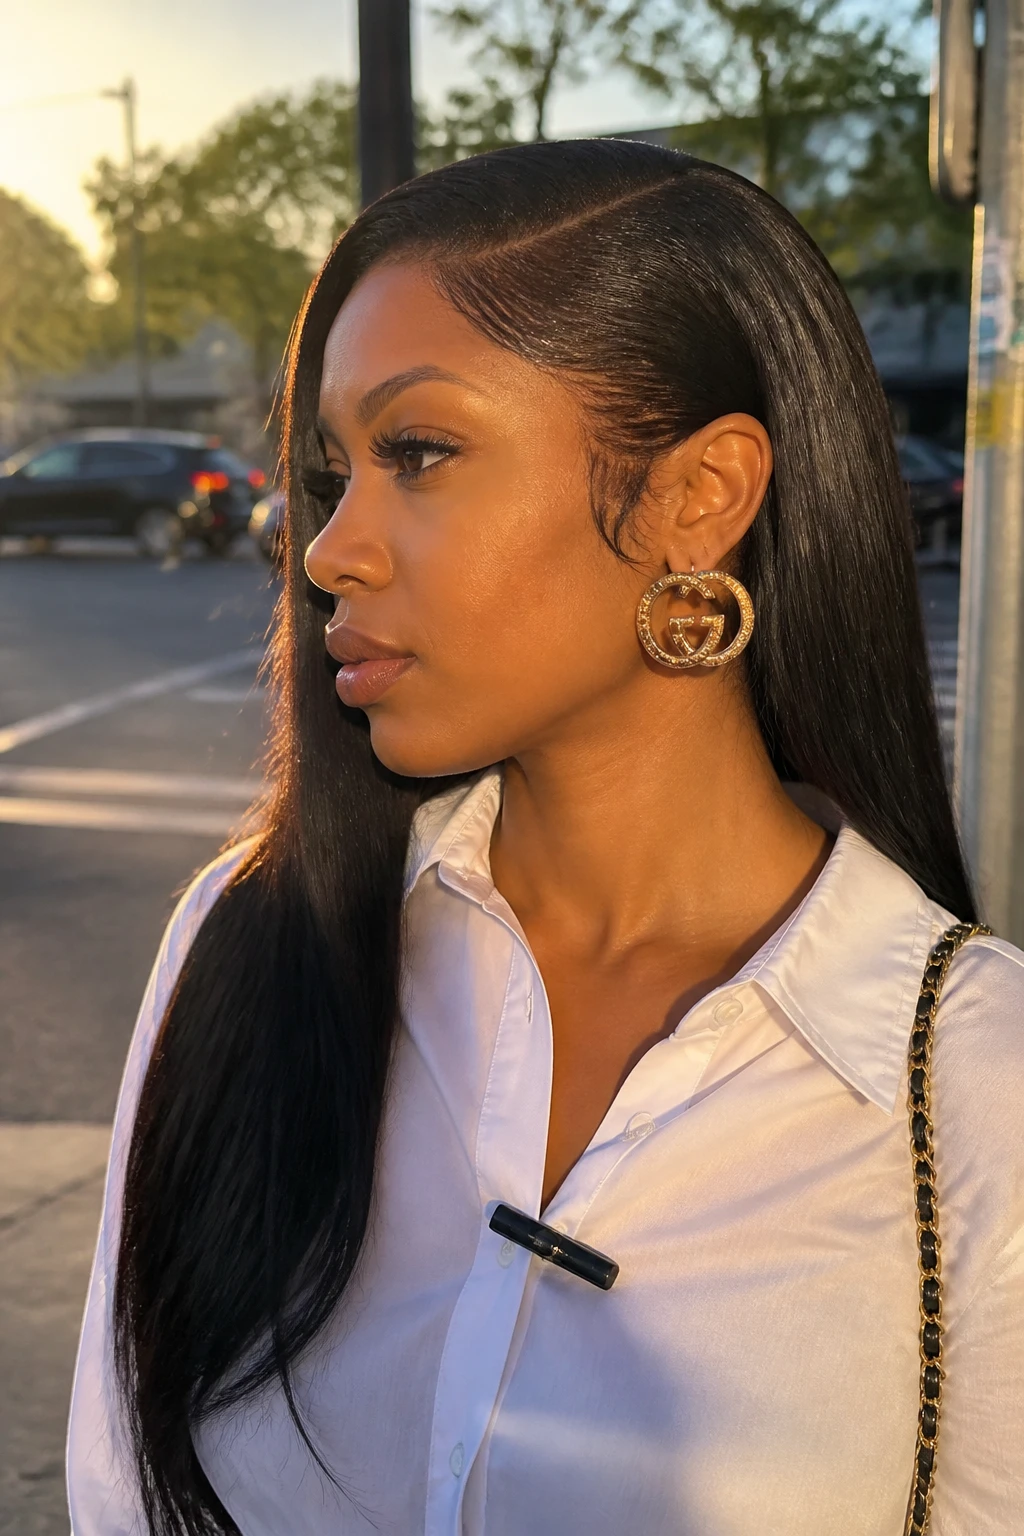
This long straight weave features a dramatic side part with one side tucked neatly behind the ear. The simple tuck reveals the cheekbone and earrings, giving an otherwise minimal hairstyle a more elegant finish. It is especially useful for formal dinners, cocktail events, weddings, and evening photographs.
What you need
- Rat-tail comb for creating the deep part
- Flat iron for smoothing the weave
- Styling wax for keeping the tucked side neat
- Small hidden bobby pin for extra hold
- Statement earrings as an optional accessory
- Create a deep side part and brush the heavier section smoothly across the forehead.
- Straighten the weave, keeping the hair close to the head around the part.
- Tuck the lighter side behind the ear and use a hidden pin if the hair slips forward.
- Smooth the surface with a small amount of wax and add earrings to complete the look.
Quick tip
Place the pin behind the ear and beneath the hair so it remains completely hidden.
12. Low Twisted Straight Weave Bun
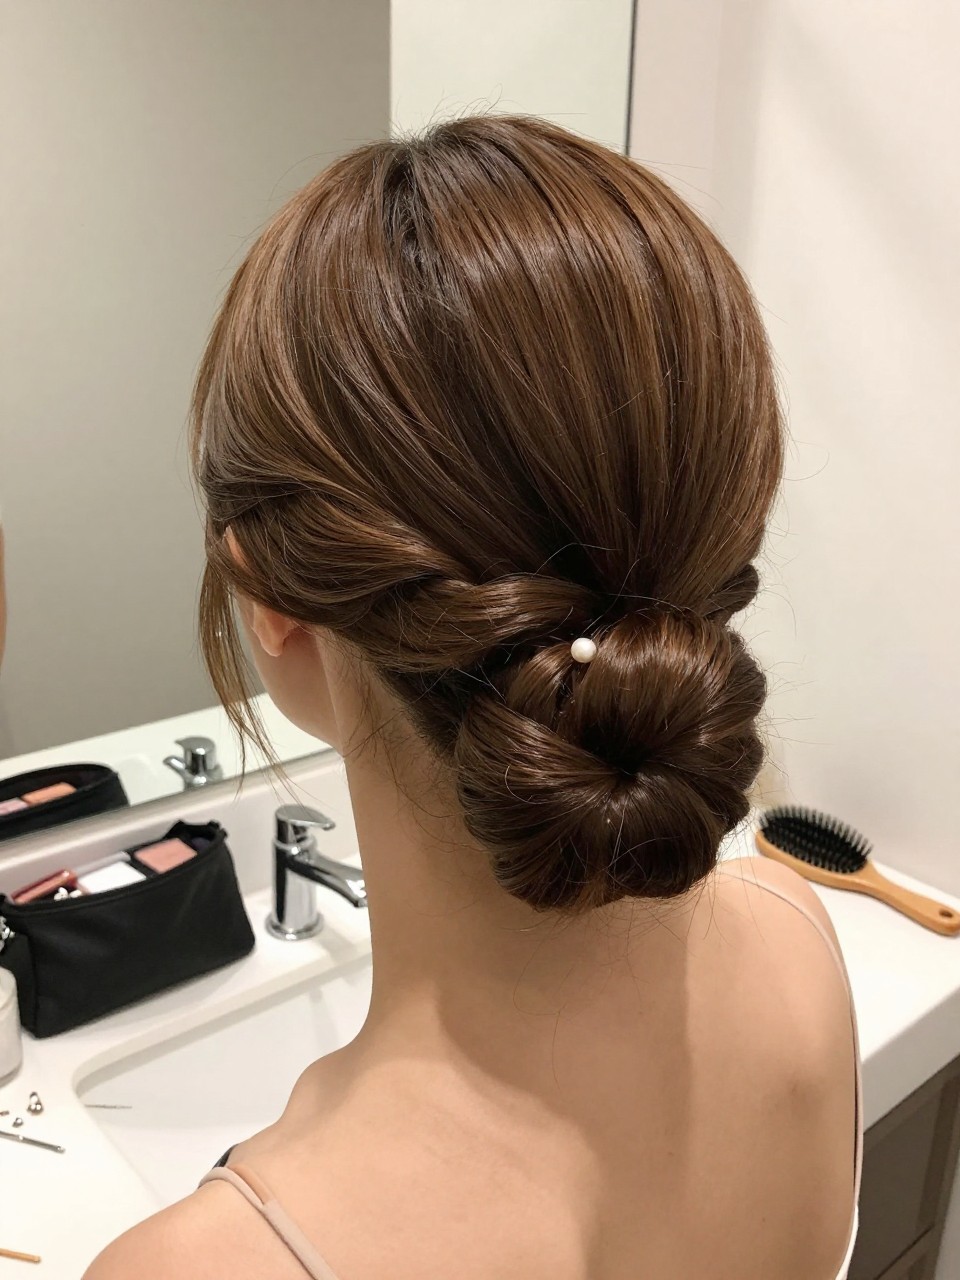
This low bun twists straight weave hair into a clean shape at the nape while keeping the top smooth and controlled. It is ideal for formal events, work presentations, weddings, or days when you need a hairstyle that stays secure for several hours. The straight texture helps the bun look sleek rather than bulky.
What you need
- Smoothing brush for gathering the hair
- Styling mousse for controlling flyaways
- Hair elastic for creating the base ponytail
- Long bobby pins for securing the twist
- Pearl pin as an optional accessory
How to style it
- Brush the weave toward the nape and secure it in a low ponytail.
- Twist the ponytail from the base to the ends, keeping the section smooth.
- Wrap the twist around the elastic and secure it with several bobby pins.
- Smooth the top, tuck away loose ends, and add one pearl pin if desired.
Quick tip
Use long hairpins rather than many small pins to hold thick weave hair more securely.
13. Asymmetrical Straight Weave Bob
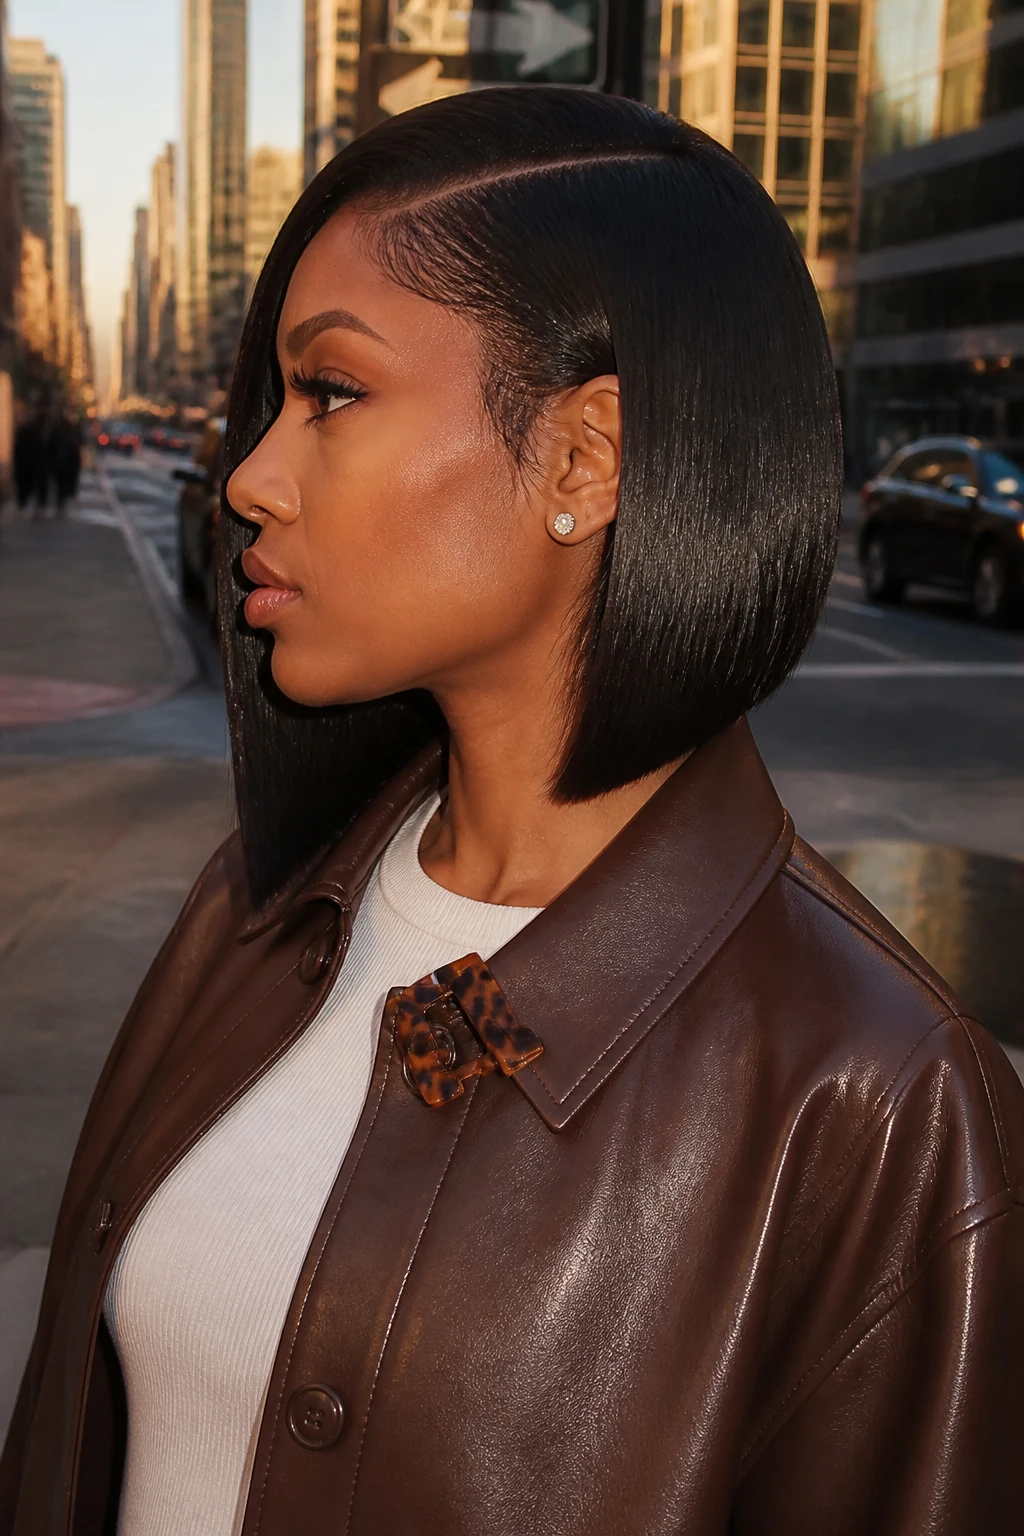
This asymmetrical bob is slightly longer on one side, giving the straight weave a modern but still refined shape. It works well for women who prefer a distinctive haircut without relying on bright colour or heavy styling. The clean lines make it suitable for work, dinners, fashion events, and polished everyday wear.
What you need
- Fine-tooth comb for aligning the angled cut
- Heat protectant for safe straightening
- Flat iron for defining the shape
- Smoothing balm for controlling frizz
- Light shine spray for finishing
How to style it
- Create a deep side part that follows the direction of the longer side.
- Straighten the hair in small sections, guiding both sides close to the jaw and neck.
- Apply smoothing balm over the surface and lightly tuck the shorter side behind the ear.
- Mist the finished bob with shine spray and check that the angled ends remain visible.
Quick tip
Keep the difference between both sides subtle for a classy result that is easy to wear.
14. Straight Weave With Hidden Crown Volume
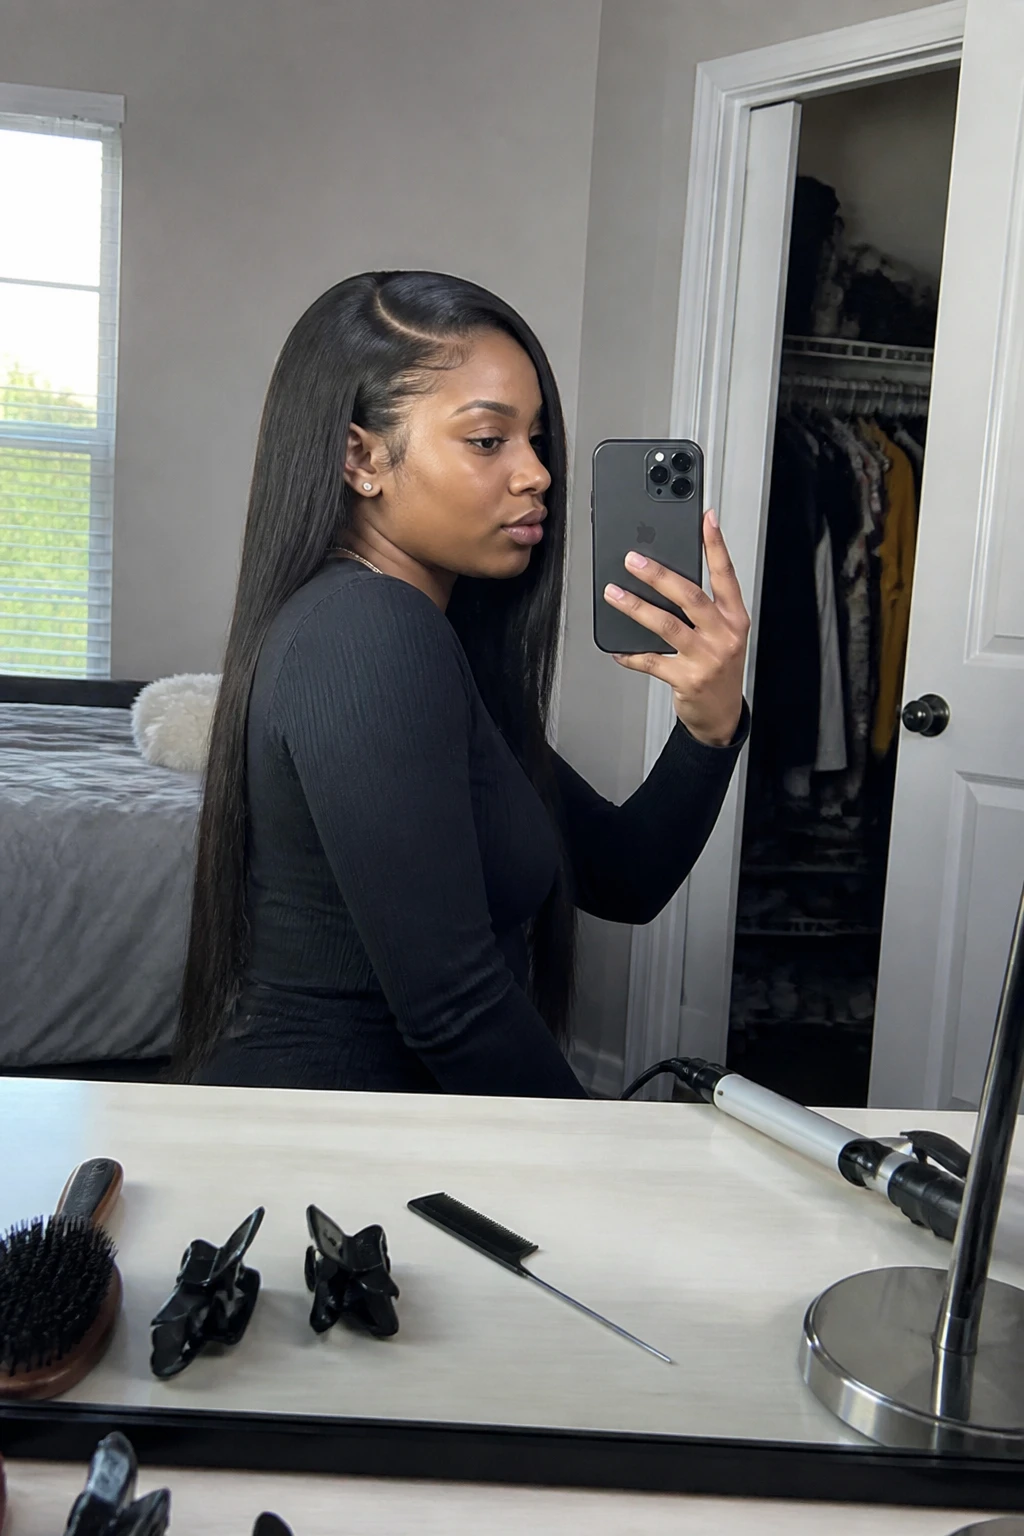
This hairstyle looks smooth and straight through the lengths but has a small amount of hidden lift at the crown. It is useful for women who find that completely flat straight hair makes their face appear longer or their weave look less full. The controlled volume works well for weddings, professional photos, dinners, and special occasions.
What you need
- Sectioning clips for separating the crown
- Fine-tooth comb for gentle backcombing
- Flat iron for smoothing the outer layer
- Volumizing spray for creating lift
- Light-hold hairspray for setting the crown
How to style it
- Separate a small section at the crown and clip the top layer out of the way.
- Mist the lower crown section with volumizing spray and gently backcomb near the roots.
- Lay the smooth top section over the teased area and lightly straighten the outer surface.
- Shape the lengths, smooth any flyaways, and mist the crown with hairspray.
Quick tip
Backcomb only the hidden lower section so the top remains sleek and free from visible tangles.
15. Straight Weave With Minimal Gold Barrette
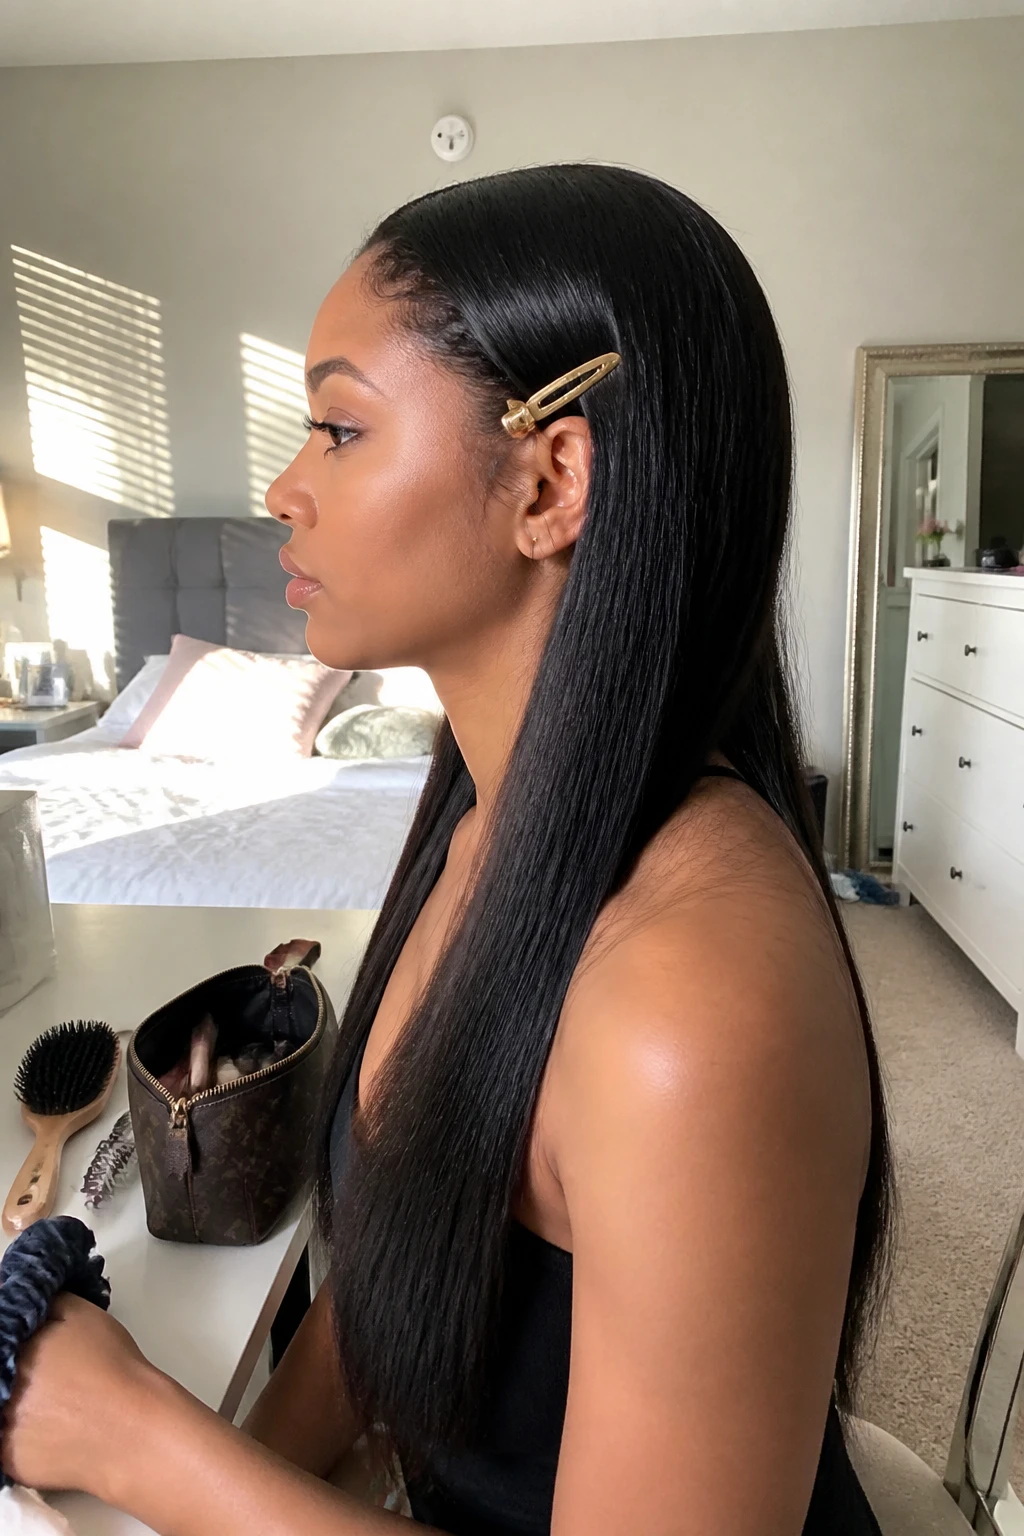
This smooth straight weave is pinned lightly on one side with a slim gold barrette for a simple but elegant detail. It is a good choice for women who want to dress up their hair without creating an updo or adding heavy accessories. The look suits dinners, weddings, holiday gatherings, date nights, and polished daytime events.
What you need
- Paddle brush for smoothing the weave
- Flat iron for creating a sleek texture
- Lightweight serum for controlling frizz
- Slim gold barrette for securing one side
- Edge brush for neatening the hairline
How to style it
- Straighten the weave and create a soft side or middle part.
- Brush one front section backward, keeping the surface smooth and close to the head.
- Secure the section just above or behind the ear with a slim gold barrette.
- Apply a small amount of serum to the lengths and smooth the hairline.
Quick tip
Choose a narrow, simple barrette instead of a large decorated clip to keep the hairstyle refined.