

Table of Contents Show
Here’s something I’ve learned from years of chopping my hair off and then growing it out again—short hair is not a limitation, it’s an invitation. People think once your hair is above your shoulders, you’re stuck with the same look every day. Nothing could be further from the truth.
Short hair actually permits you to play with texture, accessories, and details that get lost in longer lengths.

Whether you’ve got a pixie, a bob, or something in between, these 19 styles prove that cute and short go hand in hand. Some take five minutes, others take fifteen, but all of them will make you feel like you just left the salon.
1. The Textured Bob with Lived-In Waves

This is the bob that looks like you woke up this way—but in a good way. Soft, loose waves add movement and volume without looking like you tried too hard. It’s perfect for fine hair that needs a little boost.
How to style it:
- Step 1: Spray a texturizing sea salt spray onto damp hair and scrunch with your hands.
- Step 2: Diffuse on low heat or let air-dry until almost dry.
- Step 3: Use a flat iron to add random bends in different directions—not uniform curls.
- Step 4: Run your fingers through to break up the waves and finish with a flexible hairspray.
2. The Mini Top Knot

Yes, you can do a top knot with short hair. The mini version sits right at the crown and is impossibly cute. It’s the ultimate quick style for keeping hair off your face on warm days.
How to style it:
- Step 1: Gather the top section of your hair—from your temples to your crown—into a high ponytail.
- Step 2: Twist the ponytail and wrap it around itself to form a small bun.
- Step 3: Secure with bobby pins, tucking ends underneath.
- Step 4: Let the bottom layer hang loose and pull out a few face-framing pieces.
3. The Deep Side Part with Volume

Sometimes the simplest change makes the biggest impact. Switching your part from wherever it normally is to a deep side part instantly adds drama and volume.
How to style it:
- Step 1: Create a deep side part using a rat-tail comb while the hair is dry.
- Step 2: Apply a volumizing powder or spray to the roots on the lighter side.
- Step 3: Blast the roots with a blow dryer on low heat while lifting with your fingers.
- Step 4: Smooth the top layer with a flat brush and tuck one side behind your ear.
4. The Curly Shag with Bangs

Short curly hair was made for the shag cut. Layers upon layers create shape and bounce, and adding bangs frames the face beautifully. This style is pure fun.
How to style it:
- Step 1: Apply curl cream to soaking wet hair and scrunch upward.
- Step 2: Diffuse with your head tilted to the side to encourage volume.
- Step 3: Once dry, use your fingers to separate curls at the roots.
- Step 4: Arrange the bangs to sweep to one side or let them fall naturally.
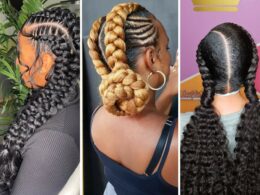
5. The Slicked Baby Braid

Adding one small braid to short hair instantly elevates the whole look. It draws the eye and adds an unexpected detail that feels fresh and modern.
How to style it:
- Step 1: Apply gel or edge control to your hairline and smooth back.
- Step 2: Take a small section from your temple on one side and braid it tightly.
- Step 3: Secure the end with a clear elastic and pin it behind your ear if it’s short.
- Step 4: Let the rest of your hair fall naturally—the contrast is the point.
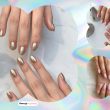
6. The Pearl Pin Accent

Short hair is the perfect canvas for accessories. A few well-placed pearl or decorative pins turn a basic style into something special in seconds.
How to style it:
- Step 1: Style your hair as usual—straight, wavy, or textured.
- Step 2: Choose 2-3 decorative pins that complement each other.
- Step 3: Place them along one side, either in a row or clustered together.
- Step 4: Tuck them at an angle so they catch the light.
7. The Tucked Bob

This style tucks one side behind the ear and lets the other side fall forward. It’s asymmetrical, modern, and takes exactly two seconds to achieve.
How to style it:
- Step 1: Apply a lightweight styling cream for smoothness and shine.
- Step 2: Tuck the hair on your preferred side firmly behind your ear.
- Step 3: Let the other side fall forward to frame your face.
- Step 4: Smooth the tucked side with a dab of hair oil for polish.
8. The Textured Pixie with Lift

A pixie cut should never be flat. This style focuses all the volume at the crown, creating height and shape that makes the whole face look lifted.
How to style it:
- Step 1: Apply a volumizing mousse to damp roots, concentrating on the crown.
- Step 2: Blow-dry using your fingers to lift upward at the roots.
- Step 3: Once dry, apply a tiny amount of texturizing paste to your fingertips.
- Step 4: Twist small sections at the crown for definition and lift.
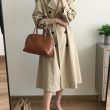
9. The Half-Up Twist

This is the short hair version of the half-up style—twisting small sections from each side and meeting in the back. It’s romantic and quick.
How to style it:
- Step 1: Take a small section from your left temple and twist it toward the back.
- Step 2: Take a matching section from your right temple and twist it back.
- Step 3: Secure both twists together at the back with bobby pins or a small clip.
- Step 4: Gently pull at the twists to loosen them slightly for softness.
10. The Wet Look Pixie

The wet look isn’t just for long hair. On a pixie, it’s edgy, editorial, and surprisingly wearable. Plus it takes about three minutes total.
How to style it:
- Step 1: Apply a strong-hold gel to damp hair from roots to ends.
- Step 2: Comb everything back smoothly with a fine-tooth comb.
- Step 3: Let it air-dry completely—don’t touch it while it dries.
- Step 4: Once dry, add a drop of shine serum for extra gloss.
11. The Bandana Bob

Adding a bandana to a bob is instant cool-girl energy. It keeps hair off your face, adds color, and hides any “I don’t know what to do with it” moments.
How to style it:
- Step 1: Fold a silk or cotton bandana into a triangle, then fold again into a headband width.
- Step 2: Place the center at your nape and bring ends up to your forehead.
- Step 3: Tie the ends in a knot or bow at your hairline.
- Step 4: Let your bob peek out from underneath and arrange a few face-framing pieces.
12. The Finger Wave Pixie

This vintage-inspired style brings finger waves to short hair for a glamorous, special-occasion look. It’s more detailed but absolutely stunning.
How to style it:
- Step 1: Apply a setting lotion or strong gel to damp hair.
- Step 2: Using your fingers and a comb, create S-shaped waves close to the head.
- Step 3: Use duckbill clips to hold each wave in place while drying.
- Step 4: Remove clips once completely dry and set with shine spray.
13. The Sleek Side Part Bob

This is the power bob—sharp, smooth, and perfectly placed. A deep side part and sleek finish create a look that says confident and put-together.
How to style it:
- Step 1: Apply a heat protectant and smoothing cream to damp hair.
- Step 2: Create a deep side part and blow-dry using a round brush for sleekness.
- Step 3: Use a flat iron to perfect the smoothness, turning ends slightly under.
- Step 4: Finish with shine spray and tuck one side behind your ear.
14. The Mini Space Buns

Space buns aren’t just for long hair—the mini version on short hair is even cuter. Two small buns at the crown are playful and youthful.
How to style it:
- Step 1: Part your hair down the middle from forehead to nape.
- Step 2: Gather each side into a high ponytail at your crown.
- Step 3: Twist each ponytail and wrap into small buns, securing with pins.
- Step 4: Let any shorter pieces hang loose around the ears for softness.
15. The Side-Swept Pixie with Volume

This style sweeps the longer top section of a pixie dramatically to one side, creating softness and movement. It’s feminine and flattering for all face shapes.
How to style it:
- Step 1: Apply volumizing mousse to damp hair, focusing on the top.
- Step 2: Blow-dry the top section using a round brush, sweeping it to one side.
- Step 3: Dry the sides and back smoothly with a flat brush.
- Step 4: Set the swept section with a light hairspray.
16. The Textured Bob with Headband

A headband on a bob is an instant outfit. Whether you choose thin and metallic or thick and fabric, it adds polish in seconds.
How to style it:
- Step 1: Style your bob with loose waves or texture.
- Step 2: Choose a headband that complements your outfit.
- Step 3: Place it about an inch behind your hairline, pushing it forward slightly.
- Step 4: Arrange a few front pieces to fall softly against the headband.
17. The Curly Tuck

For short curly hair, sometimes the cutest style is the simplest—tucking one side behind your ear and letting the curls do their thing. It shows off your face and your texture.
How to style it:
- Step 1: Apply curl cream and let hair air-dry or diffuse as usual.
- Step 2: Once dry, gently tuck the curls on one side behind your ear.
- Step 3: Let the tucked side stay in place—curls have good grip.
- Step 4: Fluff the opposite side for balance and volume.
18. The Braided Crown on Short Hair
Yes, you can do a braided crown with short hair. It’s smaller and more delicate than the long-hair version, but that’s what makes it special.
How to style it:
- Step 1: Create a deep side part.
- Step 2: Starting at the part, Dutch braid along your hairline, incorporating hair as you go.
- Step 3: Continue braiding until you reach the opposite ear, then secure with pins.
- Step 4: Tuck the end under and let any loose pieces frame your face.
19. The Messy Pixie with Accessories

Sometimes the cutest look is the messiest one, elevated by a single accessory. A messy pixie with a sparkly clip or barrette feels intentional and fun.
How to style it:
- Step 1: Apply texturizing spray and tousle your pixie with your fingers.
- Step 2: Create messy separation and lift at the roots.
- Step 3: Choose a decorative clip or barrette and place it at your temple.
- Step 4: Let the messy texture contrast with the polished accessory.