


Table of Contents Show
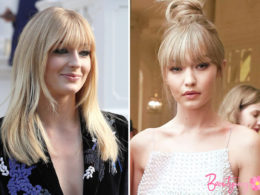
Let’s be real for a second—having long hair for prom is both a blessing and a tiny bit of a stressor. You have so much length to work with, which is amazing, but sometimes that makes deciding on a style even harder because the options feel endless.
Beauty For The Modern Woman
You might be scrolling through photos, wondering if you want it all up, half up, or flowing down, and it’s easy to get stuck. I’ve definitely been there.
I’ve put together 19 gorgeous prom hairstyles made specifically for long hair, from romantic waves to intricate updos, so you can find the one that makes you stop scrolling and say, “That’s the one.”
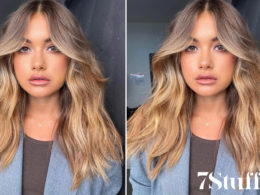
1. Mermaid Waves
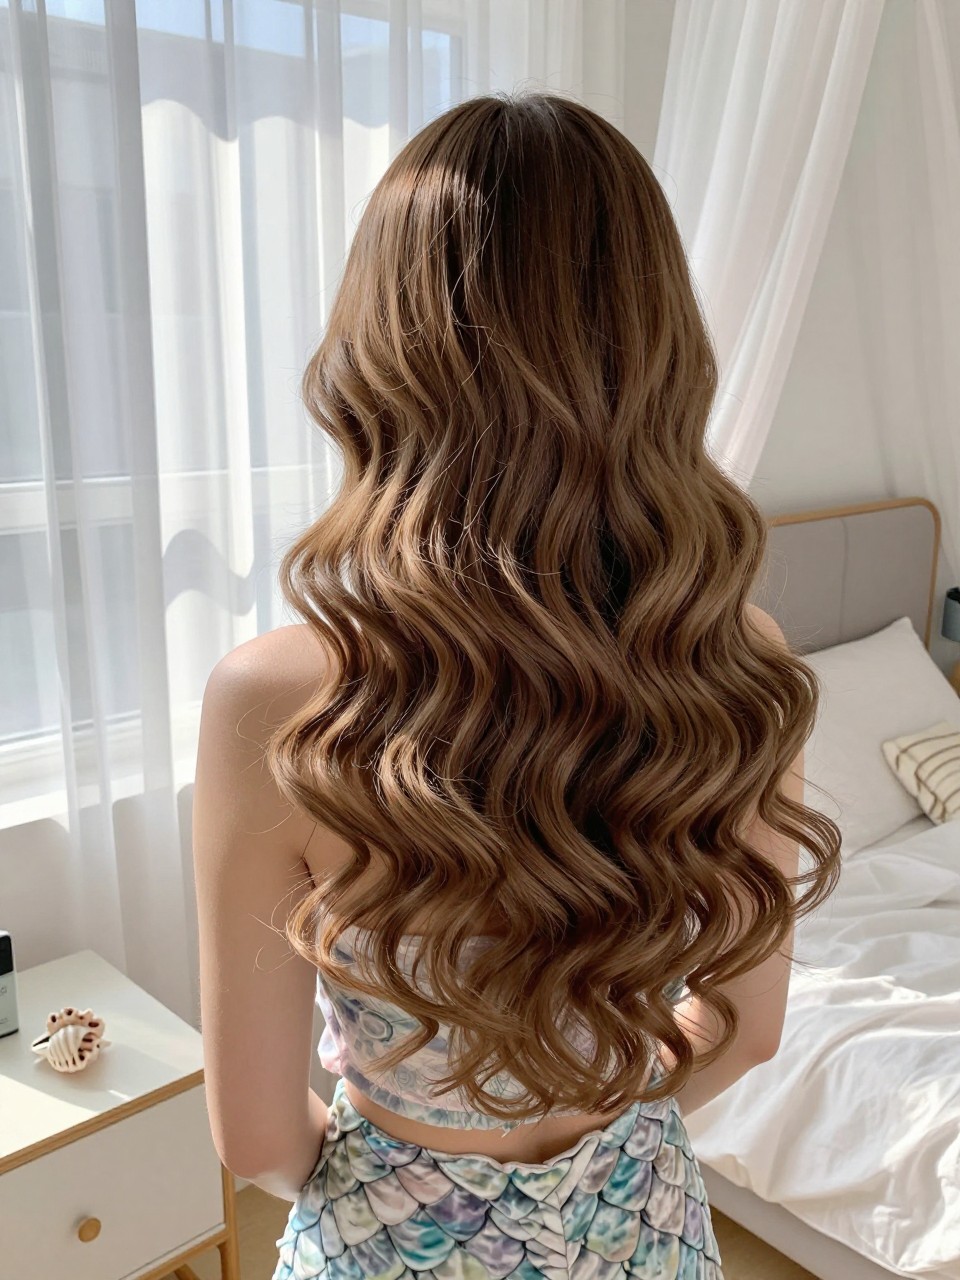
This is the ultimate romantic, bombshell look for long hair. Think loose, effortless waves that start below the chin and flow all the way down, giving you that just-came-from-the-beach-but-make-it-glamorous vibe. It’s perfect for anyone who wants to show off their length and movement.
What you need:
- 1.5-inch curling iron for loose, voluminous curls
- Heat protectant spray to prevent damage
- Texturizing spray for grip and separation
- Wide-tooth comb for brushing out curls
- Shine spray for a healthy, glossy finish
How to style it:
- Apply heat protectant to dry hair and section it into four parts—bottom left, bottom right, top left, top right.
- Wrap sections of hair around the barrel of the curling iron, leaving the ends out for a more modern, undone look. Hold for a few seconds and release.
- Once all sections are curled, let the curls cool completely. Then, gently run a wide-tooth comb through them to break them up into soft, flowing waves.
- Finish with texturizing spray for volume and shine spray for that mermaid-like gloss.
2. Braided Crown Updo
This style makes you feel like royalty. It’s a romantic updo where two braids are pinned across the top of the head like a crown, with the rest of the hair gathered into a soft, low bun. It’s a dreamy choice for bohemian or fairy-tale themed proms.
What you need:
- Texturizing spray for grip and volume
- 1-inch curling iron to soften the ends
- Clear elastics for the braids
- Plenty of bobby pins that match your hair color
- Light-hold hairspray to set everything
How to style it:
- Spray texturizer throughout your hair for grip. Create a center part from forehead to nape.
- On one side, start a French braid at your temple, braiding along your hairline towards the back of your head. Secure the end with a clear elastic. Repeat on the other side.
- Bring both braids to the back and pin them across the crown of your head, tucking the ends under. They should meet and overlap slightly to form a “crown.”
- Gather the remaining loose hair into a low, twisted bun at the nape. Pin it securely. Gently pull on the braids to loosen them for a fuller look and set with hairspray.
3. Half-Up Bubble Ponytail
This playful style takes the bubble ponytail trend and applies it to a half-up look. The top section is gathered into a series of rounded “bubbles,” while the rest of your long hair flows freely underneath. It’s fun, modern, and adds interest without committing to a full updo.
What you need:
- Small clear elastic bands (at least 4-5)
- Texturizing spray for grip
- Rat-tail comb for sectioning
- Curling iron for the loose ends (optional)
- Hairspray for hold
How to style it:
- Section off the top half of your hair from ear to ear and secure it temporarily. Spray texturizer on this section.
- Release the top section and secure it into a ponytail at the crown with a clear elastic. This is your first bubble.
- Add another elastic 2 inches down, then gently tug the hair between the elastics to puff it into a bubble. Repeat until you have 3-4 bubbles.
- Curl the loose ends of the bottom half of your hair for added romance. Set everything with hairspray.
4. Sleek Low Pony with Wrapped Ends
This is a modern take on the classic sleek ponytail. Instead of leaving the ponytail straight, the ends are wrapped or folded under and pinned, creating a chic, sculptural loop. It’s minimalist, architectural, and incredibly elegant for a sophisticated prom look.
What you need:
- Flat iron for super straight hair
- Strong-hold gel for sleekness
- Fine-tooth comb for smoothing
- Clear elastic for the base
- Bobby pins to secure the loop
- Shine spray for gloss
How to style it:
- Apply gel to damp hair and blow-dry straight. Then, use a flat iron to get hair completely sleek and smooth.
- Gather hair into a very low ponytail at the nape of the neck and secure with a clear elastic.
- Instead of leaving the ponytail hanging, fold the length up and tuck the ends under, securing them with bobby pins to create a looped or wrapped effect at the base.
- Smooth down any flyaways with more gel on your fingertips and finish with shine spray for a glass-like effect.
5. Waterfall Braid into Loose Waves
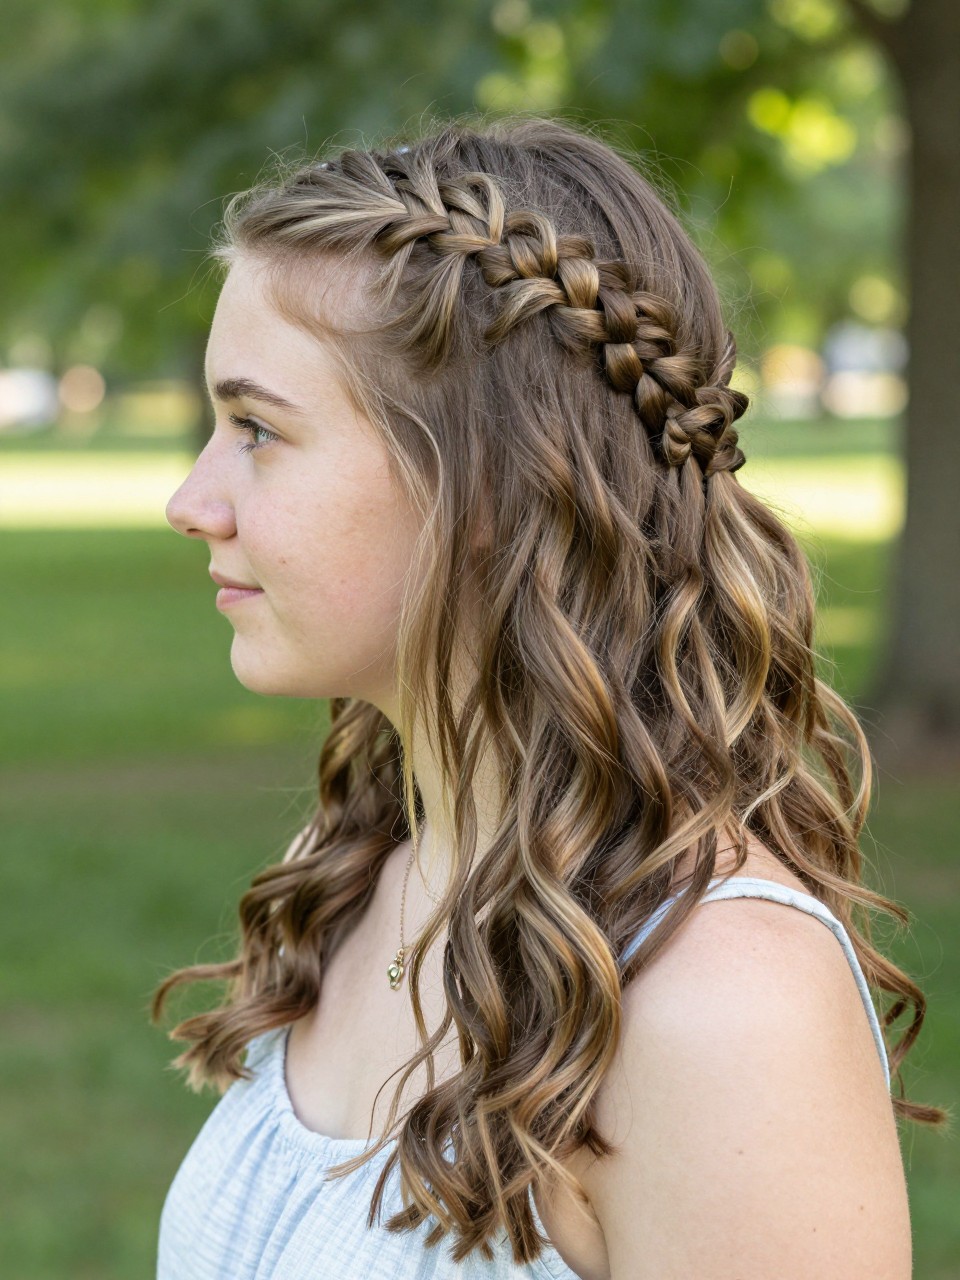
This is one of the most romantic styles for long hair. A delicate waterfall braid cascades along the side or back of your head, seamlessly blending into soft, flowing waves. It’s intricate-looking but totally doable, and it keeps hair away from your face while showing off your length.
What you need:
- 1.5-inch curling iron for waves
- Texturizing spray for grip
- Small clear elastic for the braid
- Bobby pins to secure the braid
- Light-hold hairspray
How to style it:
- Create loose waves throughout your hair with the curling iron for a romantic base. Spray with texturizer.
- Take a small section of hair near your temple and split it into three pieces to start a regular braid.
- Begin the waterfall braid: as you braid, drop the bottom strand and pick up a new section of hair from above to replace it, allowing the dropped strand to hang down. Continue this pattern along your hairline or across the back.
- Secure the end of the braid with a small elastic and tuck it under your hair, pinning it in place. Let the rest of your waves flow freely.
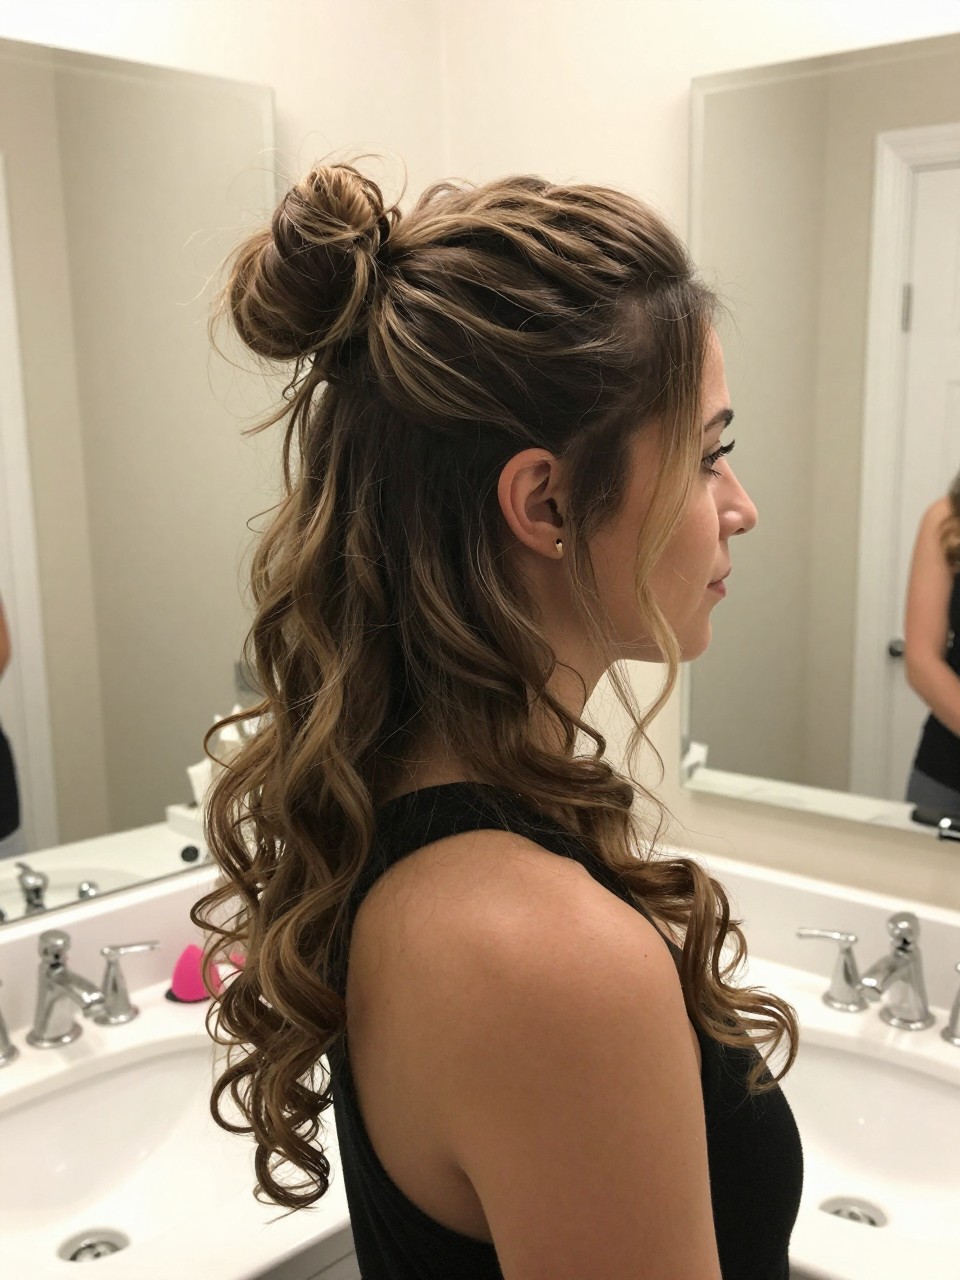
6. High Textured Bun with Face-Framing Pieces
This style is effortlessly chic and perfect for showing off your shoulders and neckline. It’s a high, voluminous bun with lots of texture and softness, plus a few wispy pieces left out to frame your face. It’s romantic and practical—your hair is up and out of the way for dancing.
What you need:
- Texturizing spray for volume and grip
- 1-inch curling iron for the face-framing pieces
- Strong elastic for the ponytail base
- Bobby pins (lots of them)
- Hairspray with flexible hold
How to style it:
- Flip your head over and spray texturizer at the roots for volume. Gather hair into a high ponytail at the crown and secure tightly.
- Backcomb the ponytail slightly for extra volume. Then, twist the ponytail loosely and wrap it around the base to form a bun, pinning as you go.
- Don’t worry about perfection—let pieces stick out naturally for a textured, romantic look. Gently pull on the bun to loosen and expand it.
- Curl a few small sections around your face with the curling iron. Let them cool, then finger-comb them softly. Set everything with hairspray.
7. Double Dutch Braid Pony
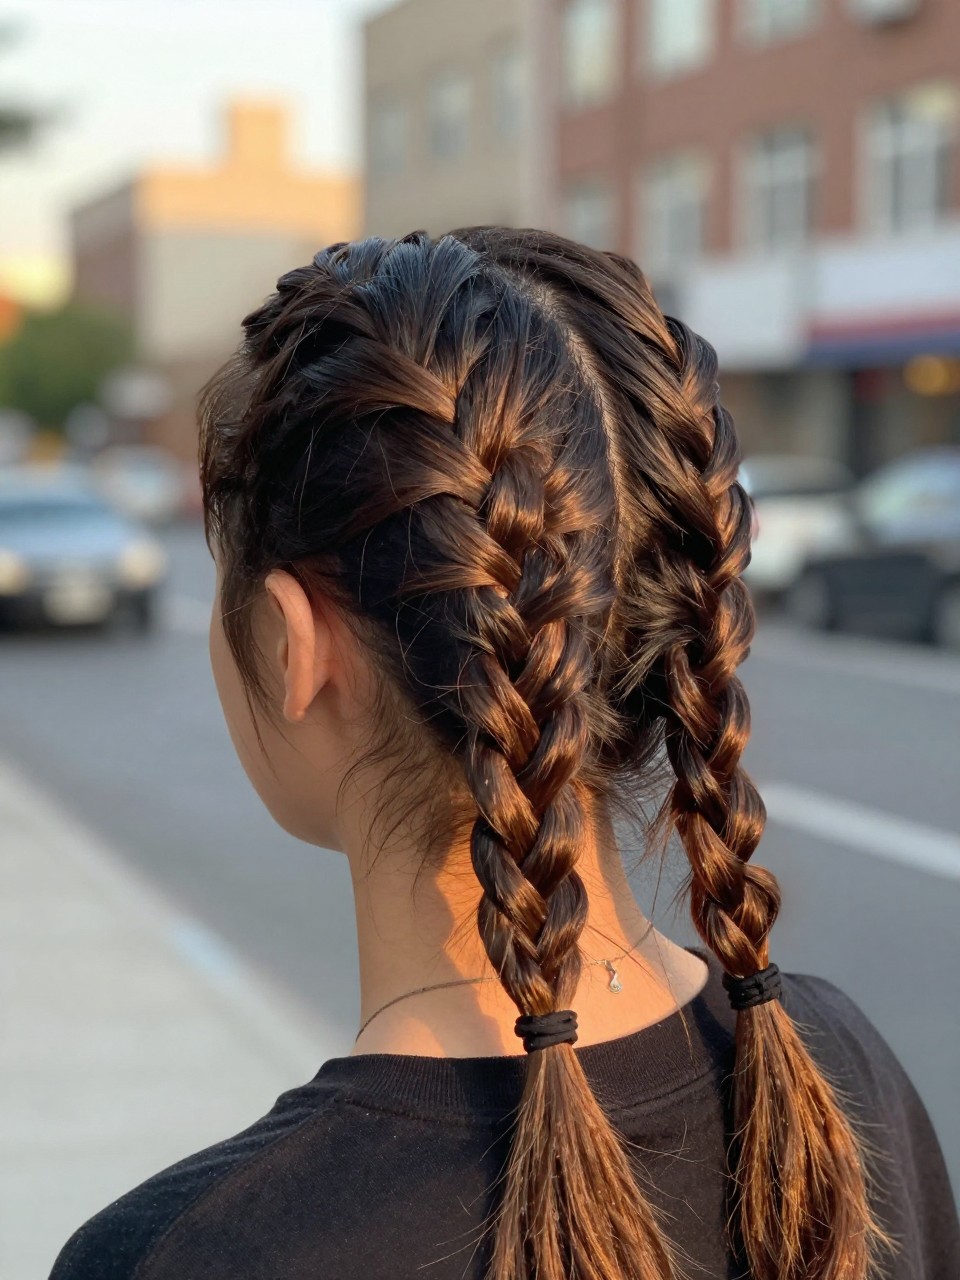
This sporty-meets-glam style is trendy and practical. Two Dutch braids (like inside-out French braids) start at the crown and meet at the nape, flowing into a single low ponytail. It’s edgy, keeps hair secure, and looks incredibly intricate.
What you need:
- Texturizing spray for grip
- Rat-tail comb for clean parts
- Clear elastics for the braids and ponytail
- 1-inch curling iron to wave the ponytail (optional)
- Hairspray for hold
How to style it:
- Create a deep zig-zag or straight center part from your forehead to your crown. Spray texturizer along the part lines.
- On one side, start a Dutch braid (braiding under instead of over) from the hairline down to the nape. Secure with a clear elastic. Repeat on the other side.
- Once both braids reach the nape, combine them with the rest of your loose hair into a low ponytail. Secure with another elastic.
- (Optional) Curl the ends of the ponytail for softness. Gently pancake the braids by pulling on the edges to make them fuller.
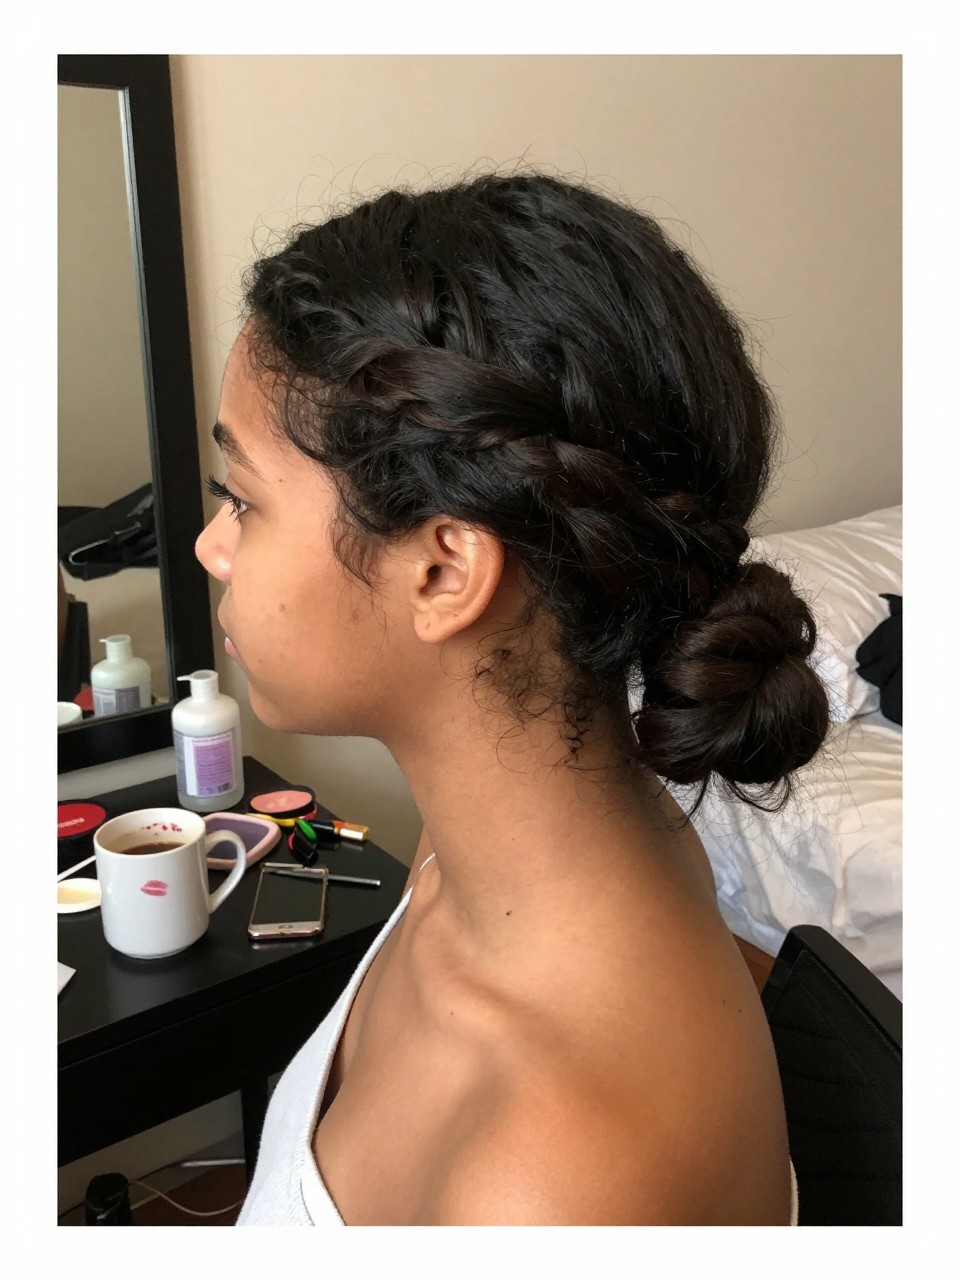
8. Romantic Low Chignon
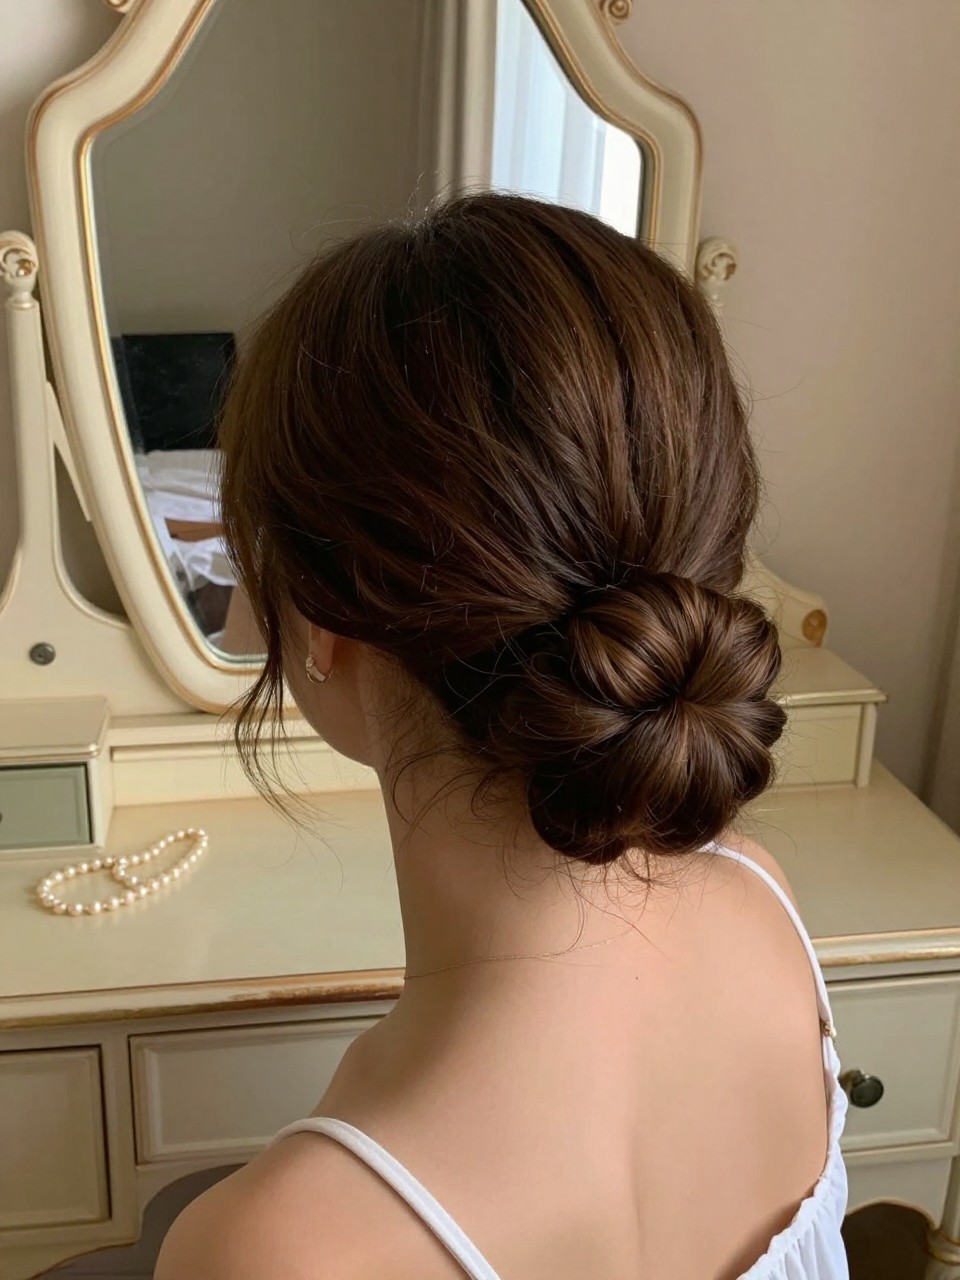
The chignon is the epitome of timeless elegance. It’s a classic low bun, usually twisted or rolled, that sits at the nape of the neck. For long hair, it creates a sleek, sophisticated shape that’s perfect for formal events and pairs beautifully with statement jewelry.
What you need:
- 1-inch curling iron for soft waves (optional)
- Shine serum for gloss
- Strong-hold hairspray
- Clear elastic
- Bobby pins and U-shaped pins for security
- Rat-tail comb for parting
How to style it:
- (Optional) Create soft waves in your hair for texture, then brush them out gently. Apply shine serum for gloss.
- Gather hair into a very low ponytail at the nape, but don’t pull the ends all the way through the elastic on the last loop—leave a looped bun shape.
- The remaining ends will hang down. Twist them loosely and tuck them up and around the base of the bun, pinning securely.
- Smooth any flyaways with hairspray and your fingertips. Tuck in any loose ends with bobby pins until the bun is smooth and secure.
9. Fishtail Braid Ponytail
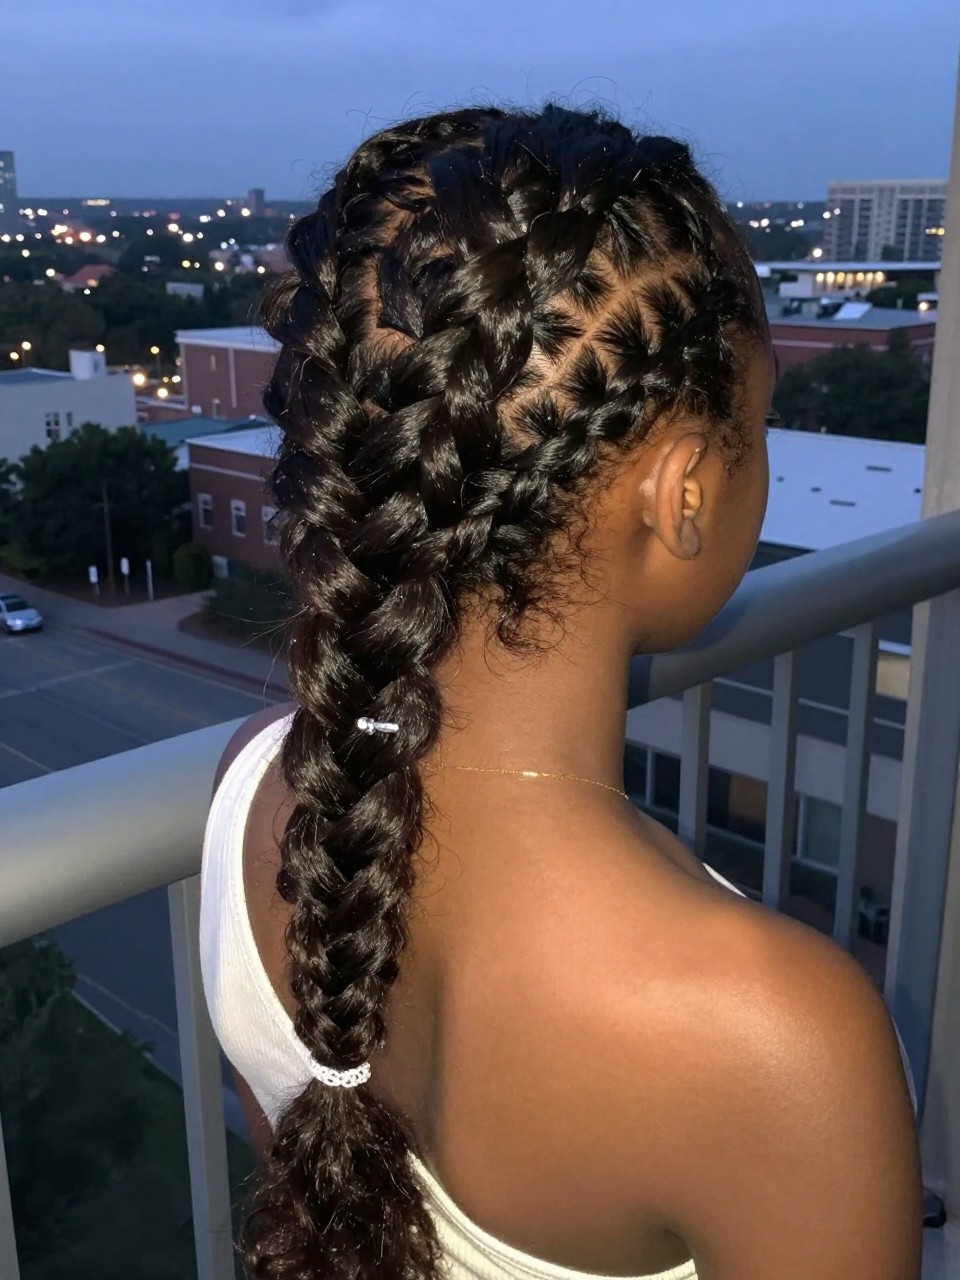
This style takes a simple low ponytail and elevates it with the intricate texture of a fishtail braid. It’s more detailed than a regular braid and looks like it took hours, but it’s actually quite simple once you get the rhythm. It’s bohemian, elegant, and perfect for showing off long hair.
What you need:
- Texturizing spray for grip
- Clear elastic for the ponytail base
- Small clear elastic for the end of the braid
- Bobby pins (optional, for tucking the end)
- Light-hold hairspray
How to style it:
- Spray your hair with texturizing spray and pull it into a sleek low ponytail at the nape of your neck. Secure with an elastic.
- Split the ponytail into two equal sections.
- To create a fishtail, take a small piece of hair from the outside edge of the left section and cross it over to join the right section. Then, take a small piece from the outside edge of the new right section and cross it over to the left. Repeat this pattern all the way down.
- Secure the end with a small clear elastic. Gently pancake the braid by pulling on the edges to make it fuller and softer. Tuck the end under and pin if desired. Finish with a light mist of hairspray.
10. Curly Half-Up with Pearl Pins
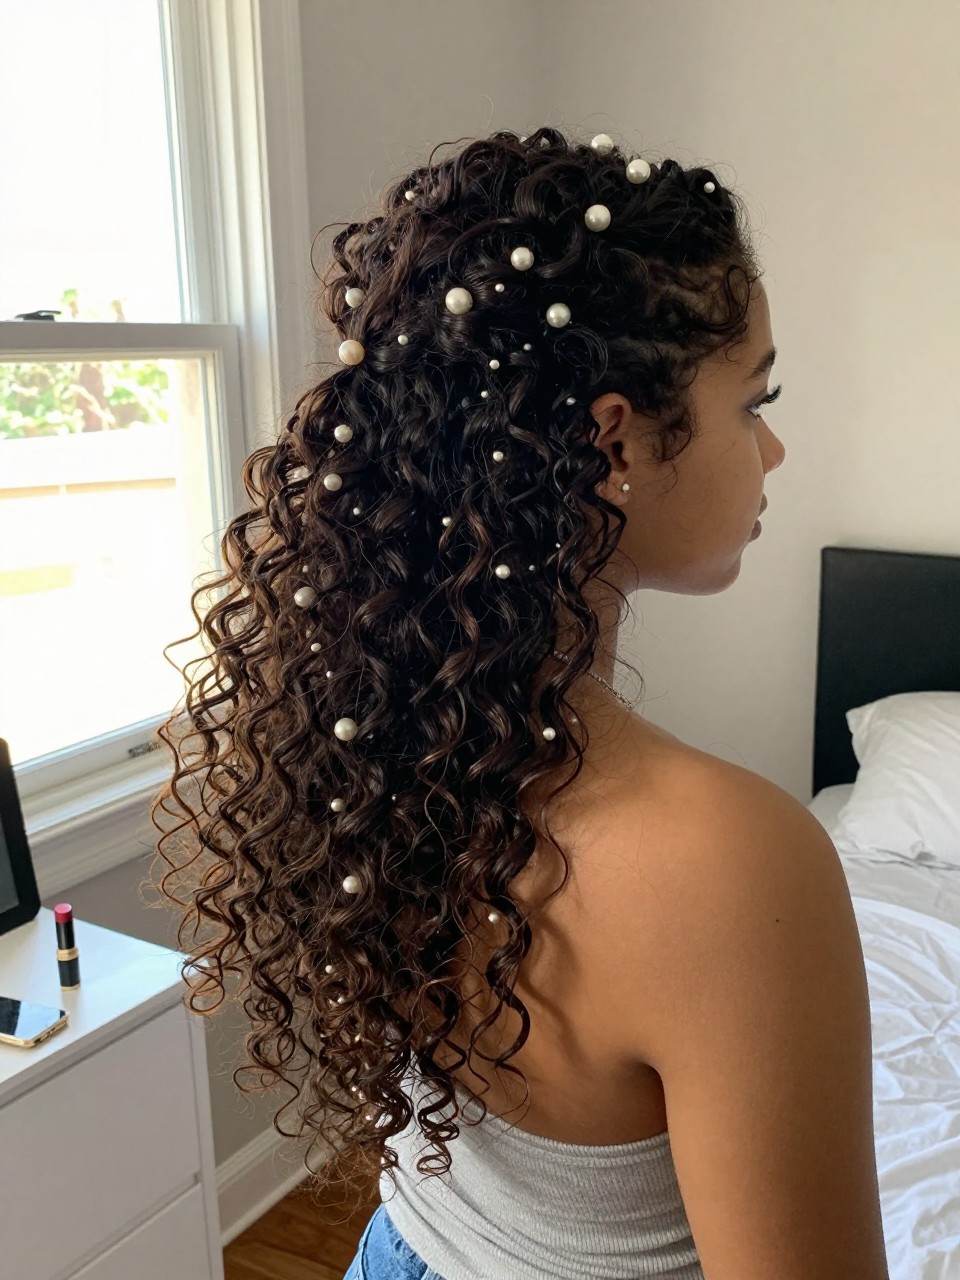
This is a sweet, romantic style that’s perfect for showing off natural curls or created ringlets. The top half is pulled back softly and secured with delicate pearl pins, adding a touch of vintage glamour. It’s feminine, elegant, and keeps hair off your face while letting your curls shine.
What you need:
- Curl-defining cream (for natural curls) or 1-inch curling iron (to create curls)
- Texturizing spray for volume
- Small clear elastic for the half-up section
- Decorative pearl pins (3-5 of them)
- Light-hold hairspray
How to style it:
- Define your natural curls with curl cream or create defined curls all over with a curling iron. Let them cool.
- Take a small section from each temple and gently pull them to the back, securing them with a small clear elastic at the crown. This should be loose and soft, not tight.
- Insert the pearl pins around the elastic in a fan or cluster pattern, pushing them in securely.
- Gently fluff the curls for volume and finish with a light-hold hairspray to keep everything in place without stiffness.
11. Sleek High Pony with Colored Extensions
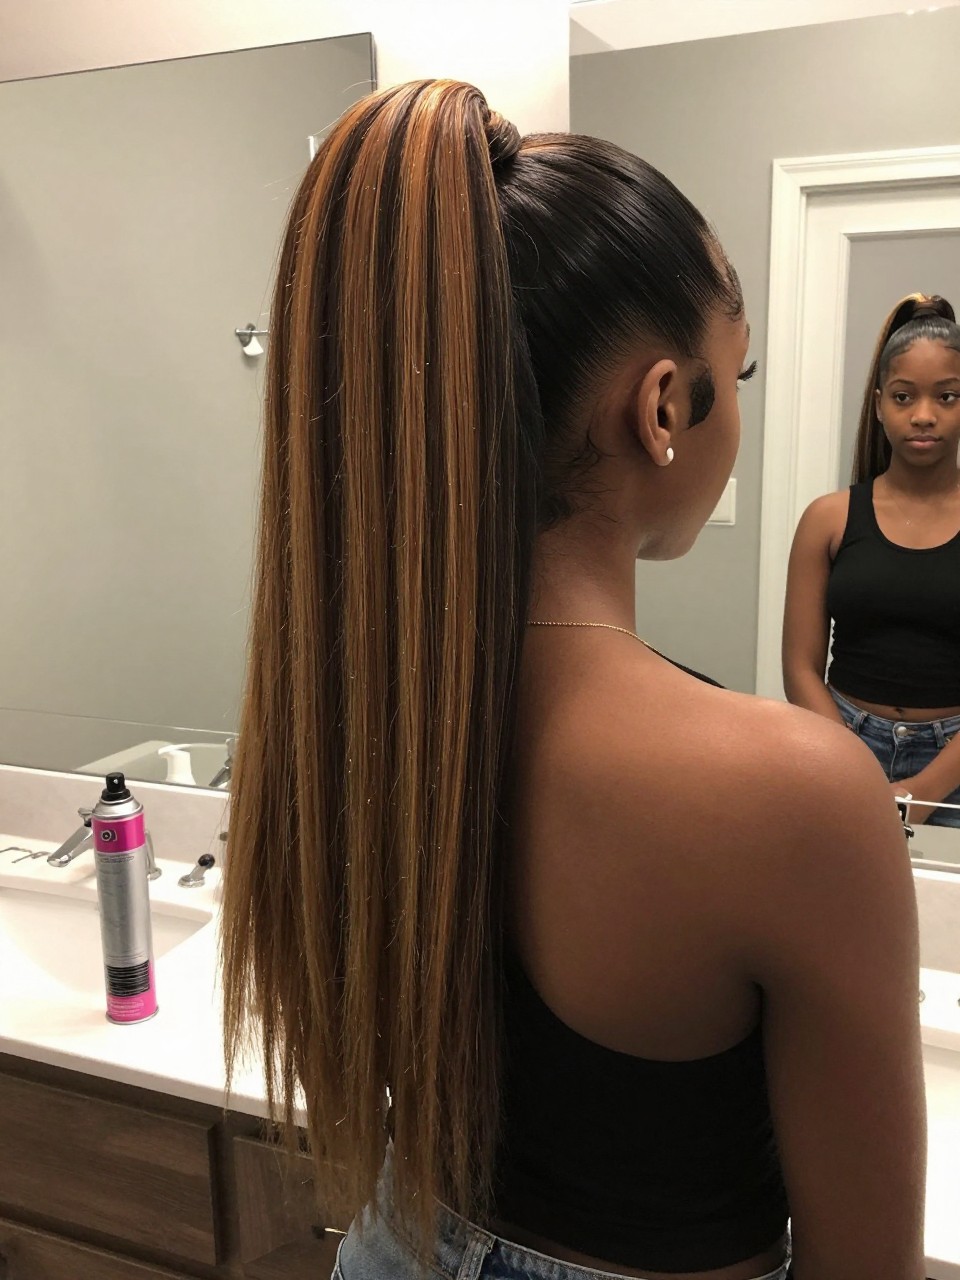
This is for anyone who wants to add a pop of fun to their prom look. A sleek, high ponytail becomes a statement when you add clip-in colored extensions at the base. Whether it’s pastel pink, vibrant blue, or subtle caramel highlights, this style is bold and modern.
What you need:
- Flat iron for sleek hair
- Strong-hold gel for slickness
- Fine-tooth comb for smoothing
- Strong elastic for the ponytail
- Clip-in colored hair extensions (choose your favorite shade)
- Shine spray
How to style it:
- Apply gel to damp hair and blow-dry straight. Then, flat iron until completely sleek and smooth.
- Gather hair into a very high ponytail at the crown and secure tightly with an elastic.
- Clip in your colored extensions around the base of the ponytail, layering them to blend with your natural hair. Make sure the clips are secure.
- Smooth down any flyaways with more gel and finish with shine spray for a glossy, head-turning look.
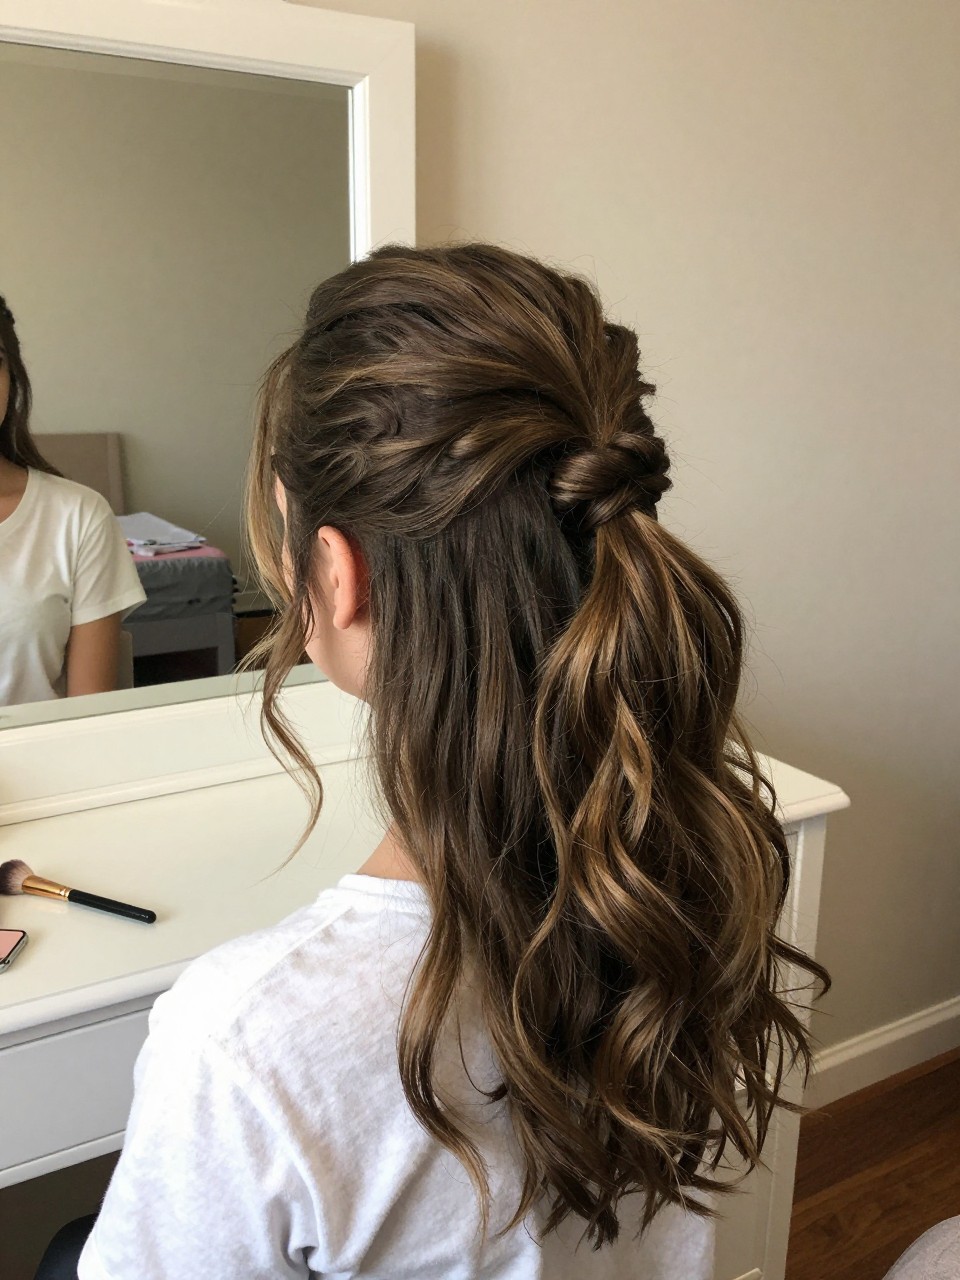
12. Twisted Low Ponytail
This style is deceptively simple but looks so polished. Sections of hair from each side are twisted and brought back to meet in a low ponytail, creating a soft, romantic detail. It’s a great option if you want something quick that still feels special and put-together.
What you need:
- 1.5-inch curling iron for soft waves (optional)
- Texturizing spray for grip
- Clear elastic for the ponytail
- Bobby pins to secure the twists
- Light-hold hairspray
How to style it:
- (Optional) Create soft waves in your hair for a romantic base. Spray with texturizer.
- Take a 2-inch section of hair from the front of one side (near your temple) and twist it loosely away from your face, working towards the back. Secure the end temporarily with a small clip.
- Repeat on the other side. Then, gather all your hair, including the two twisted sections, into a low ponytail at the nape of your neck. Secure with a clear elastic.
- Remove the clips and let the twists blend into the ponytail. Use bobby pins to secure any loose pieces if needed. Finish with hairspray.
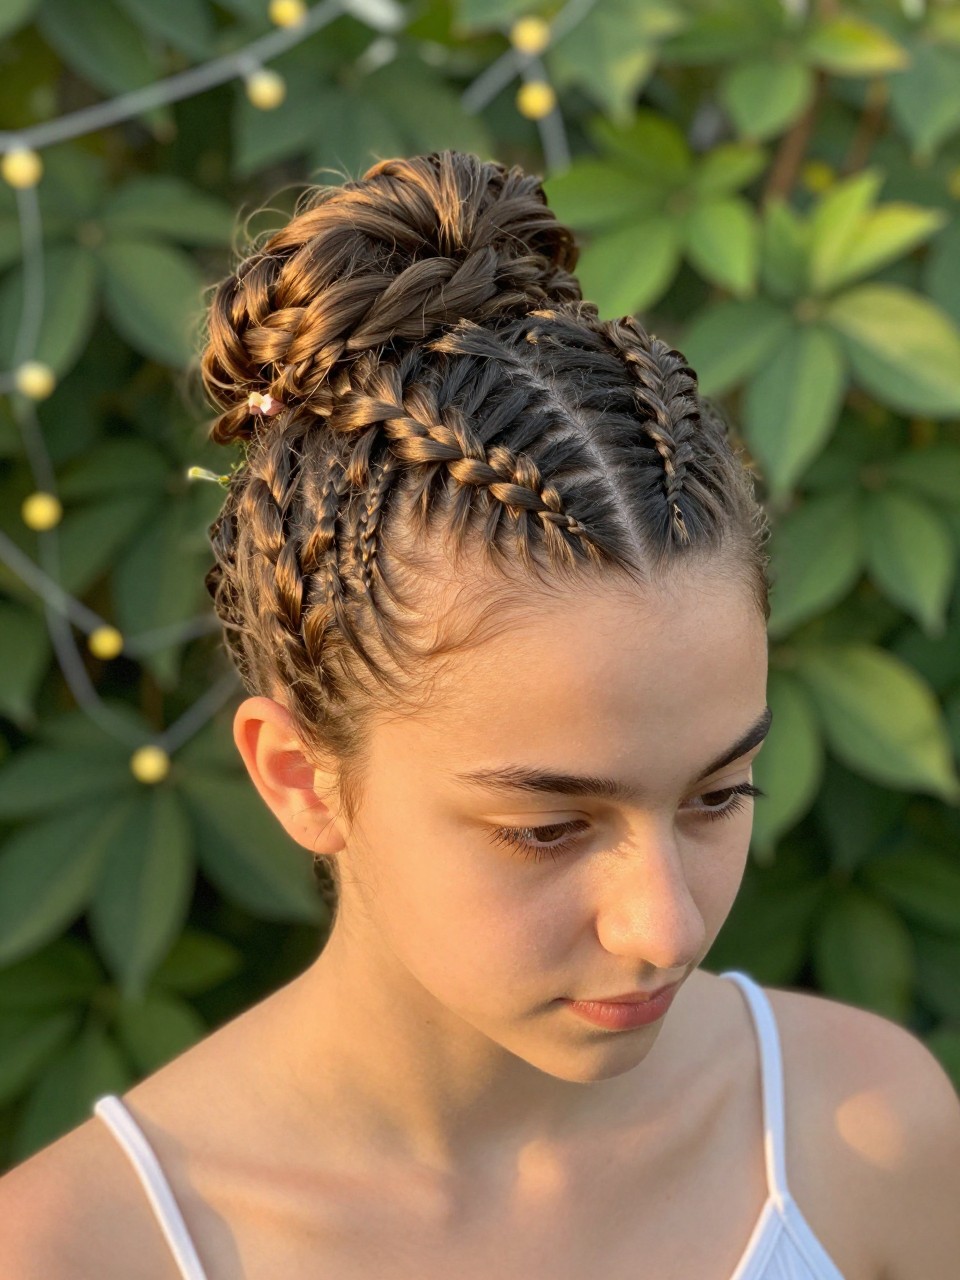
13. Halo Braid
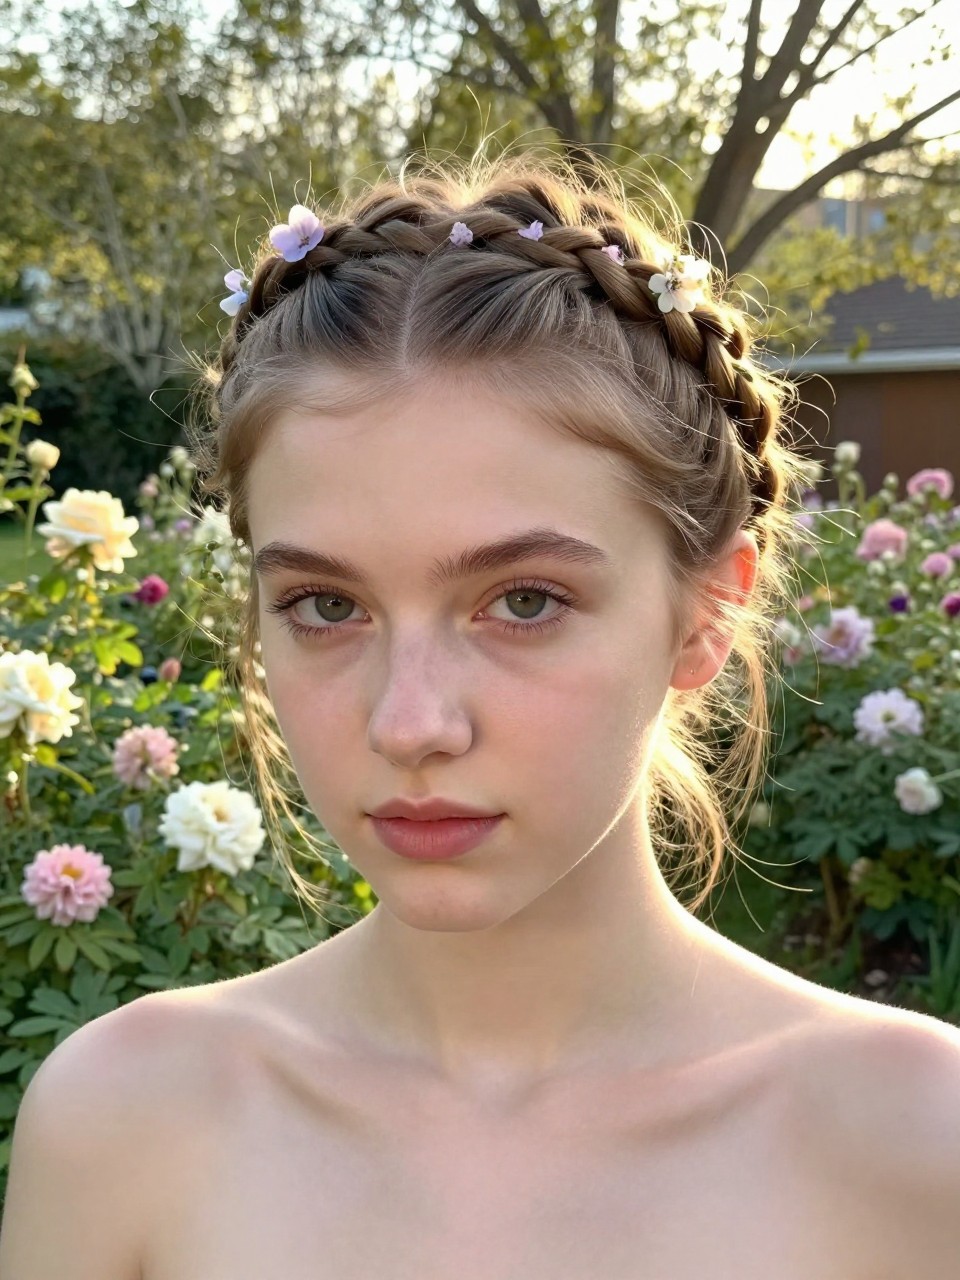
This is the ultimate boho-chic hairstyle. A single Dutch or French braid wraps all the way around your head like a halo, creating a stunning, ethereal look. It’s intricate and romantic, perfect for a whimsical prom theme or flowy, lace dress.
What you need:
- Texturizing spray for grip
- Rat-tail comb for sectioning
- Clear elastics for the braid
- Plenty of bobby pins that match your hair color
- Light-hold hairspray
How to style it:
- Spray texturizer throughout your hair for grip. Create a deep side part.
- Starting at the part, begin a Dutch braid (braiding under) along your hairline, working your way around your head. Keep the braid close to the scalp.
- Continue braiding all the way around until you reach your starting point. You may need to incorporate hair from the top and bottom as you go, like a French braid.
- Once you’ve braided all your hair, tuck the end under the beginning of the braid and pin securely. Gently pancake the braid to make it fuller and softer. Set with hairspray.
14. Deep Side Part with Old Hollywood Waves
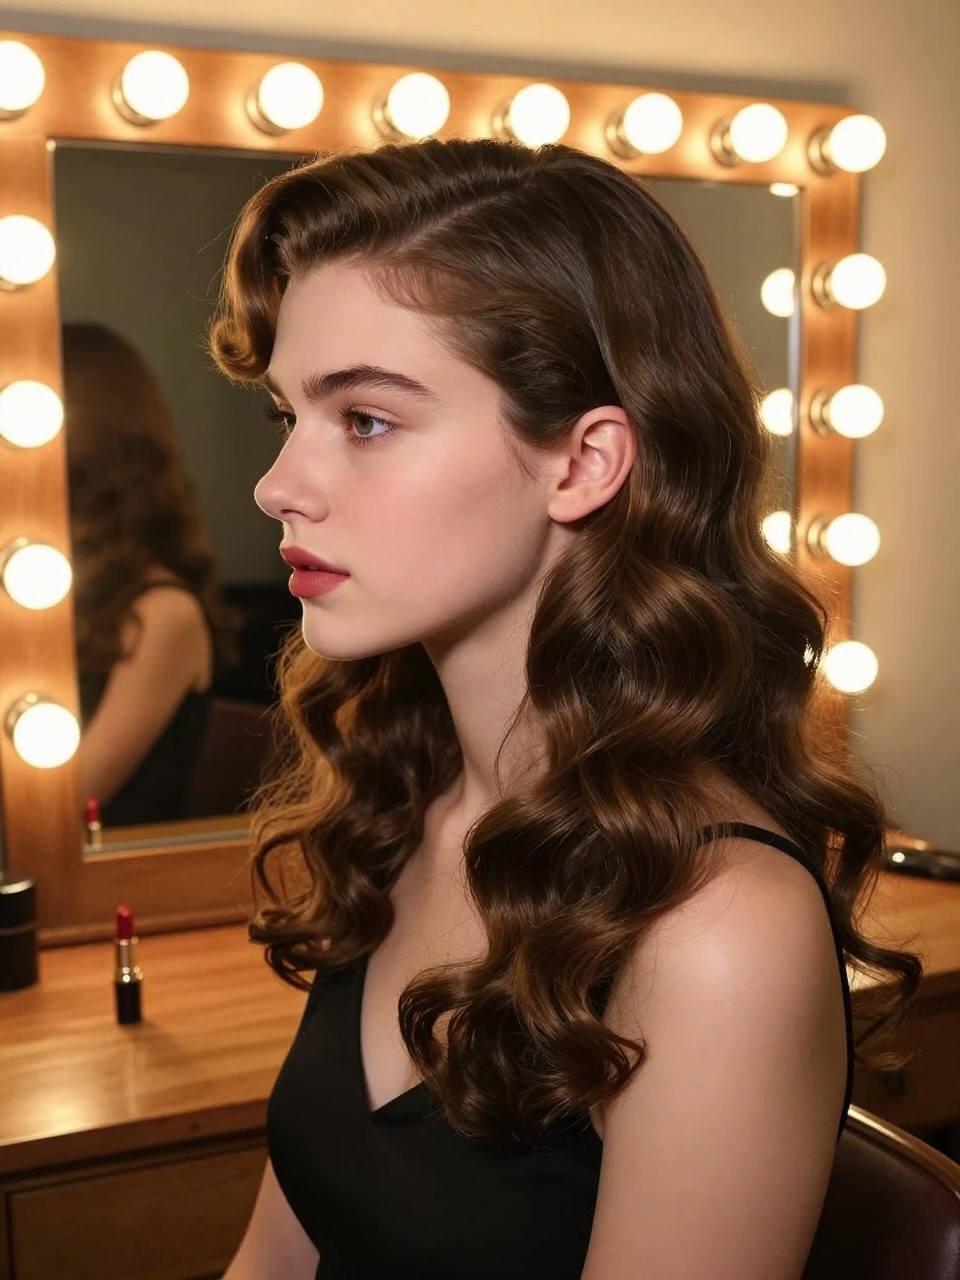
This is pure vintage glamour. A deep side part creates drama, while sculpted, finger-wave-like curls hug the head and flow into soft waves. It’s sophisticated, timeless, and absolutely stunning for a formal event like prom.
What you need:
- 1-inch marcel curling iron (with a clip) for defined waves
- Strong-hold hairspray to set the waves
- Hair clips to hold waves in place as they cool
- Paddle brush for gentle smoothing
- Shine spray for gloss
How to style it:
- Create a deep side part. Using the curling iron, create classic S-waves by clamping the iron at the root, turning it away from your face, and sliding down. Repeat to form a wave pattern.
- Immediately pin each wave to your head with a clip to let them cool and set. Spray generously with hairspray.
- Once cool, remove the clips and very gently brush through the waves with a paddle brush to soften and blend them into a glamorous, flowing curtain.
- Finish with shine spray for that classic Old Hollywood gloss. Let the waves flow over one shoulder for maximum effect.
15. Rope Twist Half-Up
This is a modern, minimalist take on the half-up style. Instead of braids, two sections of hair are twisted into rope-like strands and pinned at the back. It’s sleek, simple, and adds a subtle, interesting detail to loose waves or straight hair.
What you need:
- 1.5-inch curling iron for waves (optional)
- Texturizing spray for grip
- Clear elastics for the twists (optional)
- Bobby pins to secure
- Light-hold hairspray
How to style it:
- (Optional) Create loose waves in your hair for a romantic base. Spray with texturizer.
- Take a section of hair from one temple, about 2 inches wide. Twist it tightly away from your face until it naturally coils into a rope.
- Bring the twisted rope to the back of your head and pin it securely. You can let the end hang loose or tuck it under.
- Repeat on the other side, bringing the second twist to meet the first. Pin them together or criss-cross them. Finish with hairspray.
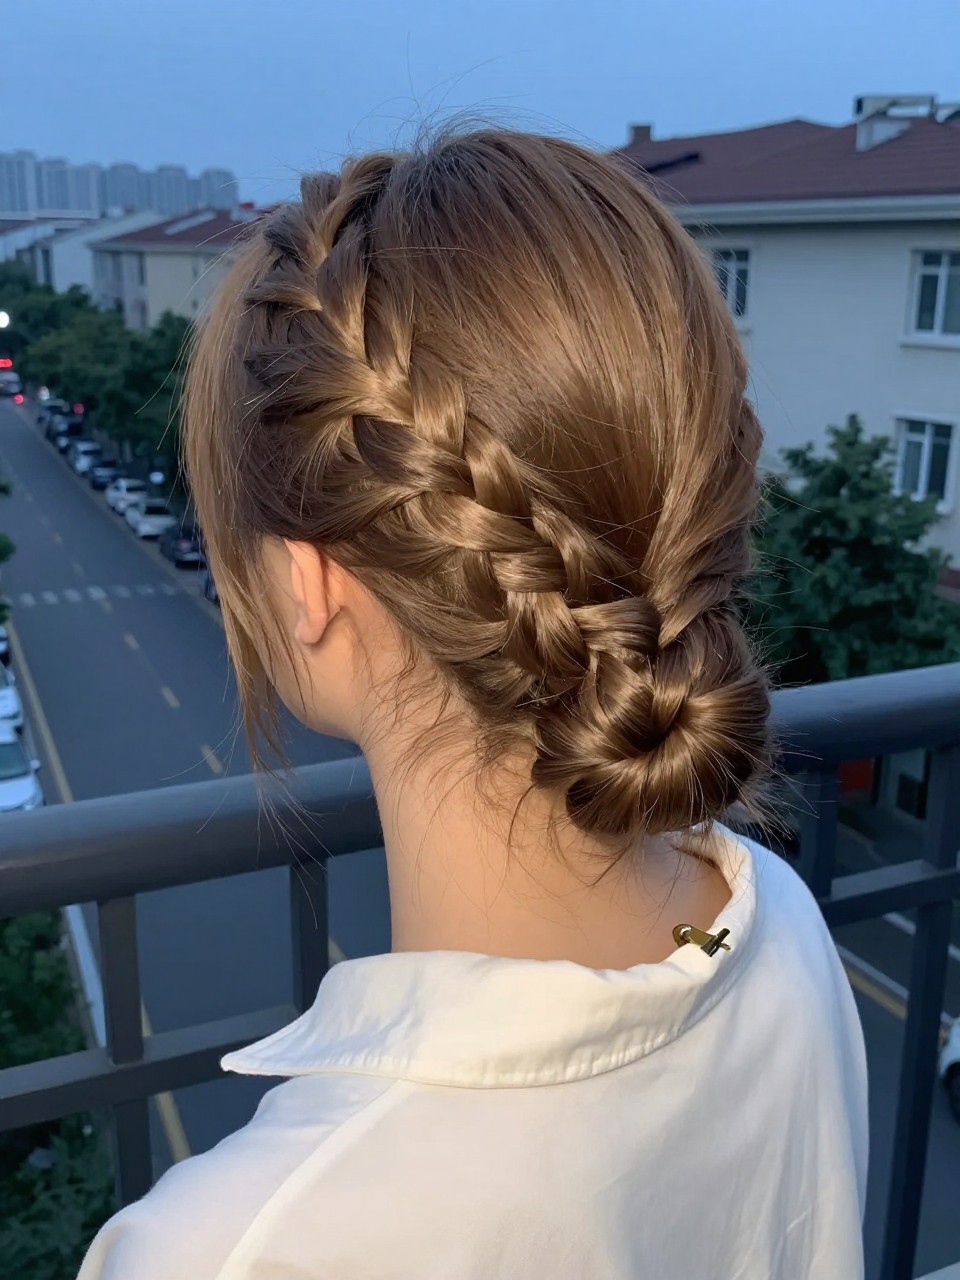
16. Braided High Bun
This style combines the elegance of a bun with the texture of a braid. A Dutch or French braid starts at the nape and is then wrapped into a high bun, creating a look that’s both intricate and sophisticated. It’s perfect for showing off the back of a dress.
What you need:
- Texturizing spray for grip
- Rat-tail comb for sectioning
- Clear elastic for the braid
- Bobby pins and U-shaped pins for the bun
- Hairspray for hold
How to style it:
- Spray texturizer throughout your hair. Flip your head over and gather all hair at the nape, then start a Dutch braid (braiding under) from the nape downwards.
- Braid all the way to the ends and secure with a clear elastic.
- Gently pancake the braid by pulling on the edges to make it fuller and softer.
- Coil the braid around itself at the nape to form a bun, tucking the end underneath. Secure with bobby pins and U-shaped pins. Finish with hairspray.
17. Side-Swept Ponytail with Volume
This is a classic red-carpet look that’s universally flattering. All your hair is swept to one side and secured in a low ponytail, with major volume at the crown. It’s glamorous, romantic, and perfect for showing off long hair while keeping it elegantly draped over one shoulder.
What you need:
- Volumizing mousse for lift
- 1.5-inch curling iron for waves
- Texturizing spray
- Boar bristle brush for teasing
- Strong elastic for the ponytail
- Bobby pins for extra security
How to style it:
- Apply mousse to damp hair and blow-dry upside down for maximum volume at the roots.
- Create loose waves with the curling iron for a romantic texture.
- Flip your head over and tease the crown gently for extra height. Then, sweep all your hair to one side (choose your best side).
- Secure with an elastic at the nape on that side. You may need a few bobby pins to hold the volume in place at the crown. Finish with texturizing spray.
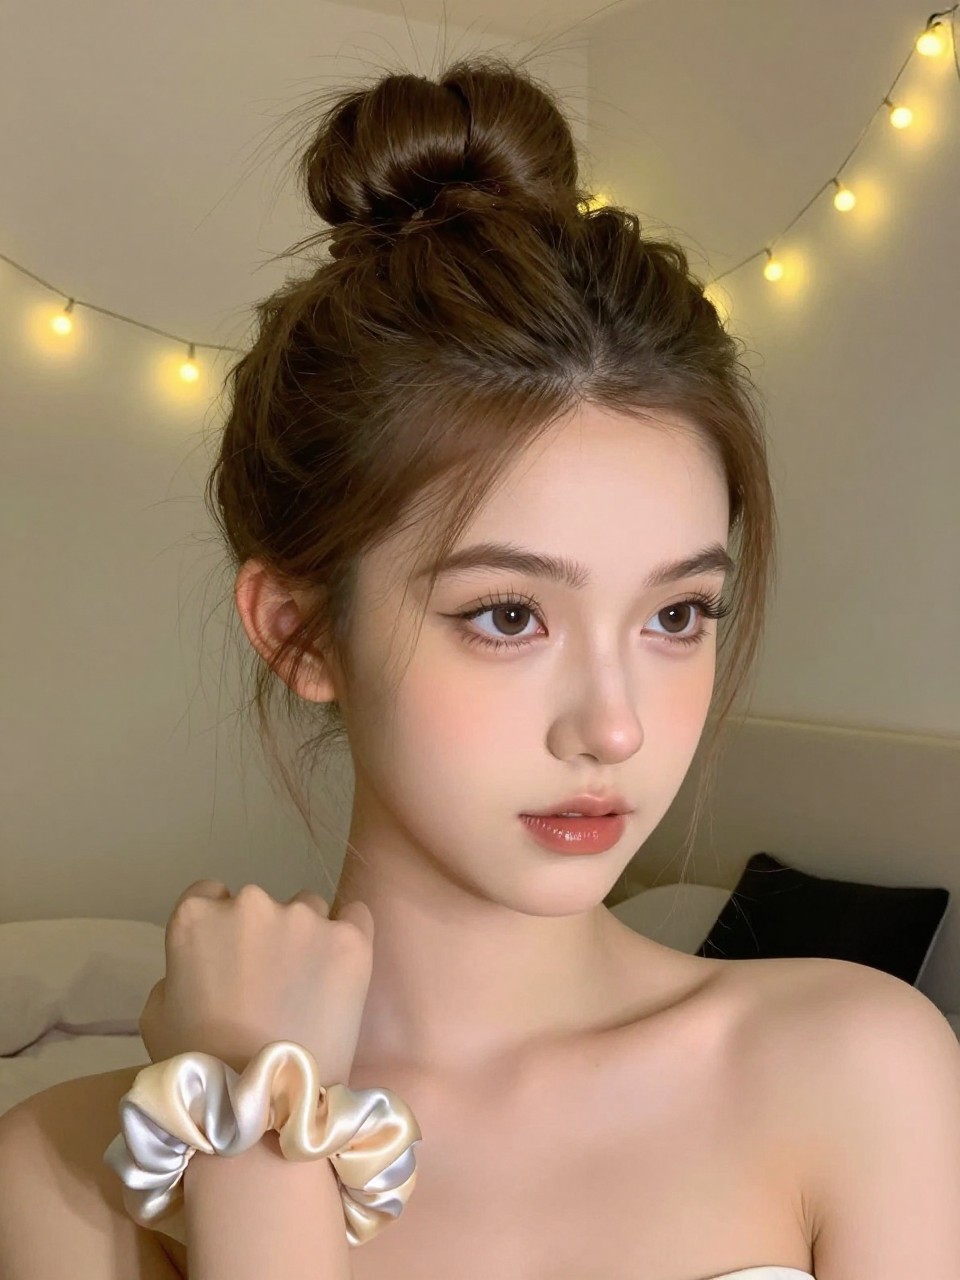
18. Textured Top Knot with Long Pieces
This is a fun, modern style that’s perfect for dancing the night away. It’s a high, messy top knot with lots of texture, but instead of tucking all the length away, you leave a few longer pieces hanging down. It’s edgy, youthful, and shows off your length in a unique way.
What you need:
- Texturizing spray for volume and grip
- Dry shampoo for root lift
- Strong elastic for the ponytail base
- Bobby pins for securing the knot
- 1-inch curling iron for the hanging pieces
- Hairspray
How to style it:
- Spray dry shampoo at the roots and texturizer throughout for volume and grip.
- Gather your hair into a very high ponytail at the crown, but on the last pull-through, only pull the hair halfway through the elastic, leaving a loop and long ends hanging.
- The loop becomes your top knot. Arrange it to look full and messy, pinning any loose pieces.
- The hanging ends will be long. Curl them with the curling iron for softness and let them cascade down. Finish with hairspray.
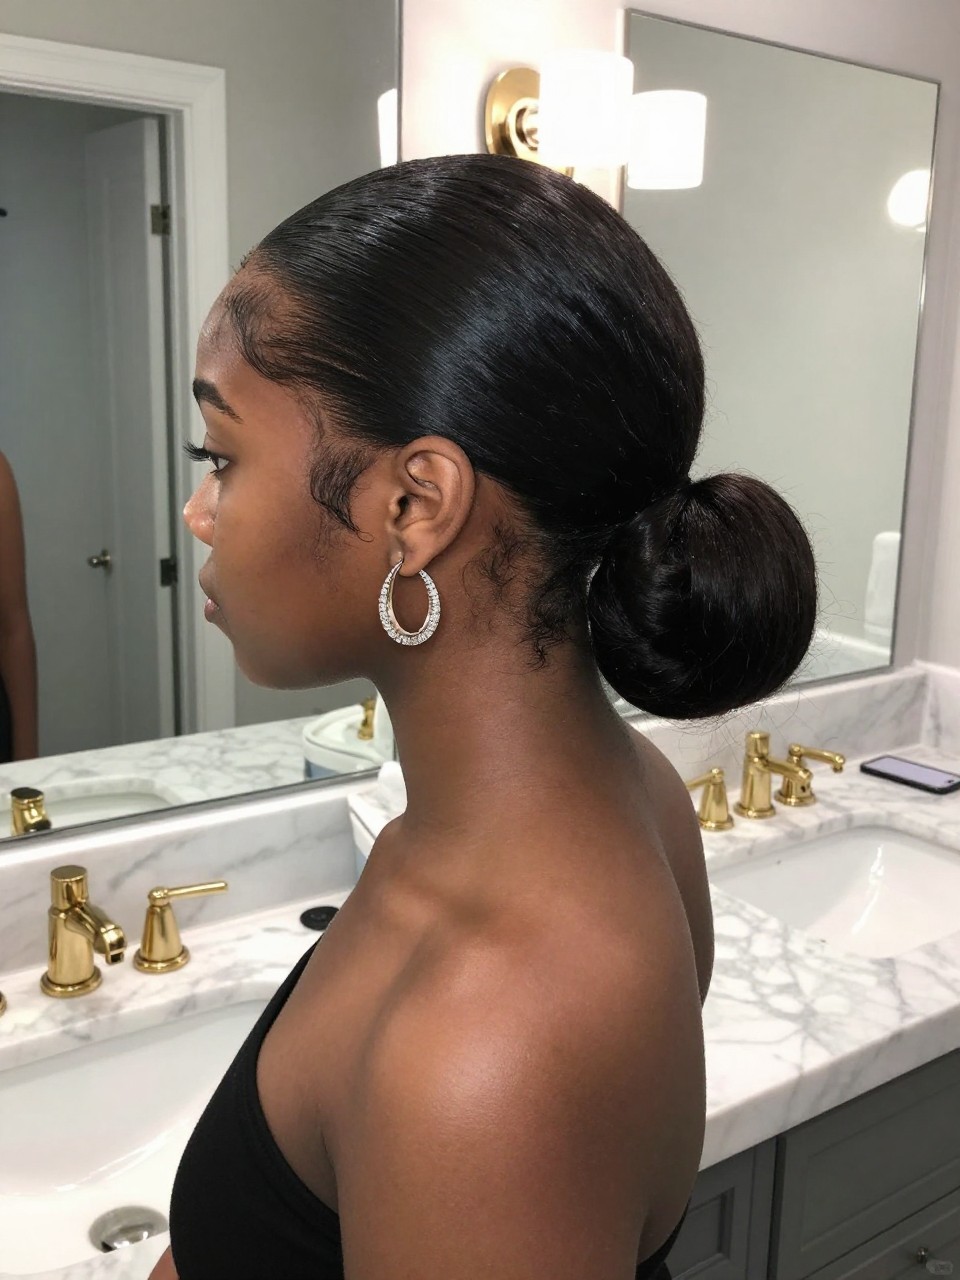
19. Classic Ballerina Bun
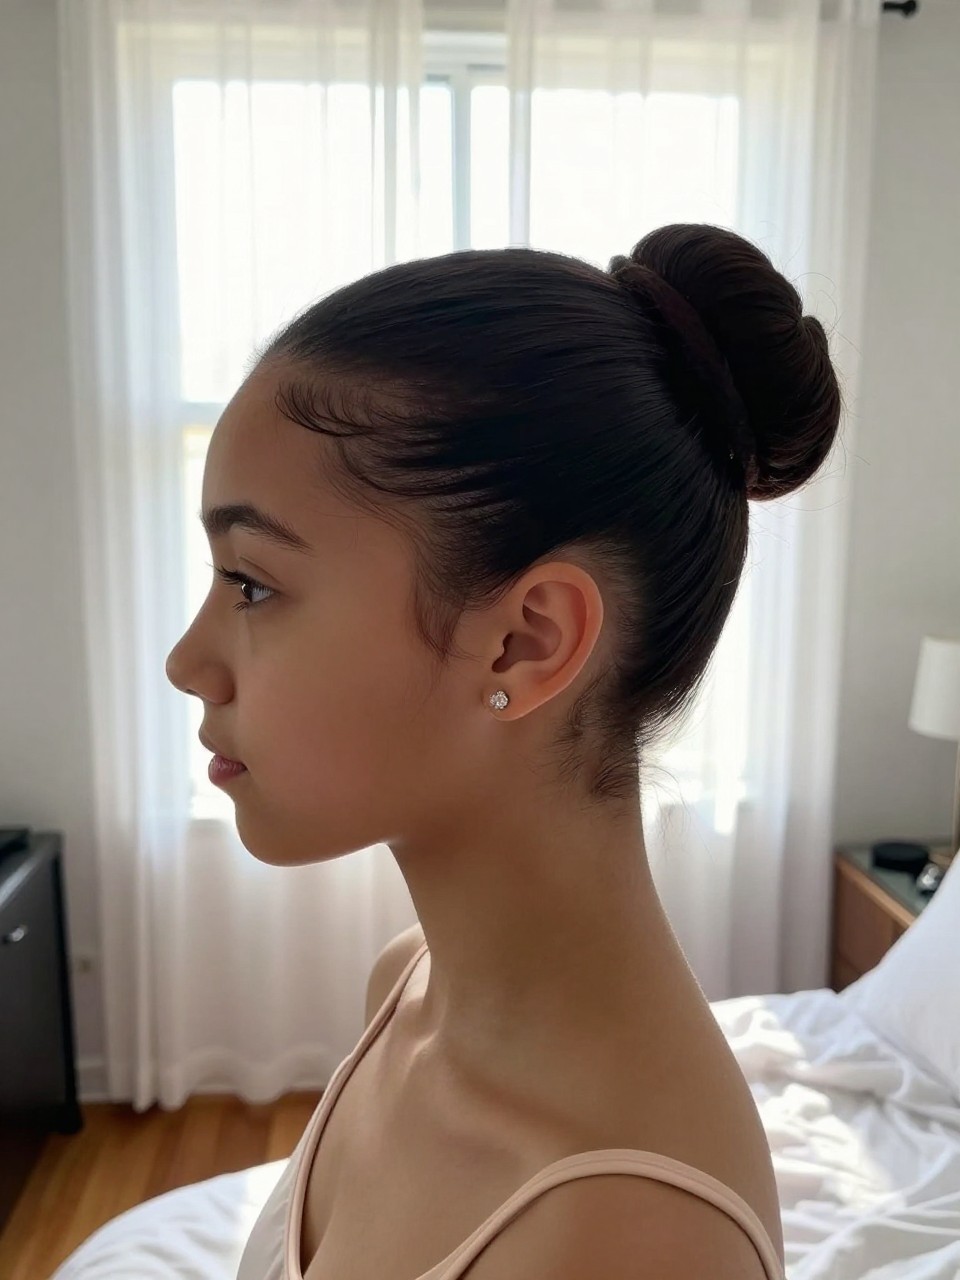
You can never go wrong with a classic. The ballerina bun is sleek, polished, and incredibly elegant. It’s a smooth, tight bun placed high or low, and it’s perfect for showing off your face, neckline, and any stunning earrings you plan to wear.
What you need:
- Paddle brush for smoothing
- Strong-hold gel for sleekness
- Fine-tooth comb for parting
- Strong elastic for the ponytail
- Bobby pins and U-shaped pins for the bun
- Shine spray for gloss
- Hairnet (optional, for extra smoothness)
How to style it:
- Apply gel to damp hair and comb through with the paddle brush for a smooth finish. Create your desired part.
- Gather hair into a high or low ponytail (wherever you want the bun) and secure tightly with an elastic.
- Twist the ponytail tightly and wrap it around the base to form a neat bun. Tuck the ends under and secure with U-shaped pins and bobby pins.
- For an extra-sleek finish, you can place a hairnet over the bun and pin it. Smooth any flyaways with more gel on your fingertips and finish with shine spray.