Table of Contents Show
Short hair is honestly perfect for weddings, because it already looks fresh and intentional without needing a lot of work. The only tricky part is making it feel “guest-ready” and not like your normal everyday hair. I’ve had that moment where my outfit is giving wedding, but my hair is giving Tuesday.
This list will help you pull together a stylish short-hair look that feels polished, holds up through photos and dancing, and matches the event, whether it’s a garden wedding, a beach ceremony, or a formal evening celebration.
1. Sleek Side-Part Tucked Bob
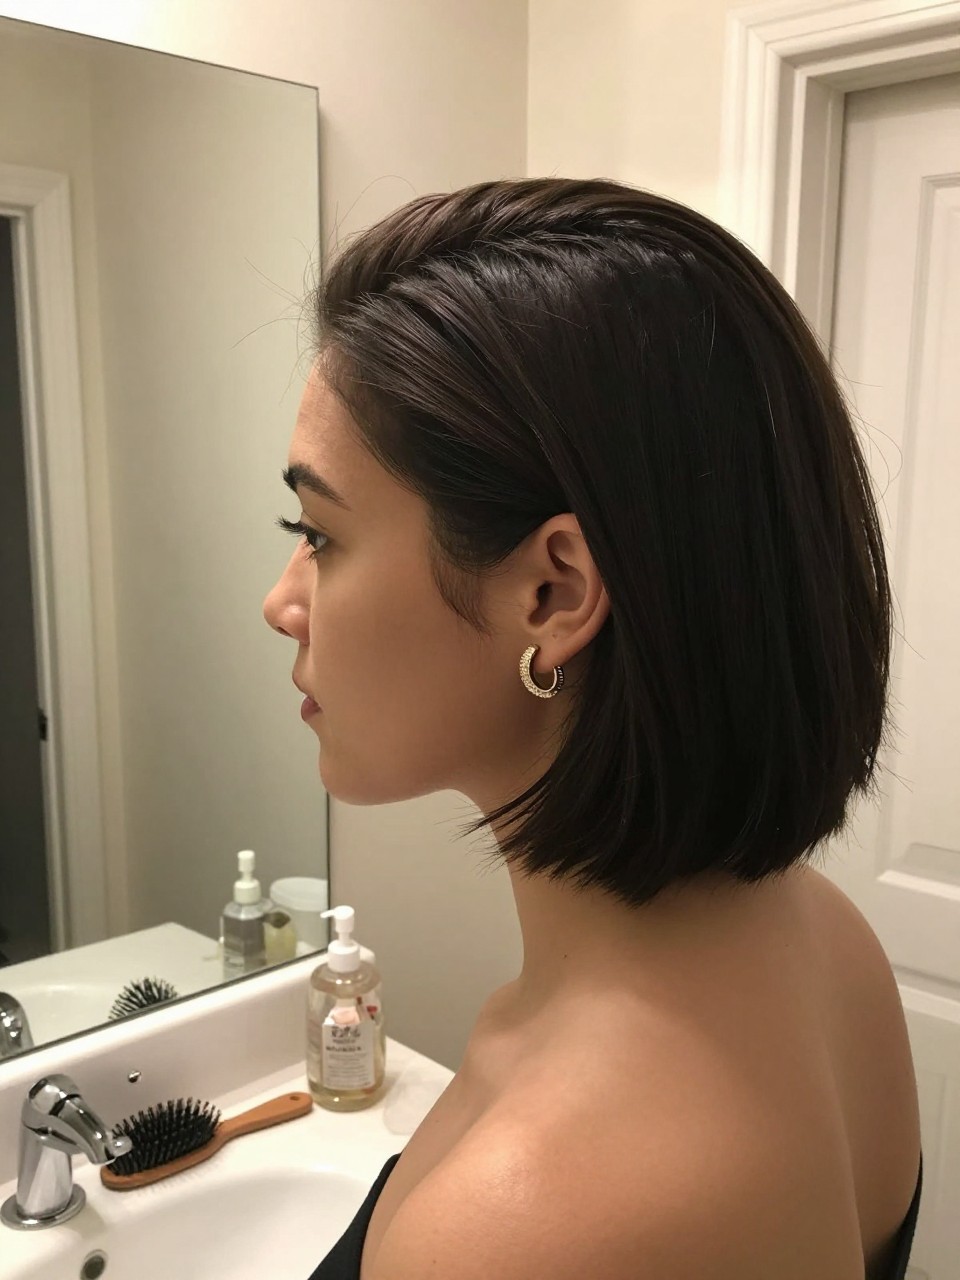
This look is clean, classy, and shows off earrings nicely. It’s perfect for a cocktail dress or a more formal wedding guest outfit.
What you need
- Rat-tail comb (for a sharp side part)
- Smoothing cream (keeps flyaways down)
- Bobby pins (secures the ear tuck)
- Shine spray (adds a polished finish)
How to style it
- Step 1: Create a deep side part and apply smoothing cream to the top layer.
- Step 2: Brush hair neatly and tuck one side behind your ear.
- Step 3: Pin behind the ear under the top layer so pins stay hidden.
- Step 4: Mist shine spray lightly and smooth flyaways with fingertips.
Quick tip
Use pins that match your hair color so the tuck looks seamless.
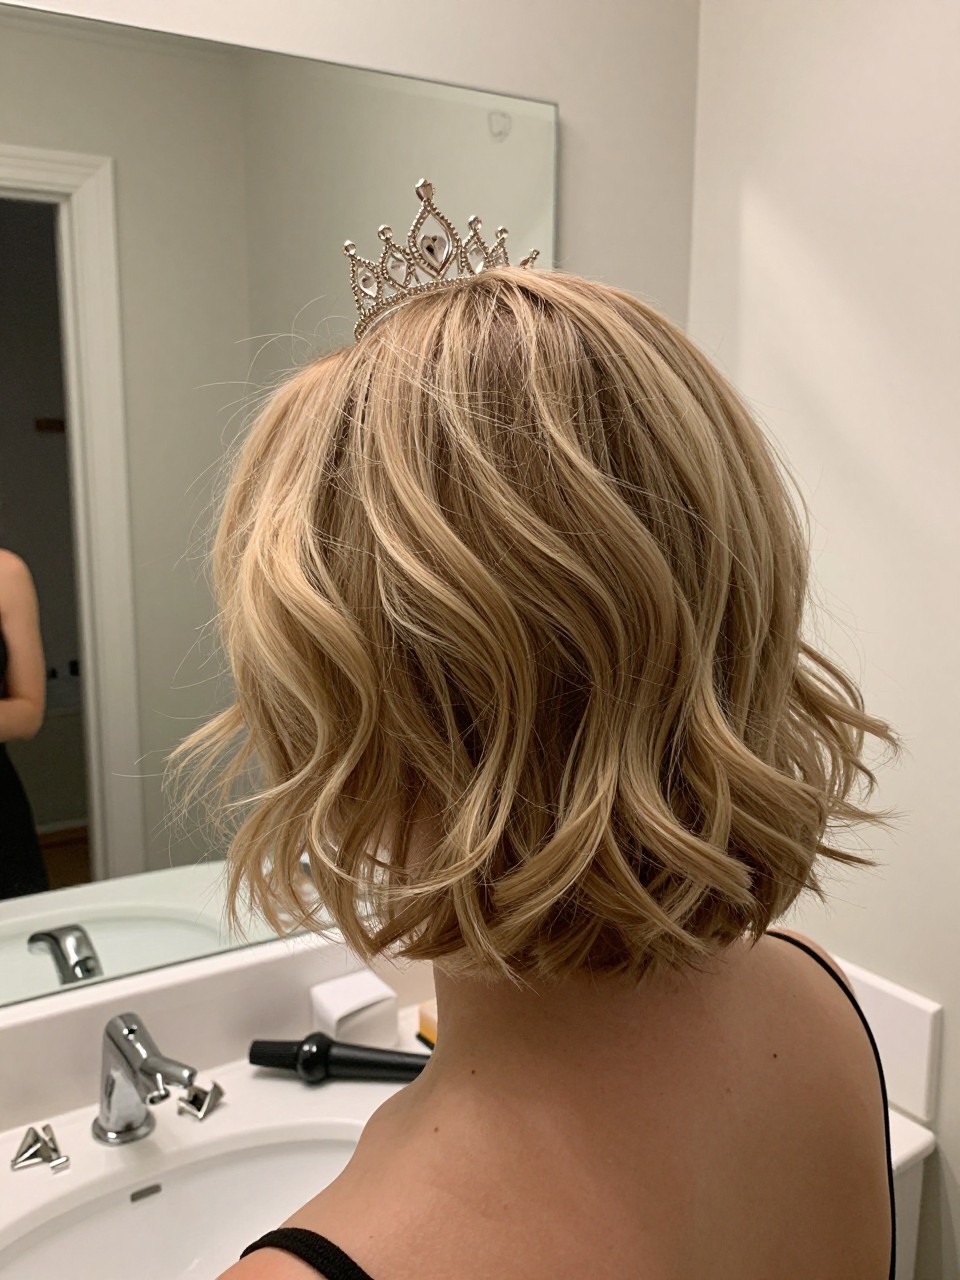
2. Soft Waves Bob With Glossy Finish
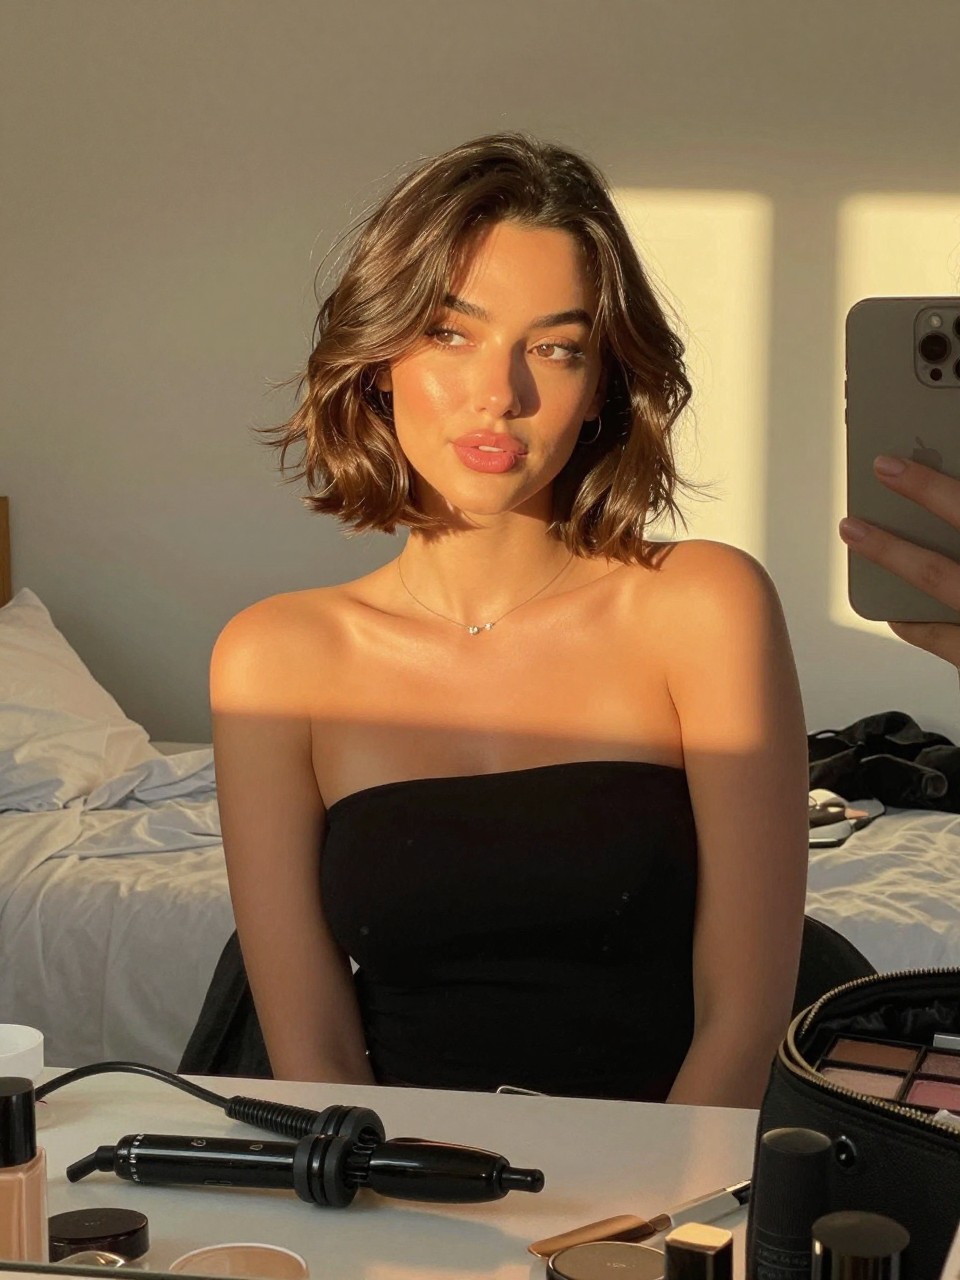
These waves feel romantic but still neat, and they photograph beautifully. It’s a great choice for daytime or evening weddings.
What you need
- 1-inch curling iron (creates soft waves)
- Heat protectant (protects hair and helps waves last)
- Wide-tooth comb (softens curls into waves)
- Light hairspray (holds without stiffness)
How to style it
- Step 1: Apply heat protectant and curl hair in loose sections.
- Step 2: Let curls cool, then brush gently with a wide-tooth comb.
- Step 3: Shape waves with your hands and smooth the top layer.
- Step 4: Mist light hairspray and add a touch of shine if needed.
Quick tip
Curl the front pieces away from your face to keep the look open and flattering.
3. Half-Up Twist With Pearl Clip

A simple half-up twist looks instantly wedding-appropriate when you add pearls. It keeps hair out of your face and feels sweet in photos.
What you need
- Texturizing spray (adds grip for the twist)
- Bobby pins (secures the twist)
- Pearl clip (adds a dressy touch)
- Curling wand (optional, softens the ends)
How to style it
- Step 1: Add texture spray and curl the ends lightly if desired.
- Step 2: Twist a small section from each side toward the back.
- Step 3: Pin the twists together and make sure it feels secure.
- Step 4: Clip the pearl accessory over the pinned area and mist lightly.
Quick tip
Place the clip slightly higher so it shows clearly from the back.
4. Deep Side-Part Glam Waves
This style feels more formal and looks great for evening weddings. The deep side part adds instant drama in a classy way.
What you need
- Curling iron (creates glam waves)
- Heat protectant (helps prevent damage)
- Duckbill clips (optional, sets the front wave)
- Shine spray (adds a soft glow)
How to style it
- Step 1: Create a deep side part and apply heat protectant.
- Step 2: Curl hair in the same direction for a smooth wave pattern.
- Step 3: Clip the front wave for a minute while it cools.
- Step 4: Brush lightly and finish with shine spray.
Quick tip
Keep the waves brushed but not flat so they still look soft and full.
5. Sleek Middle-Part Pin Back
This look is modern, neat, and very easy, but it still looks styled for a wedding. It’s perfect with bold earrings or a nice necklace.
What you need
- Rat-tail comb (creates a clean middle part)
- Smoothing cream (keeps it neat)
- Bobby pins (pins both sides back)
- Hairspray (sets flyaways)
How to style it
- Step 1: Part hair down the middle and smooth cream over the top.
- Step 2: Pin both sides back behind your ears.
- Step 3: Hide pins under the top layer for a clean look.
- Step 4: Mist hairspray lightly and smooth flyaways.
Quick tip
Criss-cross two pins on each side to keep them from sliding.
6. Curled Bob With Crystal Side Pins
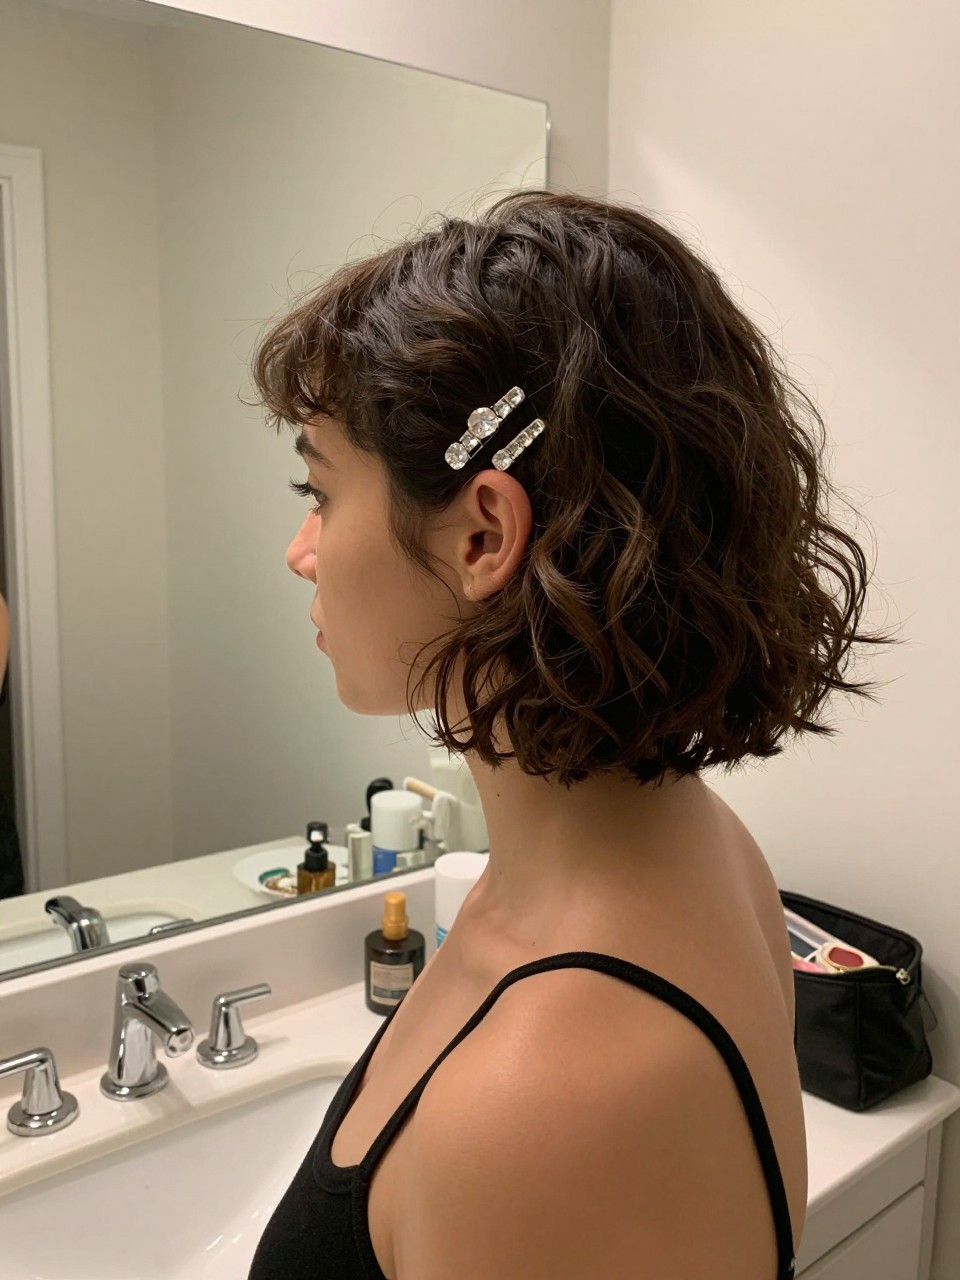
Crystal pins instantly make short hair feel fancy. This is an easy way to upgrade a simple curl for a wedding.
What you need
- Curling wand (adds soft curl)
- Heat protectant (helps curls last)
- Crystal pins (adds sparkle)
- Light hairspray (sets softly)
How to style it
- Step 1: Curl hair loosely and let it cool.
- Step 2: Brush lightly for a soft, blended curl.
- Step 3: Pin one side with 2–3 crystal pins above the ear.
- Step 4: Mist hairspray lightly and smooth flyaways.
Quick tip
Line the pins up neatly or stack them for a clean, stylish look.
7. Polished Pixie With Side Sweep
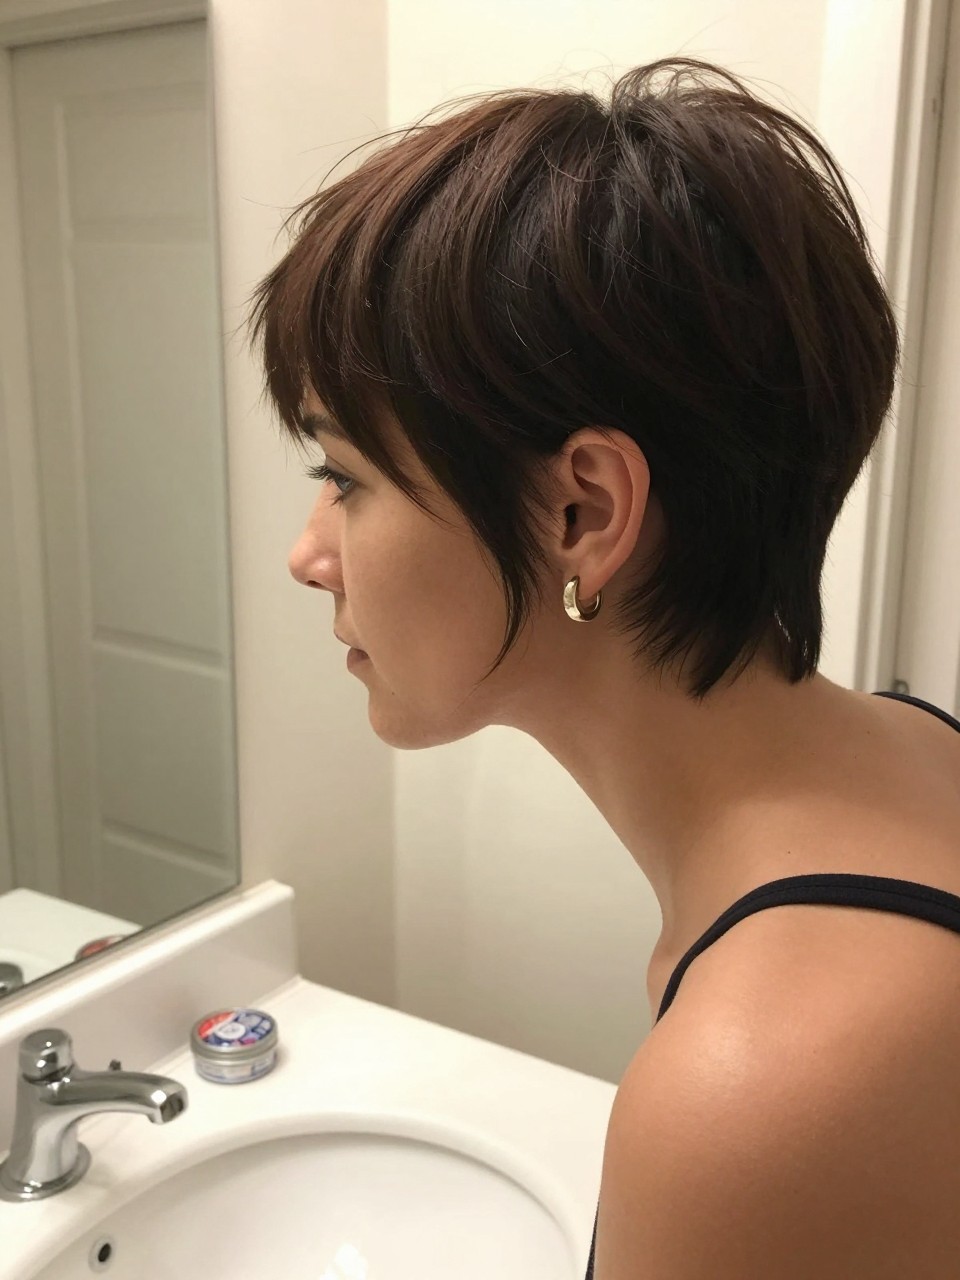
A pixie can look very wedding-guest chic with a smooth side sweep. It’s clean, modern, and looks great with a bold lip.
What you need
- Fine-tooth comb (shapes the sweep)
- Light pomade (adds control and shine)
- Mini bobby pins (optional, hold short pieces)
- Flexible hairspray (keeps it soft)
How to style it
- Step 1: Create a side part and apply a tiny bit of pomade.
- Step 2: Comb hair into a smooth side-swept shape.
- Step 3: Pin any pieces that won’t stay flat.
- Step 4: Mist flexible hairspray and smooth flyaways.
Quick tip
Use pomade only on the top layer so the style doesn’t look heavy.
8. Claw Clip Half-Up Twist for a Lob
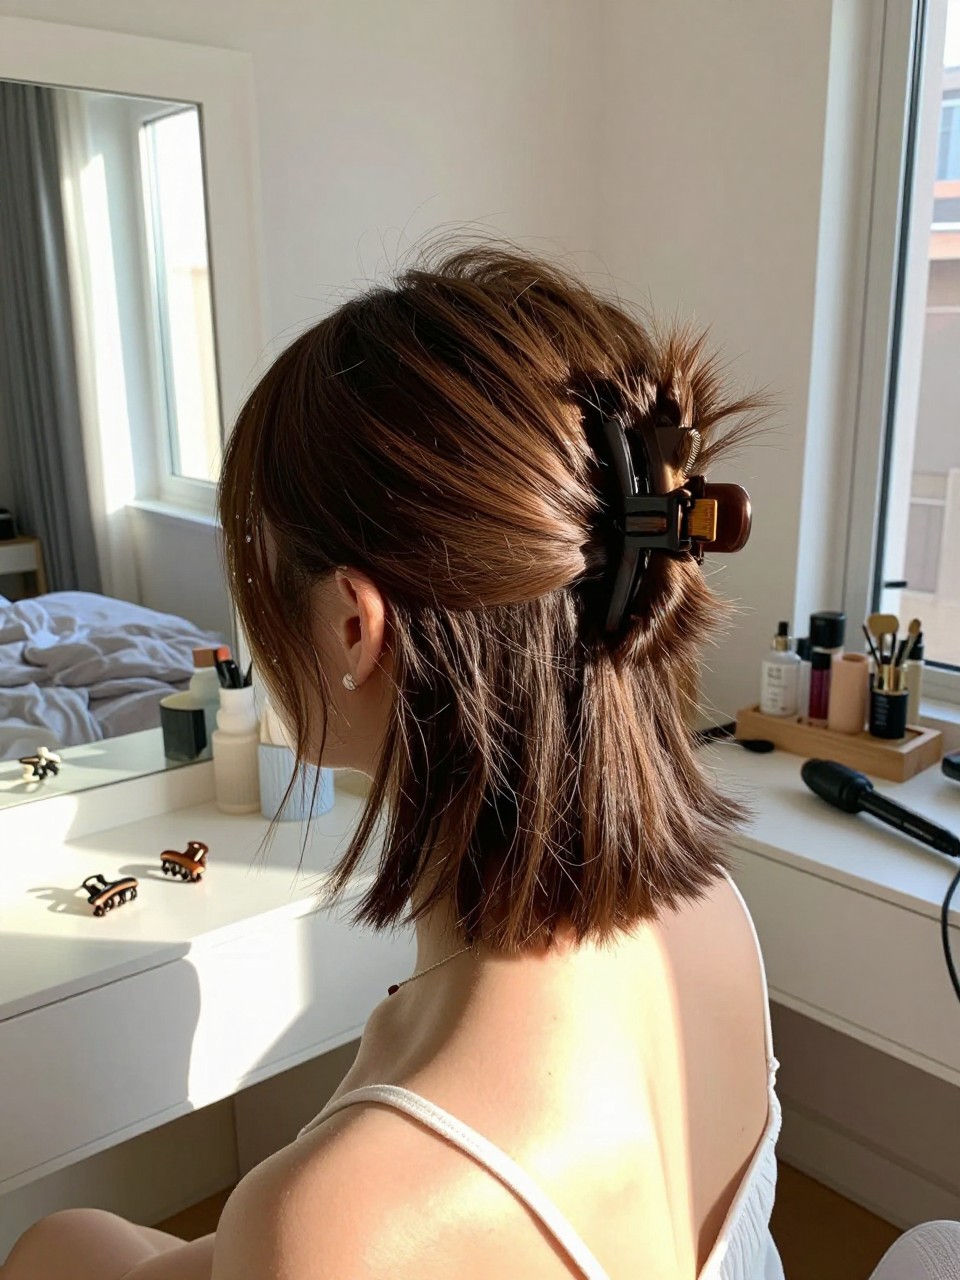
If your hair is long enough for a mini half-up, a claw clip makes it quick and secure. It looks stylish and effortless in a good way.
What you need
- Texturizing spray (adds grip)
- Small claw clip (holds the half-up twist)
- Curling wand (optional, softens ends)
- Shine mist (optional, adds polish)
How to style it
- Step 1: Add texture spray and curl ends lightly if you want.
- Step 2: Twist the top half back and clip it in place.
- Step 3: Tuck loose ends into the clip for a cleaner look.
- Step 4: Smooth flyaways and add a light mist.
Quick tip
Choose a tortoiseshell or neutral clip so it looks more dressy.
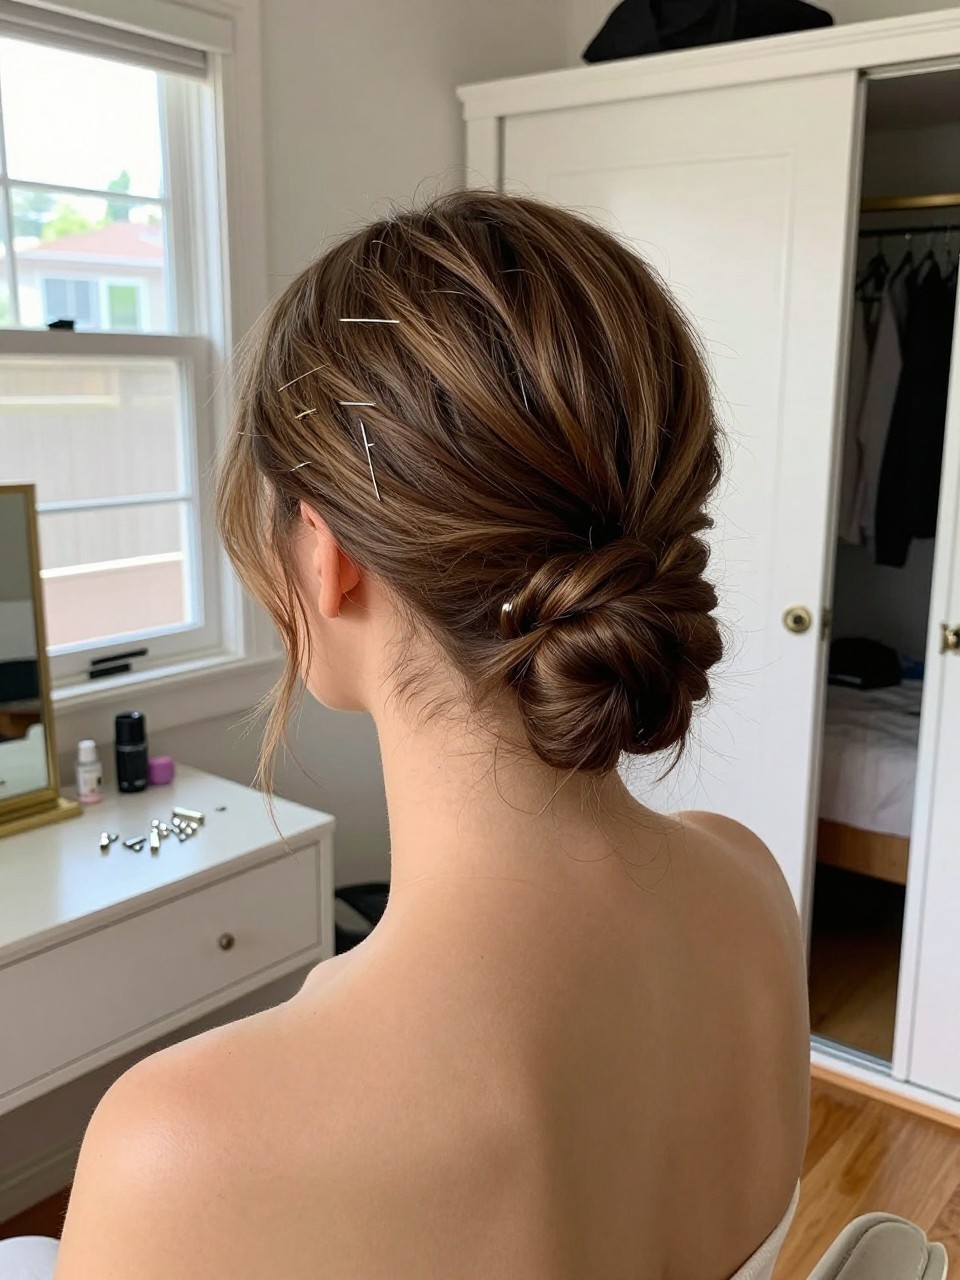
9. Short Hair Faux French Twist
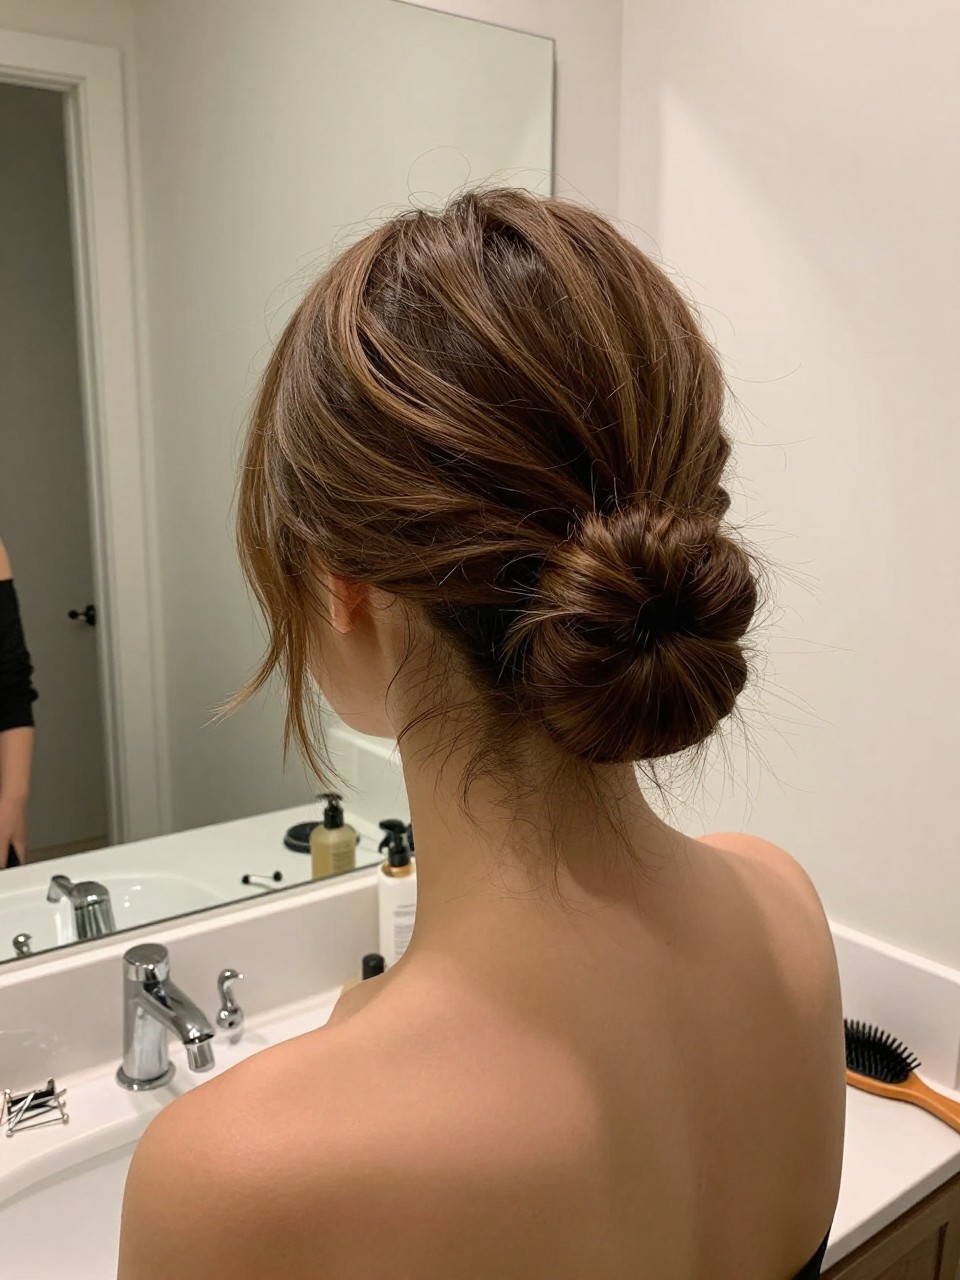
This gives you an updo feel even with short hair. It looks elegant from the back and keeps hair controlled during a long event.
What you need
- Texturizing spray (adds grip for pinning)
- U-pins or bobby pins (creates the twist shape)
- Fine-tooth comb (smooths top)
- Hairspray (sets)
How to style it
- Step 1: Add texture spray and smooth the top back.
- Step 2: Roll hair inward at the back to create a twist shape.
- Step 3: Pin down the roll from top to bottom until secure.
- Step 4: Mist hairspray and smooth flyaways.
Quick tip
Pin in a vertical line down the center for the cleanest twist look.
10. Wet-Look Tucked Bob for Evening Weddings

This style is bold, sleek, and very modern. It works best for formal evening weddings and looks amazing with a simple dress.
What you need
- Wet-look gel (creates glossy finish)
- Wide-tooth comb (spreads product evenly)
- Bobby pins (secures the tuck)
- Strong-hold spray (sets)
How to style it
- Step 1: Apply gel to damp hair and comb it back neatly.
- Step 2: Tuck both sides behind the ears.
- Step 3: Pin any short pieces behind the ears.
- Step 4: Set lightly with strong-hold spray.
Quick tip
Keep the gel on the top layer only so it looks glossy, not oily.
11. Side Braid Accent With Loose Waves
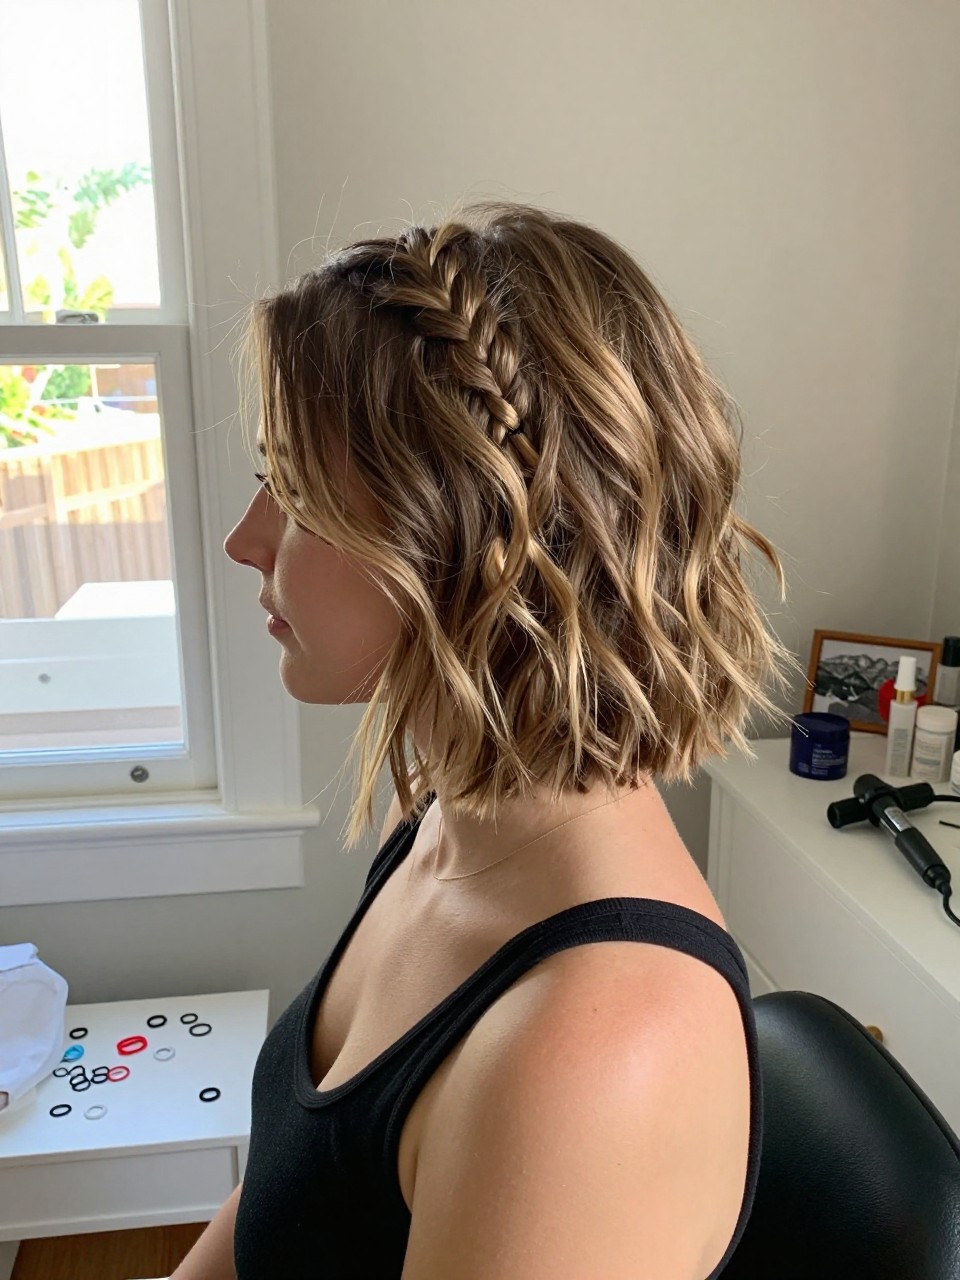
A small braid detail adds a romantic touch without needing long hair. This works best on lobs and longer bobs.
What you need
- Texturizing spray (adds grip for braiding)
- Mini elastic (secures braid)
- Bobby pins (hides the elastic)
- Light hairspray (sets softly)
How to style it
- Step 1: Add soft waves to your hair.
- Step 2: Braid a small section near the temple and tie with a mini elastic.
- Step 3: Pin the braid back or tuck it under a top layer.
- Step 4: Mist hairspray lightly and loosen waves.
Quick tip
Loosen the braid slightly to make it look fuller and more wedding-ready.
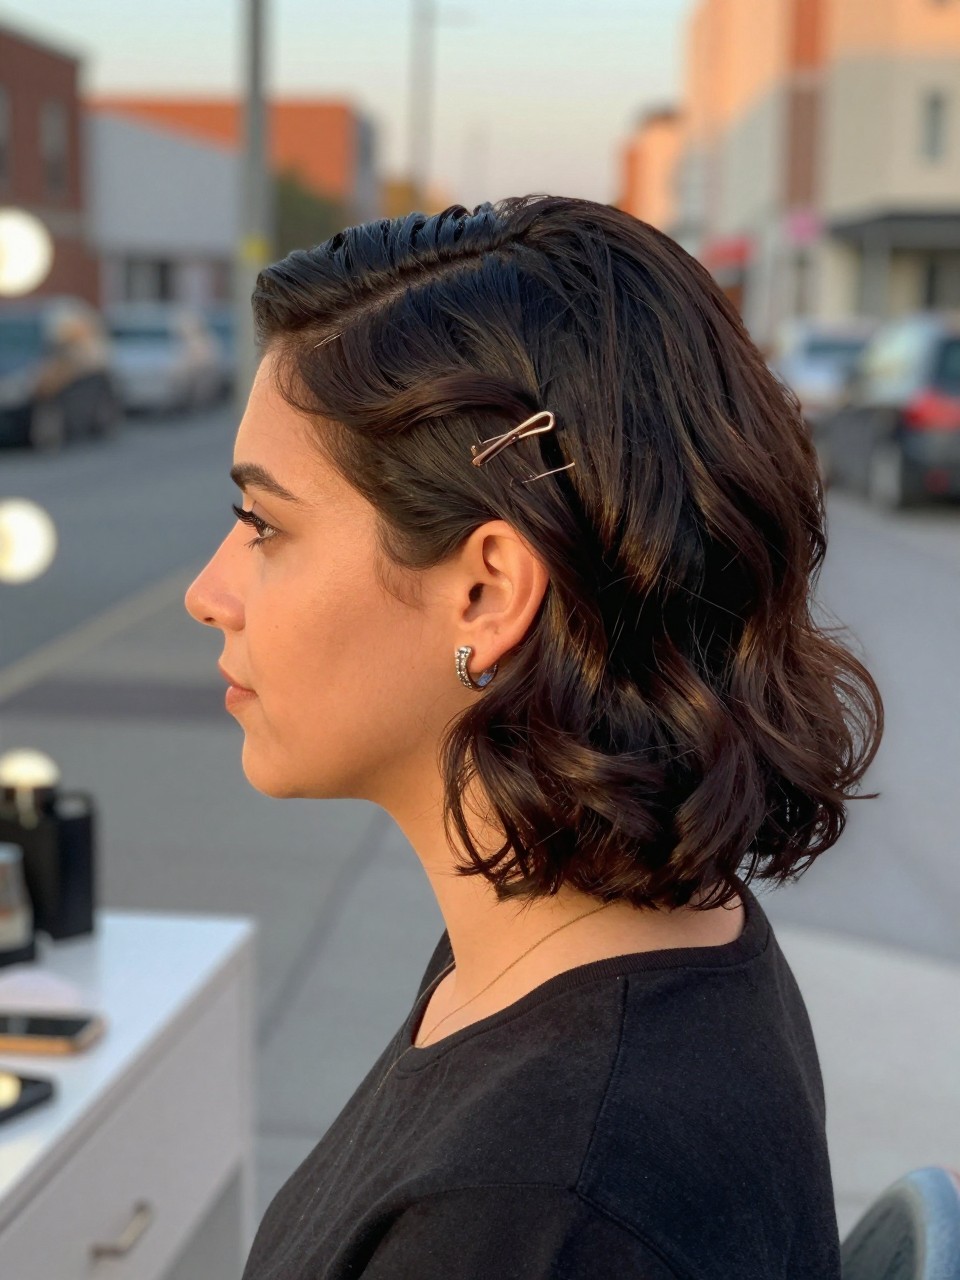
12. Pinned Back Crown With Soft Waves
This style keeps hair out of your face and looks pretty from the back. It’s a great option for outdoor weddings where you want control.
What you need
- Curling wand (adds waves)
- Heat protectant (helps hold)
- Bobby pins (pins the crown back)
- Decorative clip (optional, adds detail)
How to style it
- Step 1: Curl hair into soft waves and let it cool.
- Step 2: Take a small section from each side and pin them back at the crown.
- Step 3: Hide pins under the top layer or add a decorative clip.
- Step 4: Loosen waves and mist hairspray.
Quick tip
Pin slightly higher than you think so it shows well in photos.
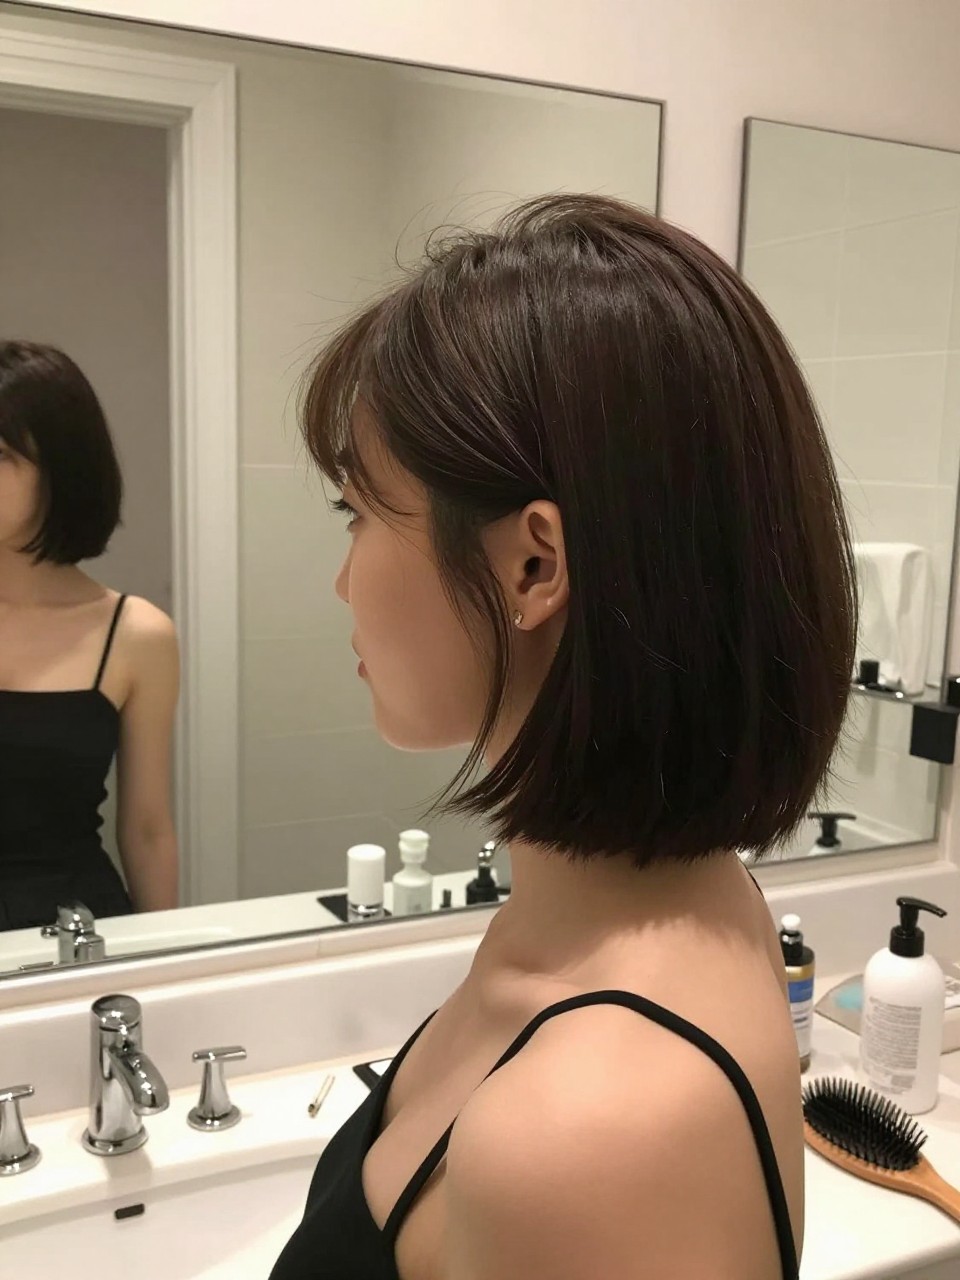
13. Smooth Blowout Lob With Ends Curled Under
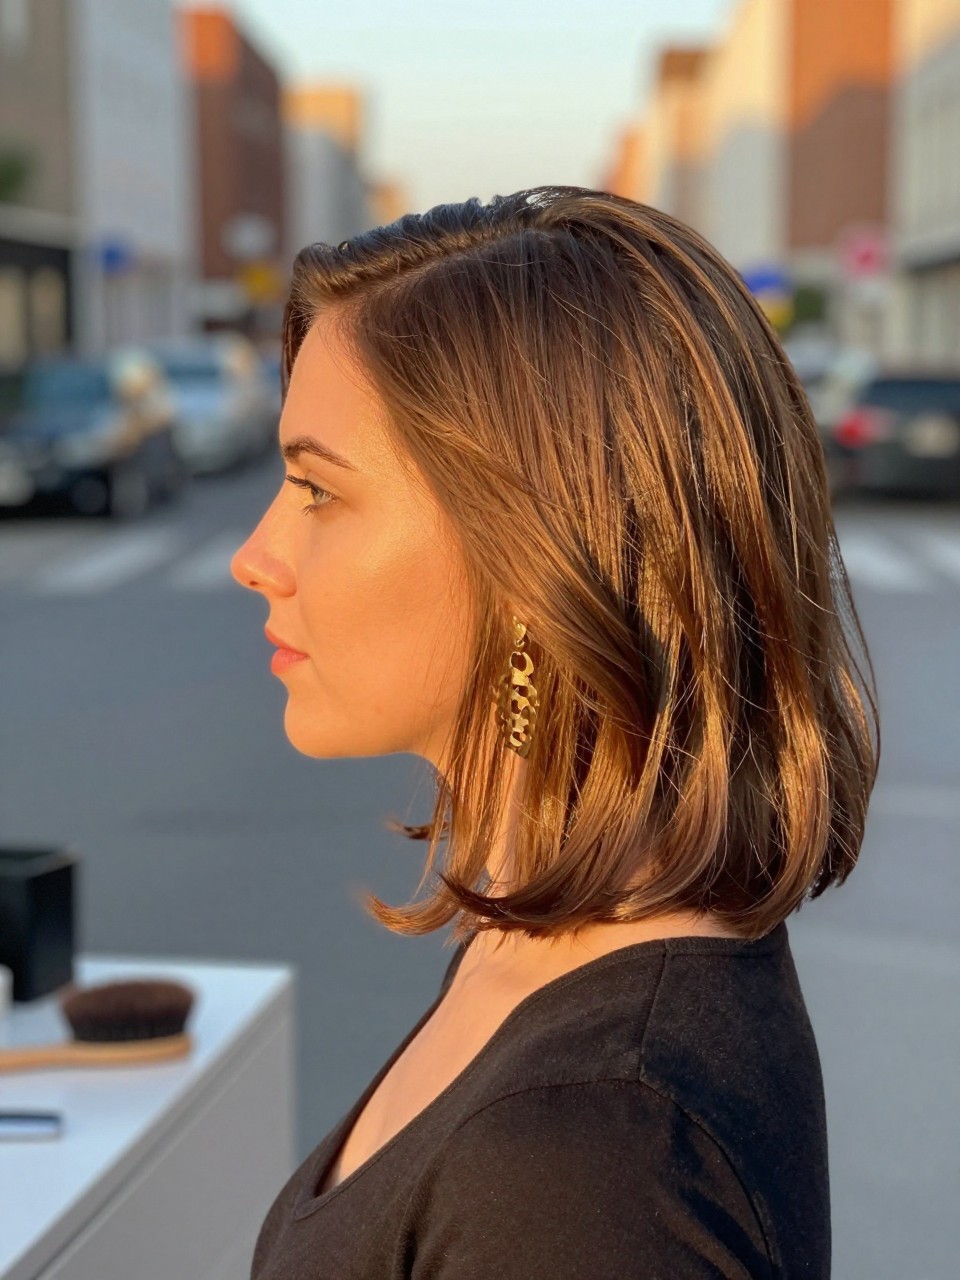
A smooth blowout makes short hair look expensive and polished. The curled-under ends give it a soft, classy finish.
What you need
- Blow-dry cream (smooths hair)
- Round brush (shapes ends)
- Shine spray (adds polish)
- Bobby pins (optional, for ear tuck)
How to style it
- Step 1: Apply blow-dry cream and dry hair with a round brush.
- Step 2: Curve ends under slightly for a clean shape.
- Step 3: Tuck one side behind the ear if you want.
- Step 4: Add shine spray and smooth flyaways.
Quick tip
Let hair cool fully before you touch it too much, it helps the shape last longer.
14. Modern Finger Waves for Short Hair

Finger waves look vintage and very chic, especially for formal weddings. This is a standout style for pixies and short bobs.
What you need
- Wave gel (holds the shape)
- Fine-tooth comb (creates a wave pattern)
- Duckbill clips (sets waves while drying)
- Flexible hairspray (finishes)
How to style it
- Step 1: Apply wave gel to damp hair and create a side part.
- Step 2: Shape waves with the comb and clip each ridge.
- Step 3: Let hair dry fully, then remove clips carefully.
- Step 4: Mist hairspray lightly and smooth edges.
Quick tip
Keep clips flat to avoid dents in the finished waves.
15. Low Twist Back With Hidden Pins
This is one of the easiest wedding guest styles for short hair, but it still looks elegant. The twists create a clean shape and help hold short layers back.
What you need
- Texturizing spray (adds grip)
- Bobby pins (secures twists)
- Smoothing cream (optional, keeps top neat)
- Light hairspray (sets)
How to style it
- Step 1: Add texture spray and create a soft part.
- Step 2: Twist each side back toward the nape.
- Step 3: Pin both twists low, hiding pins under the top layer.
- Step 4: Loosen slightly for softness and mist hairspray.
Quick tip
Pin in an X shape so the twists stay secure through dancing.