
Table of Contents Show
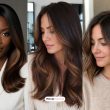
So, prom is coming up, and if you have curly hair, you might be sitting there wondering if you should straighten it just to make styling easier. I get it—sometimes our natural texture feels like a wild card when you need a polished look. But here’s the thing: your curls already have the volume and personality that so many people try to create with hot tools.
This post is all about working with your texture to create prom hairstyles that show off your natural definition while still feeling special and done-up.
Whether you want an updo, a half-up style, or to wear your hair down, I’ve gathered 18 ideas that will make your curls the star of the night.
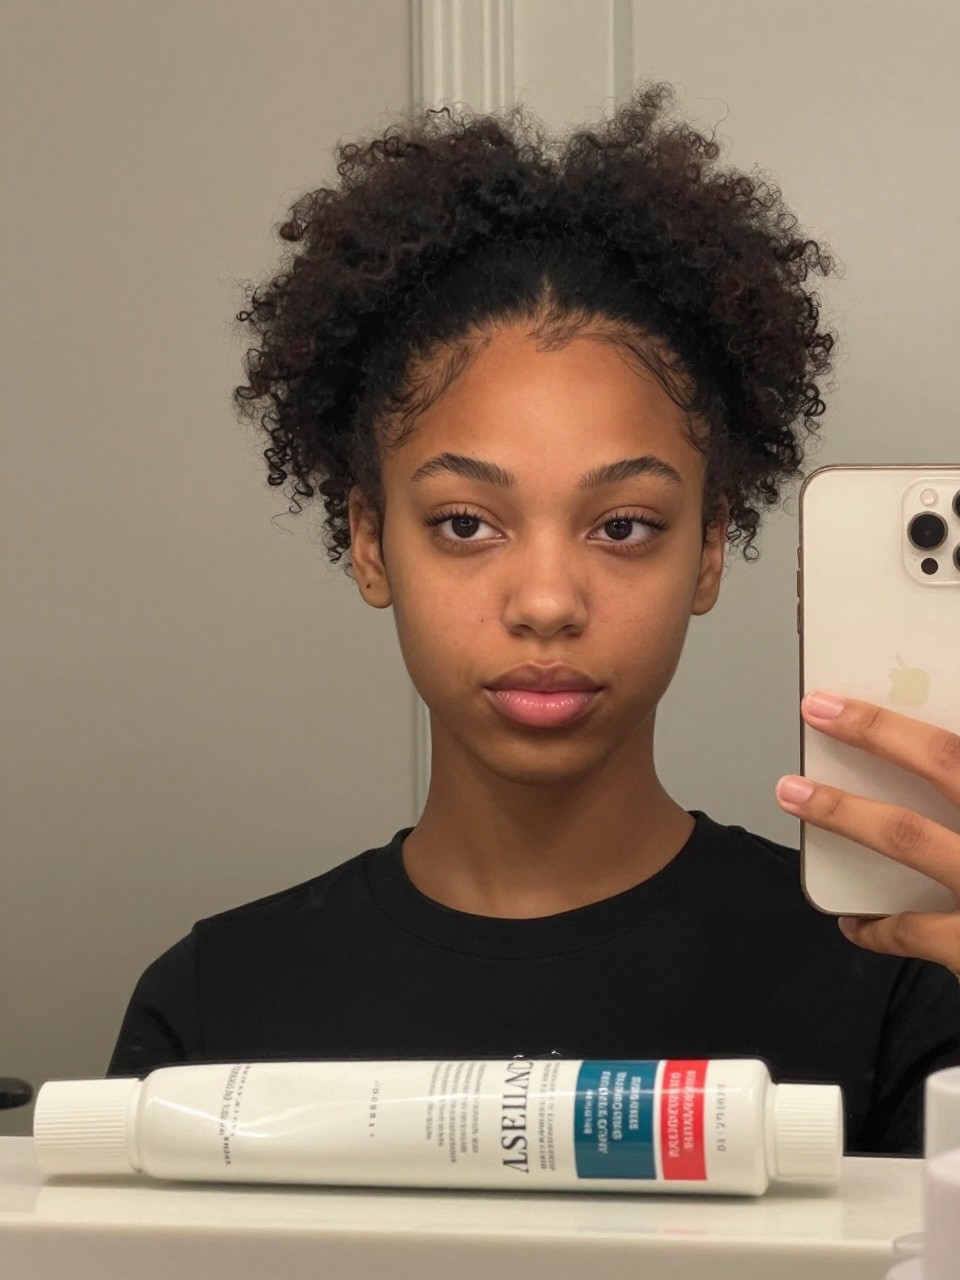
1. Voluminous High Puff
This style is exactly what it sounds like—a big, beautiful puff of curls gathered at the crown of your head. It gives you that lifted, elegant look while keeping all your hair off your neck for dancing.
What you need:
- Wide-tooth comb (for gentle detangling)
- Strong-hold edge control (to smooth the hairline)
- Thick satin scrunchie or elastic (to prevent breakage)
- Hold-enhancing hairspray (for all-night staying power)
How to style it:
- Step 1: Detangle your dry curls gently with a wide-tooth comb, then flip your head upside down.
- Step 2: Gather all hair at the very top of your head and secure it with a thick satin scrunchie.
- Step 3: Smooth down your edges with edge control and a soft brush.
- Step 4: Fluff the puff for more volume and set with hairspray.
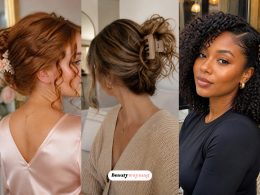
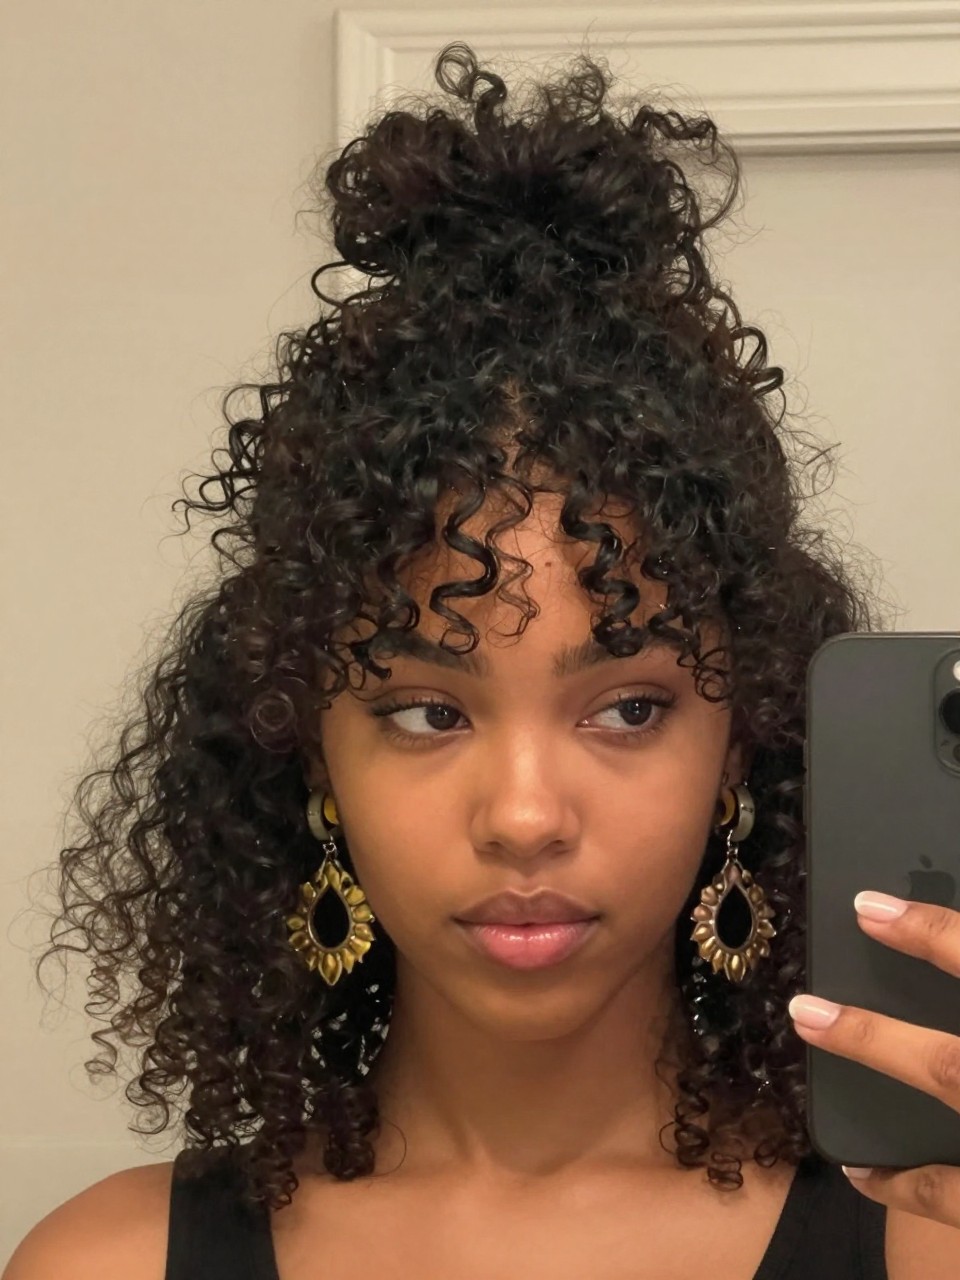
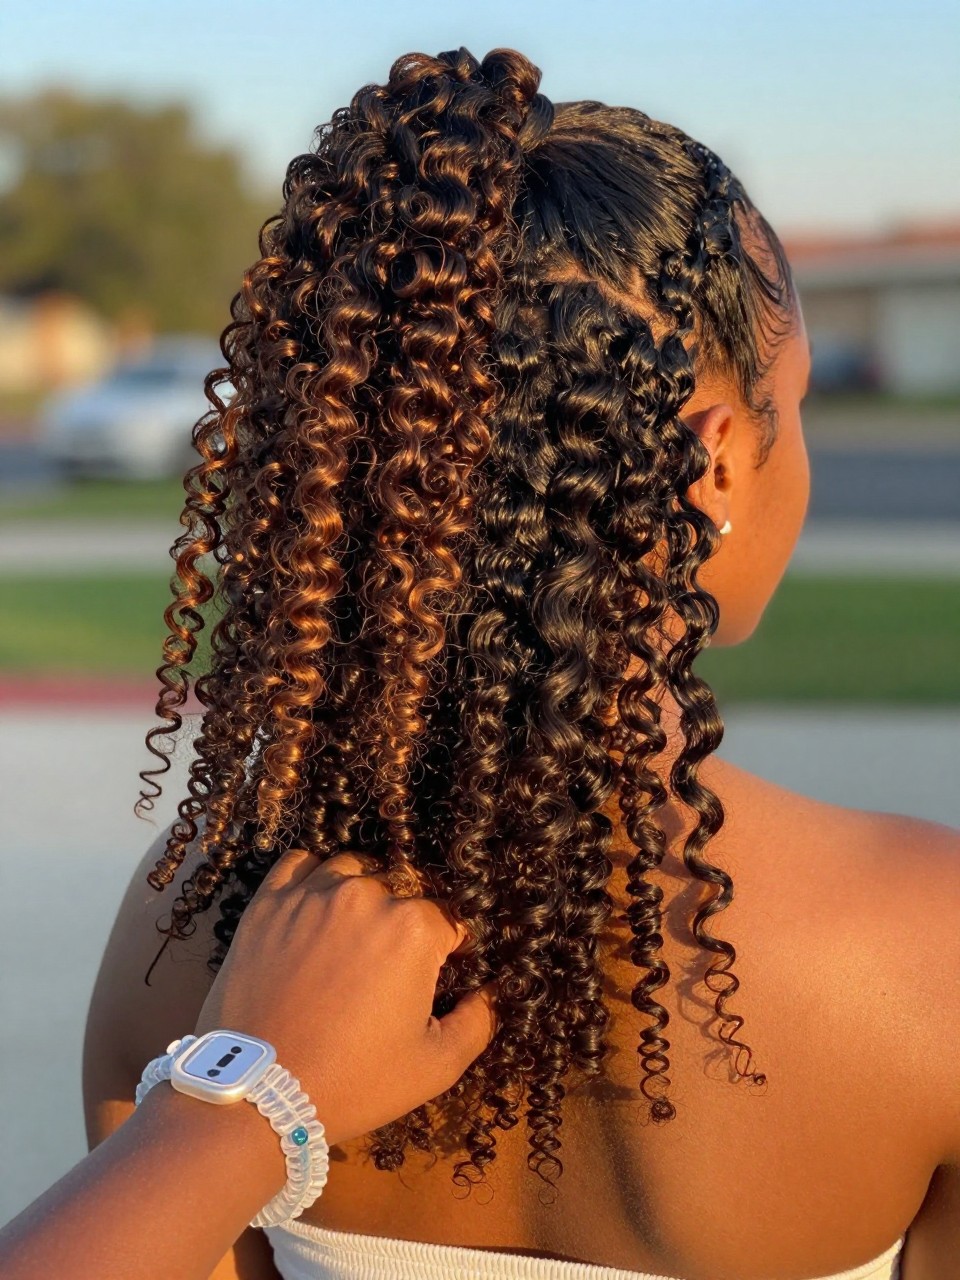
2. Half-Up Half-Down with Defined Curls
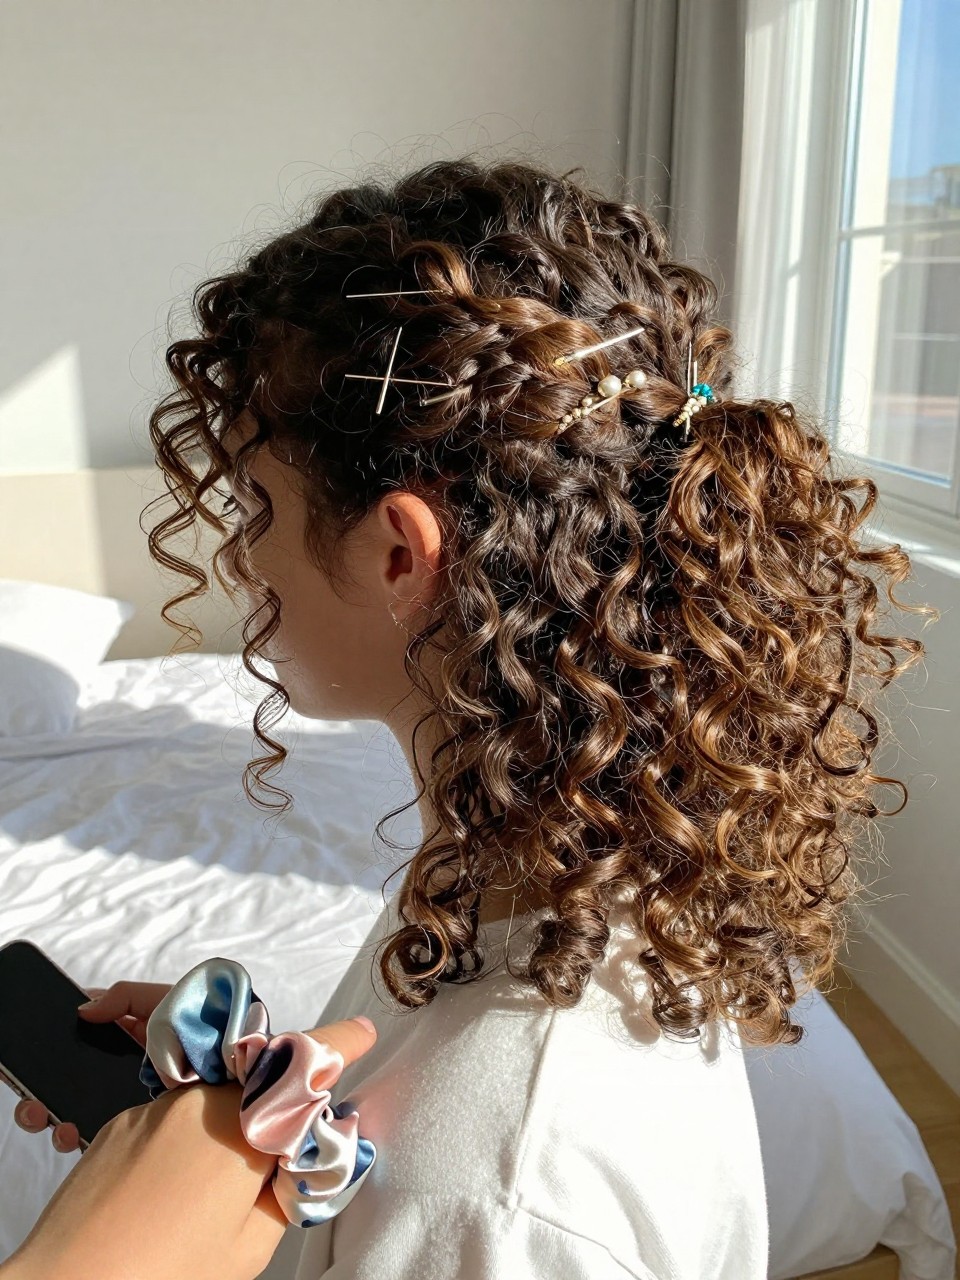
This is the curly girl classic for a reason—it shows off your length and texture while keeping hair out of your face. The contrast between the pulled-back top and the full, bouncy bottom is effortlessly romantic.
What you need:
- Leave-in conditioner (to refresh curl definition)
- Small clear elastic (for an invisible hold)
- Curl-defining cream (to enhance your natural pattern)
- Decorative pins or small clips (for a touch of sparkle)
How to style it:
- Step 1: Refresh your curls with a leave-in conditioner, focusing on the mid-lengths to ends.
- Step 2: Take a section from each temple and bring them to the back, securing with a small clear elastic.
- Step 3: Optional—twist the ponytail section before pinning for a different look, or just leave it loose.
- Step 4: Add a few decorative pins around the elastic and gently pull out a few face-framing tendrils.
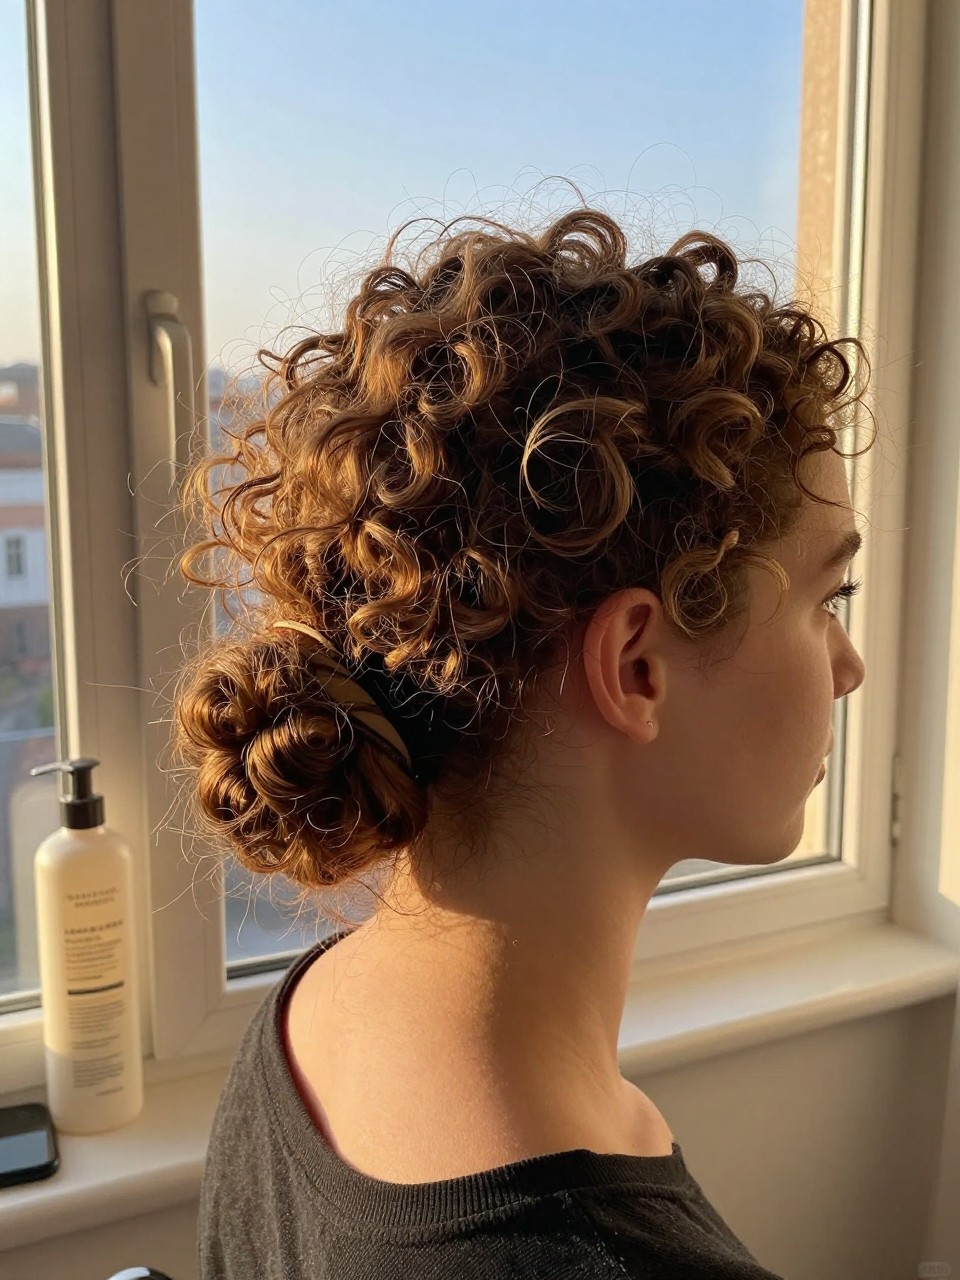
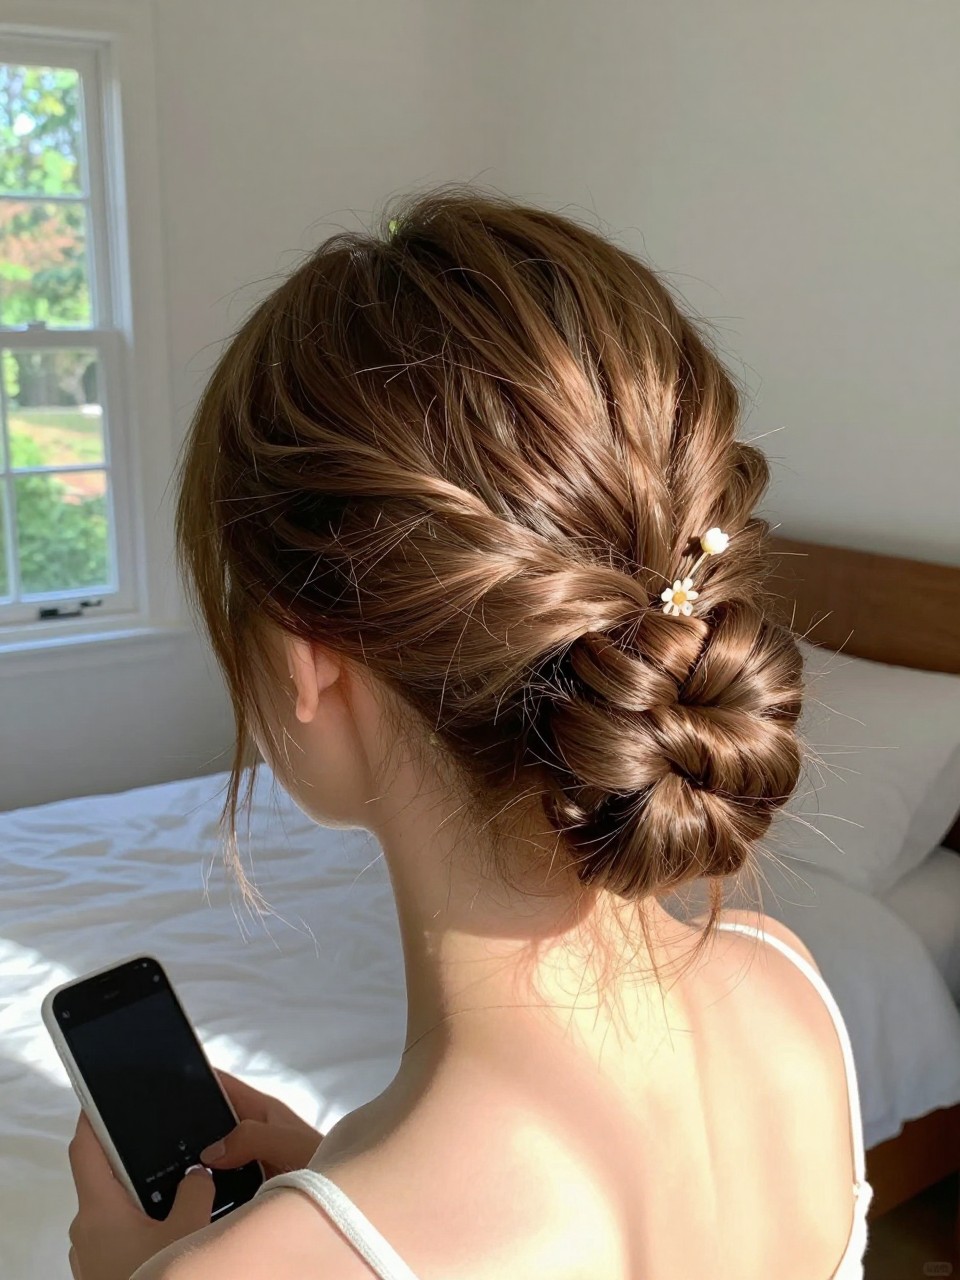
3. Textured Low Bun
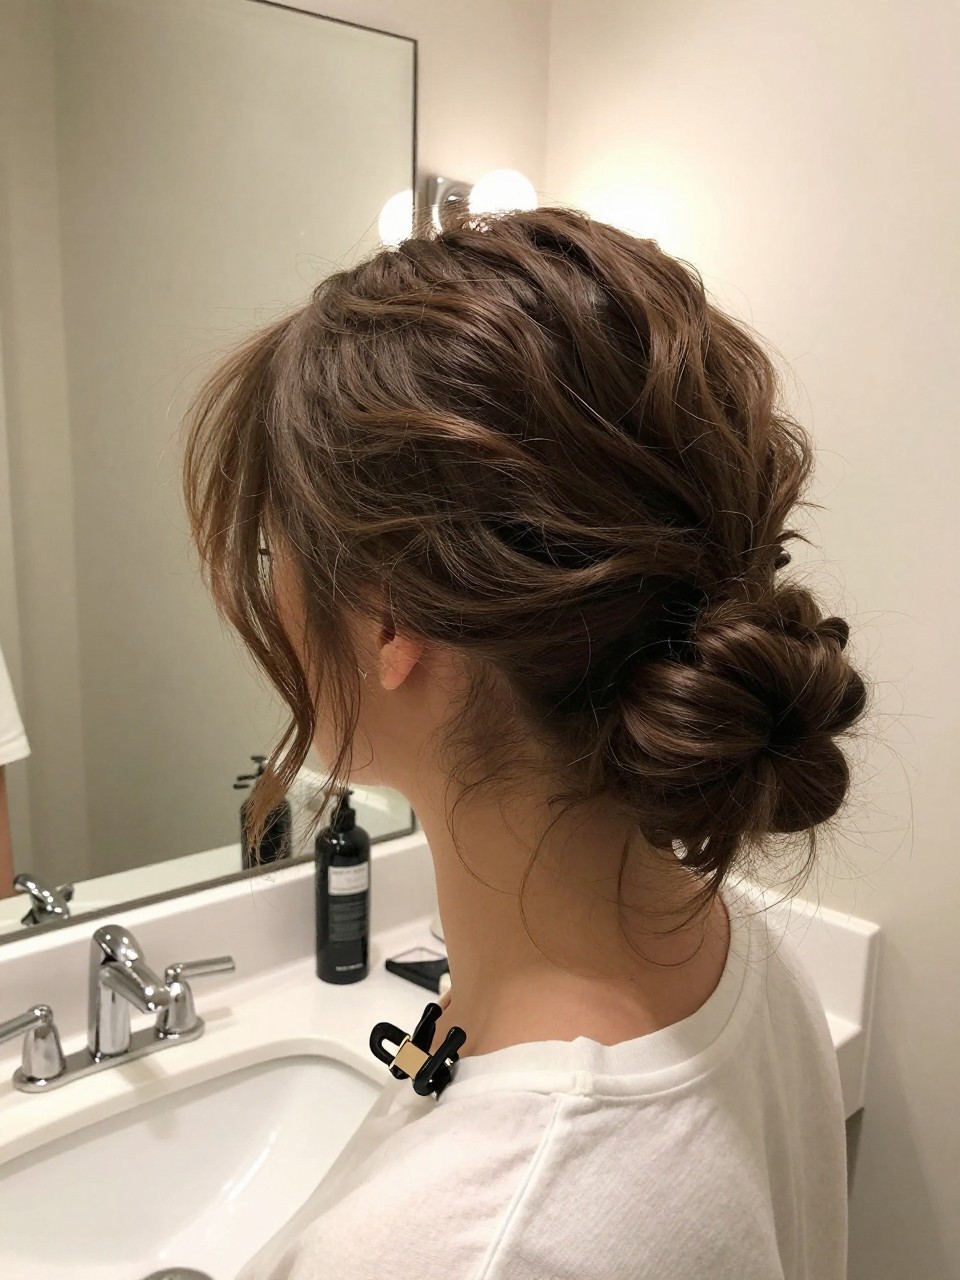
Don’t let the word “bun” fool you—this isn’t your everyday messy bun. It’s a low, gathered style that lets your natural texture create beautiful shape and movement, making it look intentionally undone and very chic.
What you need:
- Medium-hold styling mousse (to add grip and texture)
- Satin scrunchie (to match your hair color)
- U-shaped hair pins (they grip curly hair better than bobby pins)
- Light-hold hairspray (to keep flyaways in check)
How to style it:
- Step 1: Apply mousse to damp or dry hair to enhance texture.
- Step 2: Gather hair at the nape of your neck and secure it with a satin scrunchie into a low ponytail.
- Step 3: Twist the ponytail loosely and wrap it around the base, pinning sections with U-shaped pins as you go.
- Step 4: Gently pull at the bun to loosen it slightly for more volume, then mist with hairspray.
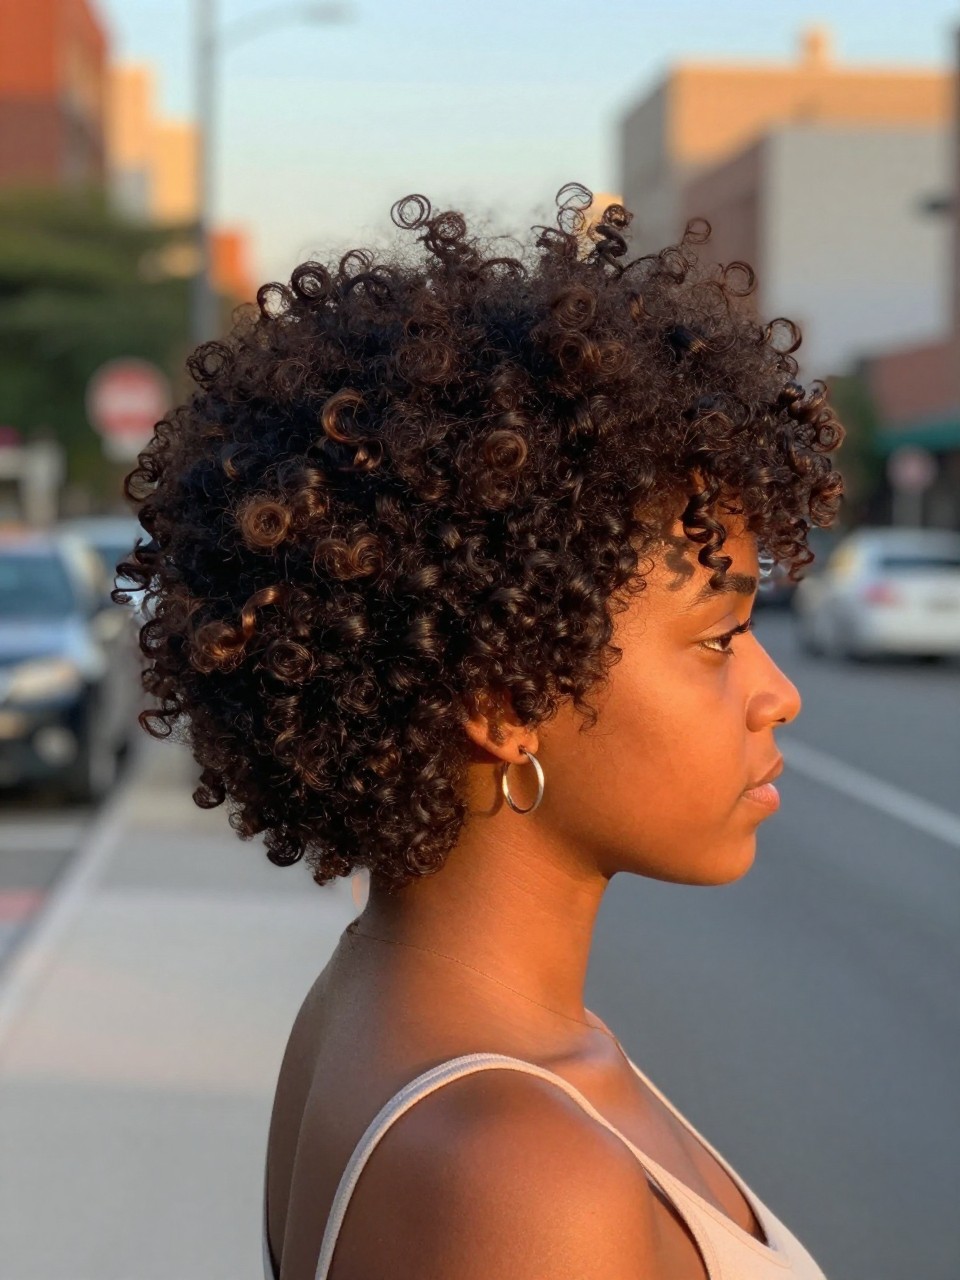
4. Pineapple Updo with Curly Bangs
This style takes the classic curly “pineapple” (what you do before bed) and makes it prom-ready. It’s essentially a high ponytail where all the curls cascade forward like a fountain, with bangs or shorter pieces left out to frame the face.
What you need:
- Wide headband or silk scarf (optional accessory)
- Strong elastic band (to hold the height)
- Curl refresher spray (to wake up definition)
- Edge control (for a sleek hairline)
How to style it:
- Step 1: Flip your head forward and gather all curls at your high forehead, securing tightly.
- Step 2: Let the curls fall forward over your head—don’t pull them back.
- Step 3: If you have curly bangs, define them with your fingers and let them frame your face.
- Step 4: Smooth your hairline with edge control and add a decorative headband or scarf for flair.
5. Side-Swept Curls with Volume Clip
Channel old Hollywood glamour by sweeping all your curls to one side. This look is dramatic, romantic, and gives the illusion of even more volume, especially if you add a small clip at the root for lift.
What you need:
- Volume clip or small rattail comb (to lift the roots)
- Strong-hold gel (to keep the side part defined)
- Bobby pins (matching your hair color)
- Shine serum (for glossy, healthy-looking curls)
How to style it:
- Step 1: Create a deep side part with a rattail comb and apply gel along the part line to keep it clean.
- Step 2: Use a volume clip at the root on the heavier side to lift the hair at the crown.
- Step 3: Gather all curls and sweep them over one shoulder, securing any shorter pieces at the nape with bobby pins.
- Step 4: Apply shine serum to the ends and remove the volume clip once the hair sets.
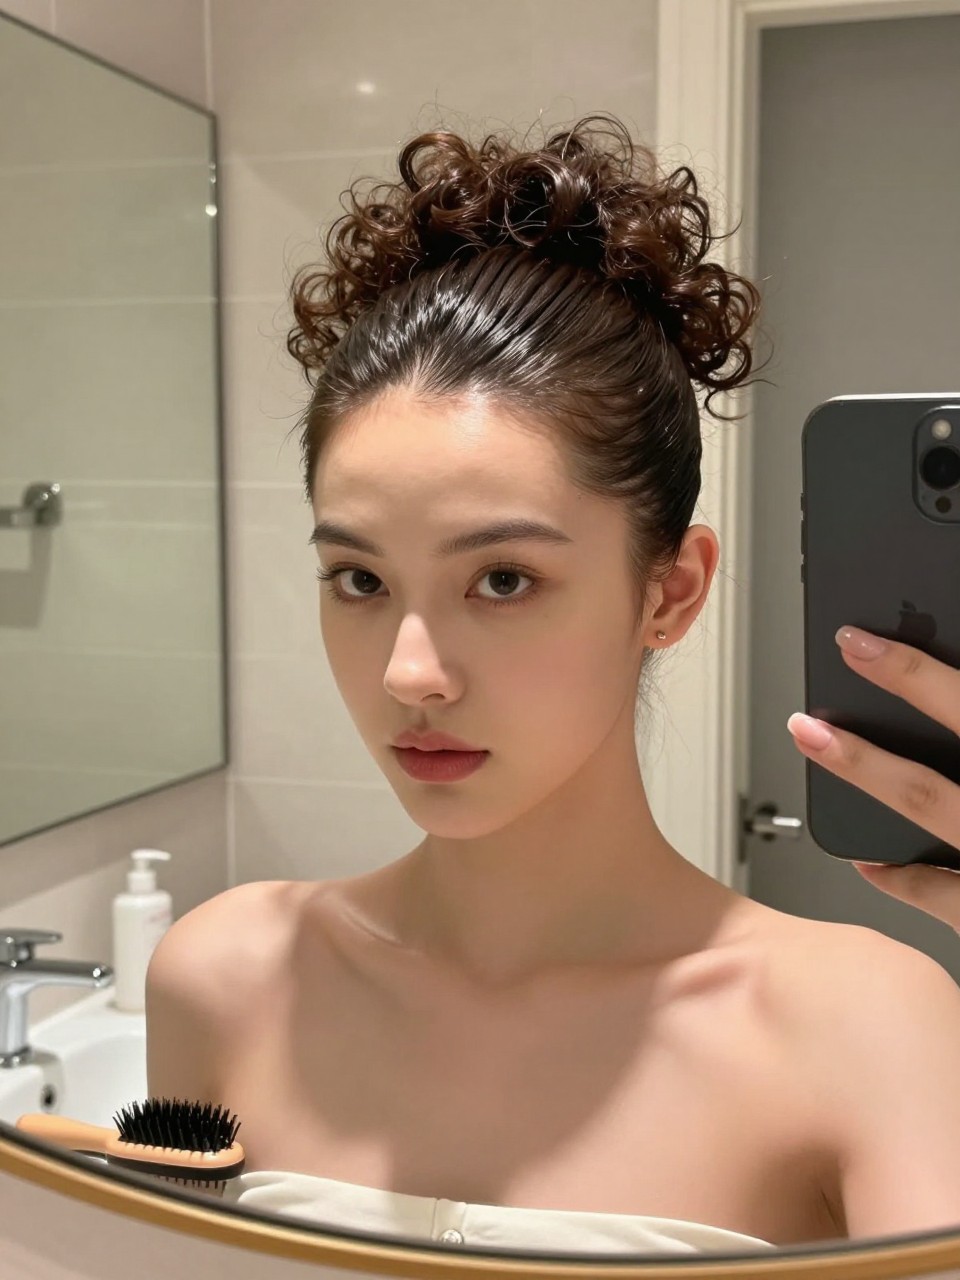
6. Curly Top Knot with Defined Edges
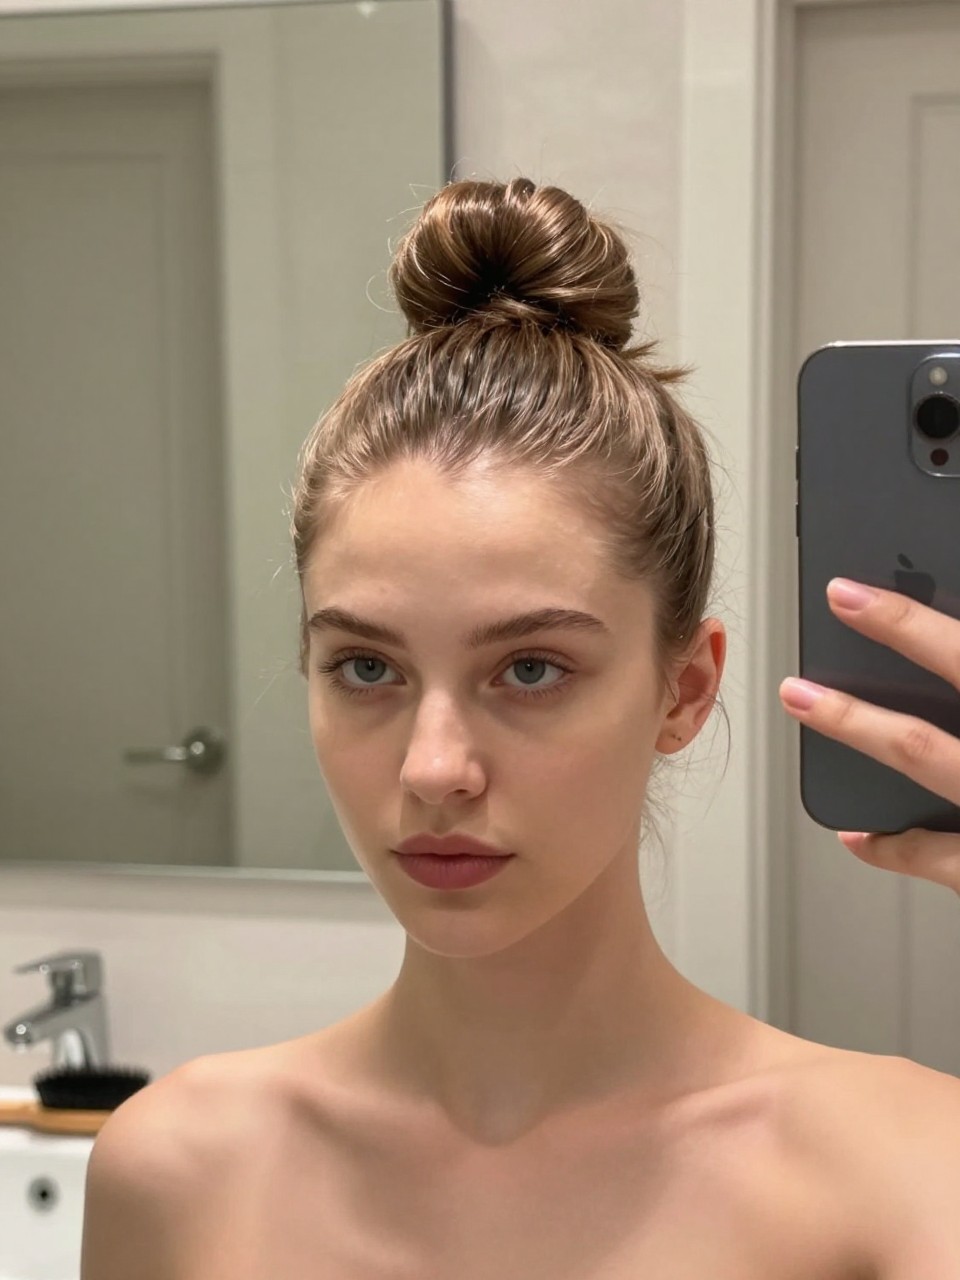
A top knot is a great option if you want something sleek and modern. On curly hair, it becomes a textured statement piece. The key is keeping the bun smooth and round while defining your edges for a polished finish.
What you need:
- Boar bristle brush (for smoothing edges)
- Edge control gel (extra strong hold)
- Large elastic (to hold the knot)
- Medium-hold hairspray (to keep everything in place)
How to style it:
- Step 1: Brush all hair up to the crown of your head and secure it into a very tight ponytail.
- Step 2: Twist the ponytail and wrap it around the base to form a ballerina-style bun, tucking the ends under.
- Step 3: Secure the bun with pins, making sure it’s smooth and round.
- Step 4: Use edge control and a brush to lay your edges down in your favorite pattern, then set with hairspray.
7. Braided Crown with Loose Curls
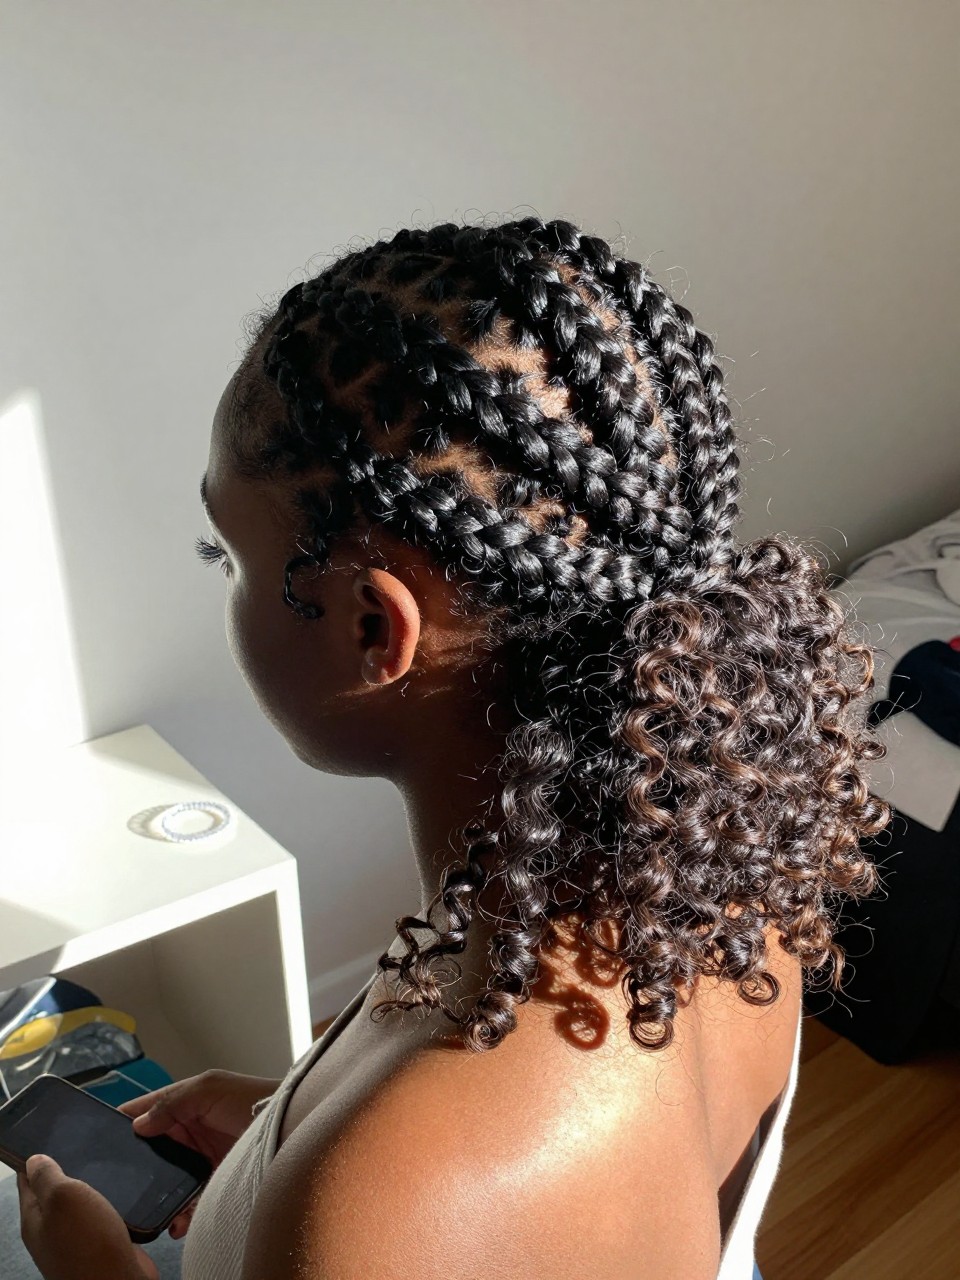
This style is perfect if you want a boho, ethereal vibe. Two Dutch or French braids are pinned across the top of the head like a crown, while the rest of your curls flow freely underneath. It’s intricate but surprisingly doable.
What you need:
- Rattail comb (for clean sections)
- Small clear elastics (to secure braids)
- Bobby pins (to pin the crown)
- Texture spray (to blend the braids with loose curls)
How to style it:
- Step 1: Part your hair down the middle and create two Dutch or French braids starting at the temples, braiding only the top section.
- Step 2: Secure each braid with a small elastic.
- Step 3: Bring one braid over the top of your head and pin it behind the opposite ear. Repeat with the other braid.
- Step 4: Fluff your loose curls and spray everything with texture spray to blend and hold.
8. Defined Curls with Crystal Pins
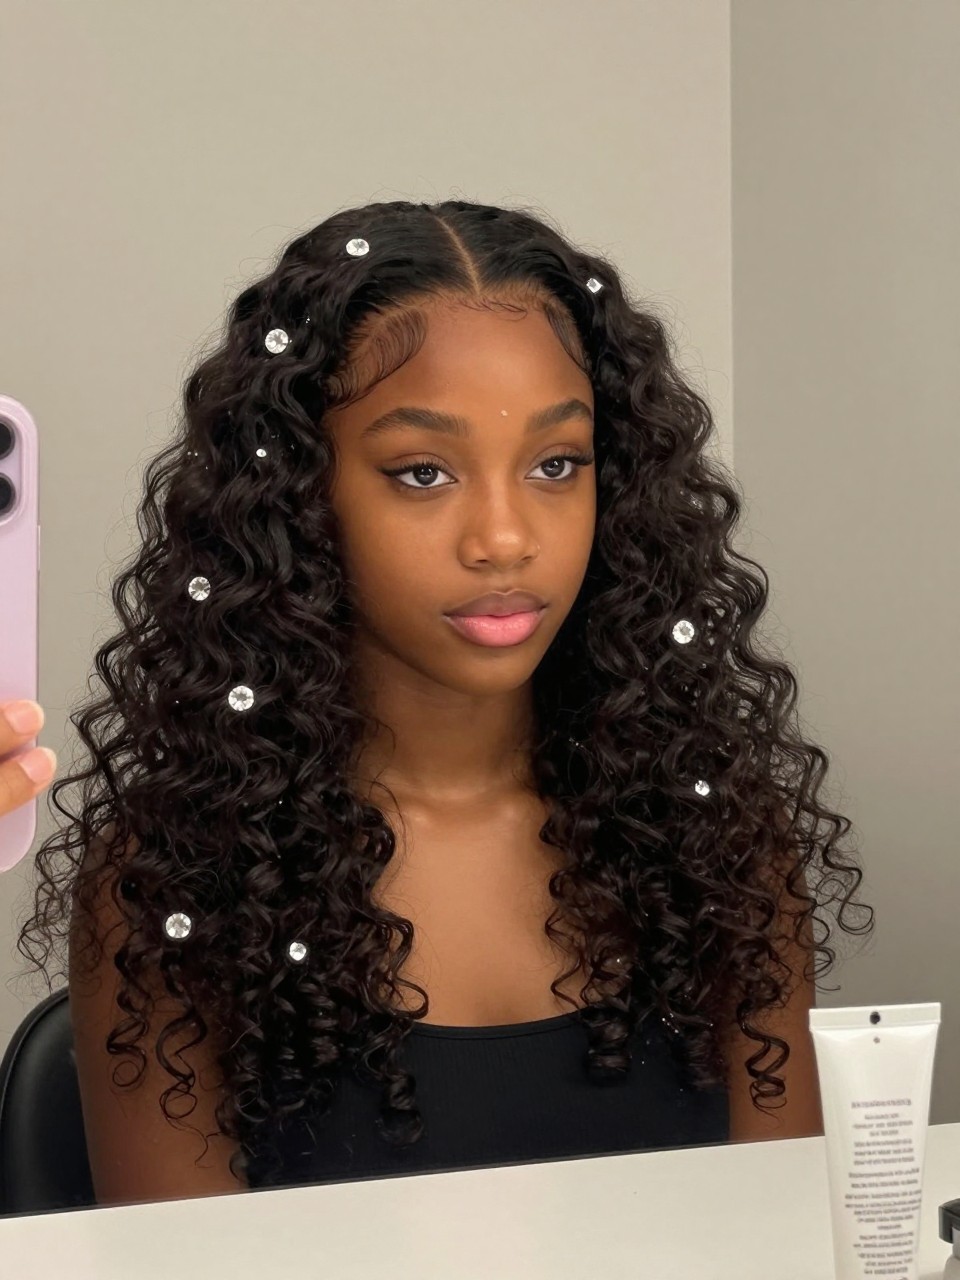
Sometimes the simplest idea is the best. Let your curls air-dry or diffuse them to perfection, then simply add a cluster of small crystal or pearl pins scattered throughout. It’s an easy way to elevate your everyday curl look into something formal.
What you need:
- Curl-defining cream (for maximum definition)
- Diffuser attachment (to dry without frizz)
- Crystal or pearl hair pins (scatter them randomly)
- Shine spray (for a glossy finish)
How to style it:
- Step 1: Apply curl cream to soaking wet hair and scrunch.
- Step 2: Diffuse until 80% dry or let air dry completely.
- Step 3: Once hair is fully dry and fluffed, start pinning crystal pins randomly throughout the curls—focus on one side or scatter them all over.
- Step 4: Finish with shine spray to make the crystals and your curls gleam.
9. Low Curly Pony with Wrapped Base
A low ponytail is a classic, but you can make it special by taking a small section of hair and wrapping it around the elastic to hide it. This little detail makes the style look intentional and polished.
What you need:
- Smoothing serum (to reduce frizz)
- Medium-hold elastic (to match your hair)
- Bobby pin (to secure the wrapped section)
- Hairspray (for hold)
How to style it:
- Step 1: Apply smoothing serum to your hair to control any frizz.
- Step 2: Gather hair at the nape of your neck and secure with an elastic.
- Step 3: Take a small strand from underneath the ponytail, wrap it around the base to cover the elastic, and pin the end underneath with a bobby pin.
- Step 4: Spray the wrapped section lightly with hairspray to keep it neat.
10. Curly Mohawk Updo
This edgy style involves pinning back the sides of your hair, leaving a strip of volume down the center. It’s bold, modern, and shows off your curl pattern in a structural way that’s perfect for a fashion-forward prom look.
What you need:
- Strong-hold gel (to slick the sides)
- Rattail comb (for precise sections)
- Lots of bobby pins (to secure the sides)
- Volumizing powder or spray (for the center strip)
How to style it:
- Step 1: Section off a strip of hair from your forehead to your nape—this is the “mohawk” section. Clip the rest away.
- Step 2: Apply strong-hold gel to the side sections and smooth them back tightly, pinning them flat against your head.
- Step 3: Release the center strip and apply volumizing powder at the roots for lift.
- Step 4: Arrange the center curls to stand up or fall back dramatically, then set with hairspray.
11. Romantic Curly Chignon
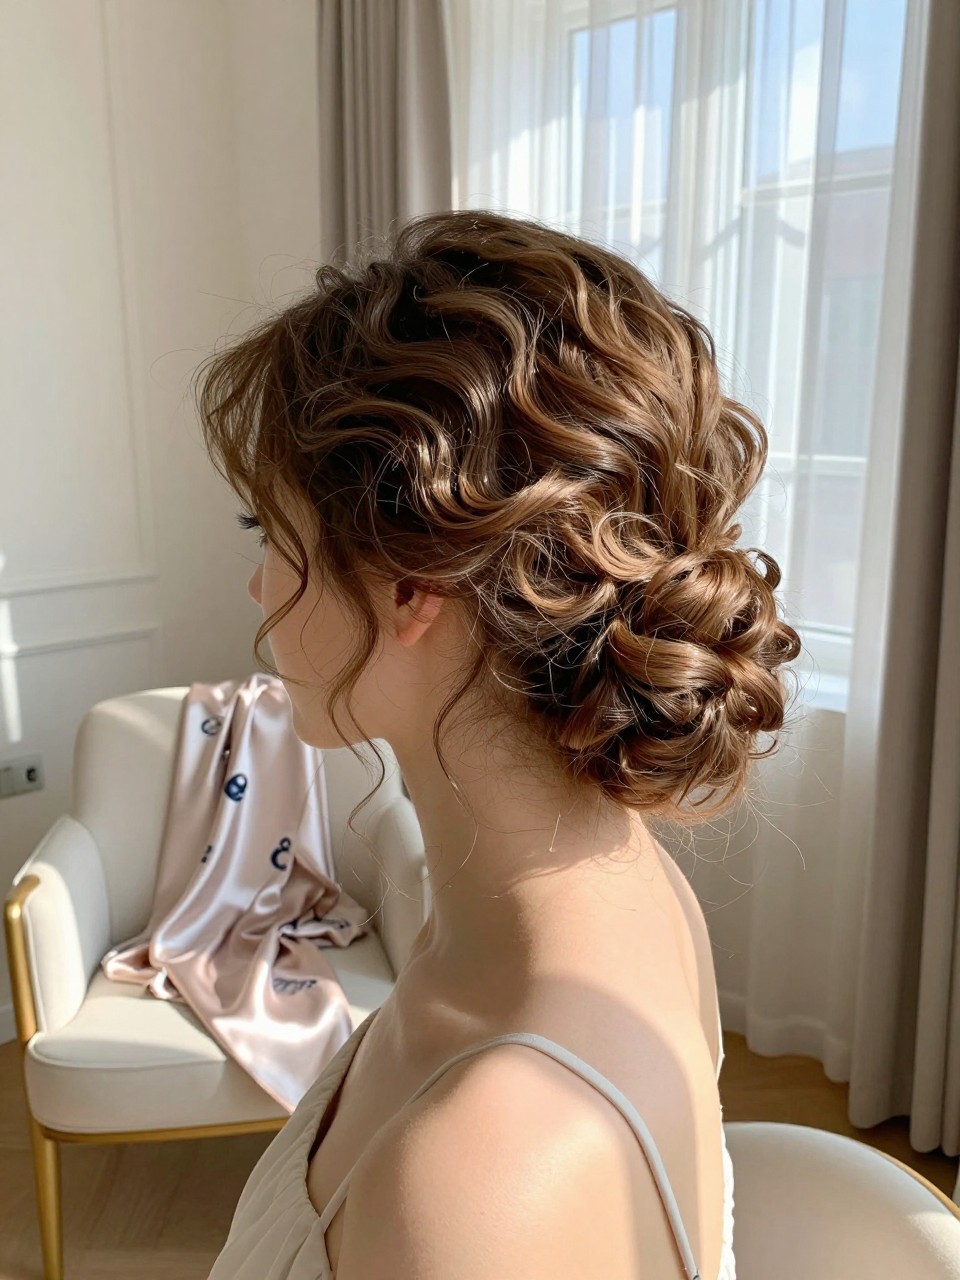
A chignon is a classic, elegant updo that sits low at the nape. On curly hair, it has a softer, more romantic feel than a sleek, straight version. It looks intricate but is essentially just a low bun with loops and texture.
What you need:
- U-shaped pins (for secure hold)
- Light-hold mousse (for texture)
- Satin scarf (to wrap while setting, optional)
- Finishing spray (to tame flyaways)
How to style it:
- Step 1: Apply mousse to damp hair and let it dry completely for texture.
- Step 2: Gather hair at the nape loosely and start forming loops and coils, pinning them as you go to create a soft, gathered shape.
- Step 3: Don’t try to make it perfect—the loops should look organic and curly.
- Step 4: Tuck in any loose ends with pins and mist lightly with finishing spray.
12. Curly Half-Up Bubble Ponytail
This is a fun, playful take on the half-up style. Instead of just pulling back the top, you create a “bubble” effect by adding multiple elastics down the length of the ponytail and gently pulling each section for a rounded shape.
What you need:
- Small clear elastics (several of them)
- Rat-tail comb (to gently puff the bubbles)
- Edge control (for the hairline)
- Light-hold hairspray (to keep the shape)
How to style it:
- Step 1: Section off the top half of your hair and secure it into a high ponytail at the crown.
- Step 2: Add another clear elastic an inch or two down the ponytail. Gently pull the hair between the elastics to create a rounded “bubble.”
- Step 3: Repeat adding elastics and creating bubbles all the way down the length of the ponytail.
- Step 4: Smooth your edges with control and lightly spray the bubbles to hold their shape.
13. Fluffy Faux Hawk
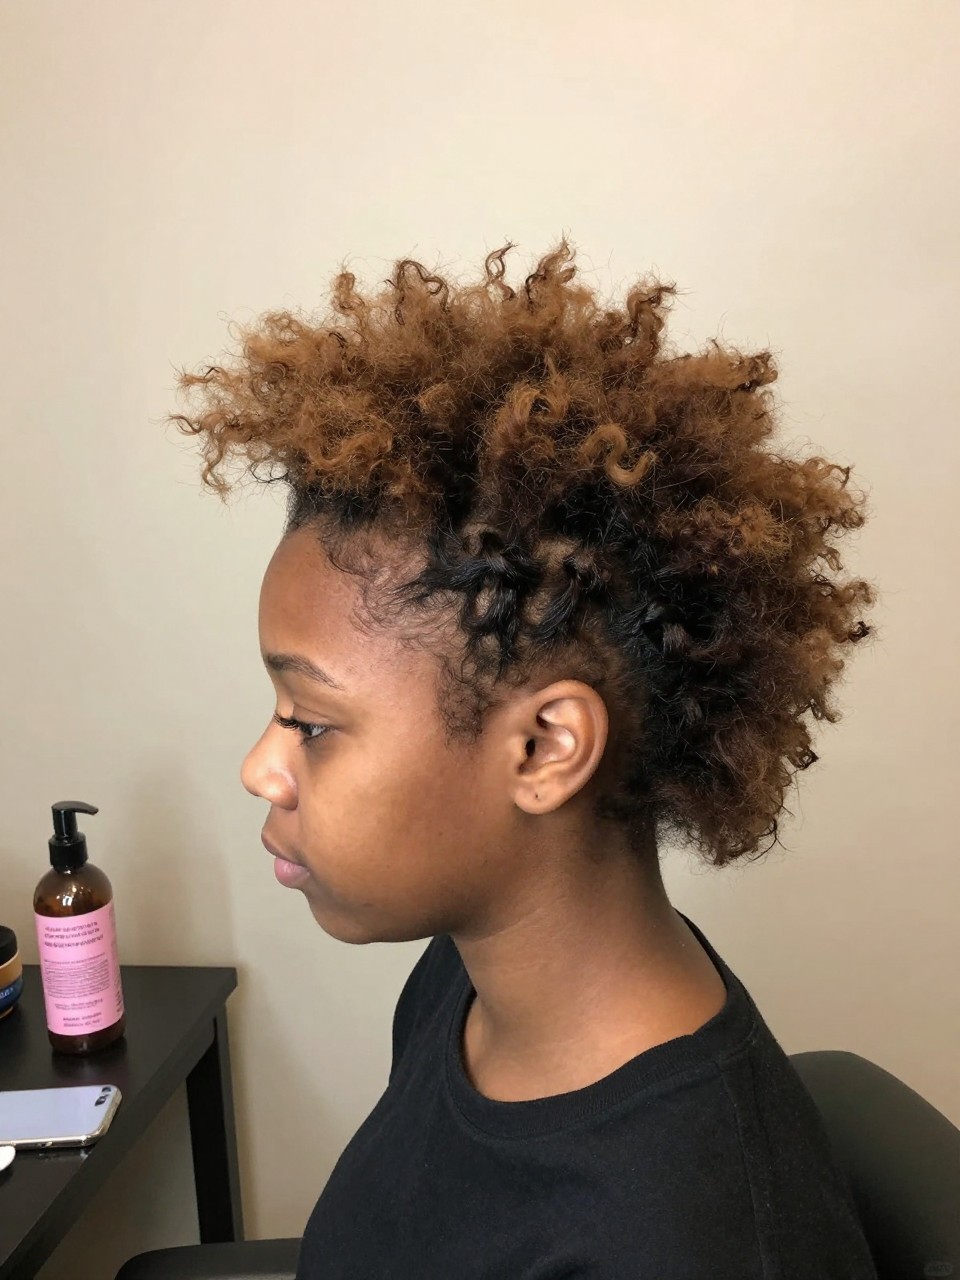
Similar to the mohawk, but softer. Instead of slicking the sides down flat, you simply pull them back and pin them, allowing them to still have some volume. This creates a look that’s edgy but still very curly and soft.
What you need:
- Curl refresher spray (to revive the sides)
- Bobby pins (to secure the sides)
- Volumizing powder (for the center)
- Strong-hold hairspray (to keep the shape)
How to style it:
- Step 1: Refresh your curls all over with a refresher spray.
- Step 2: Take sections from each side, twist them lightly, and pin them back towards the crown—don’t flatten them completely.
- Step 3: Apply volumizing powder to the roots of the center section and fluff for maximum height.
- Step 4: Arrange the pinned sides to blend with the center and lock everything in with hairspray.
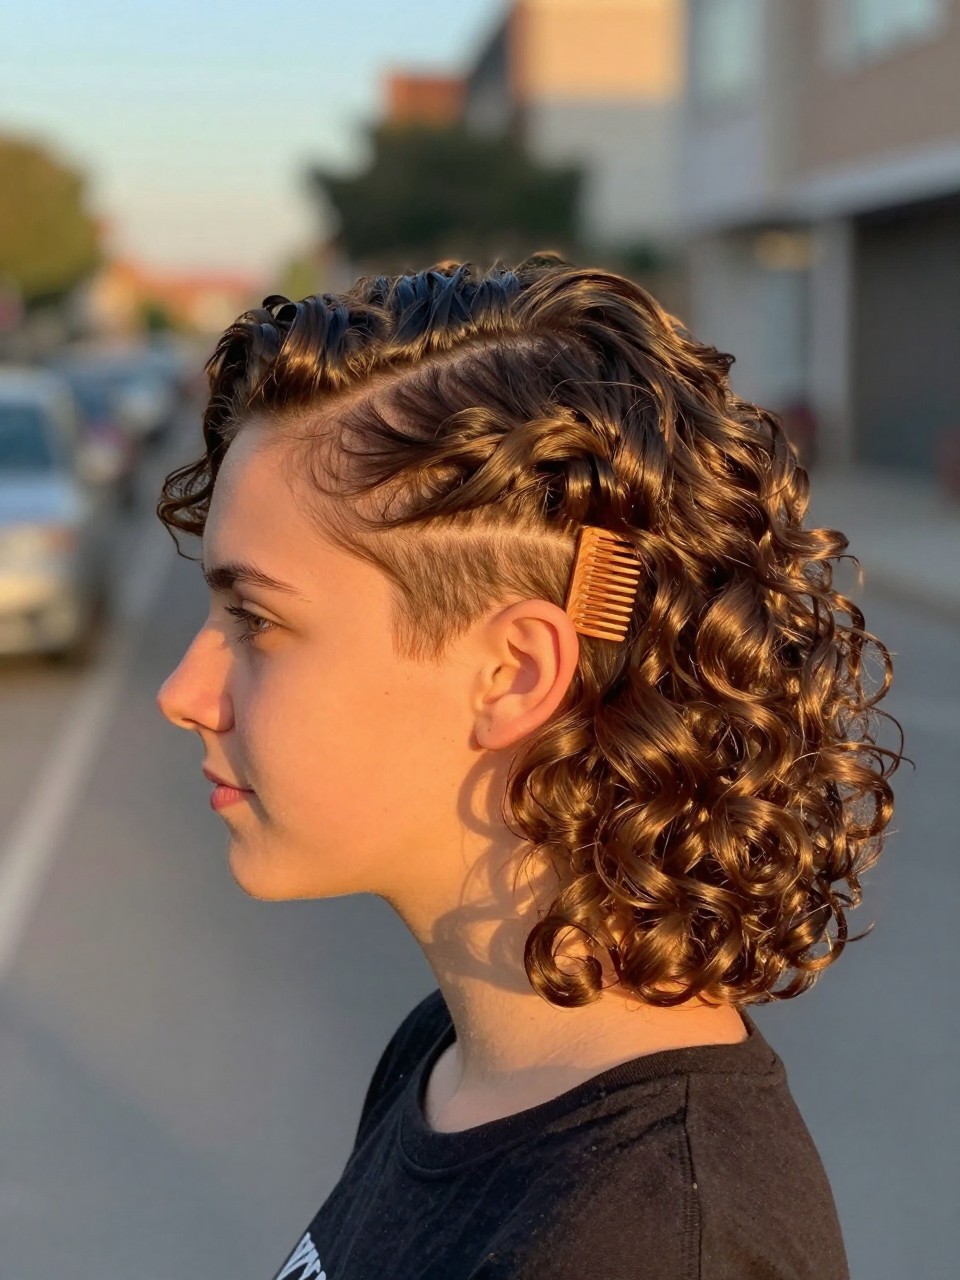
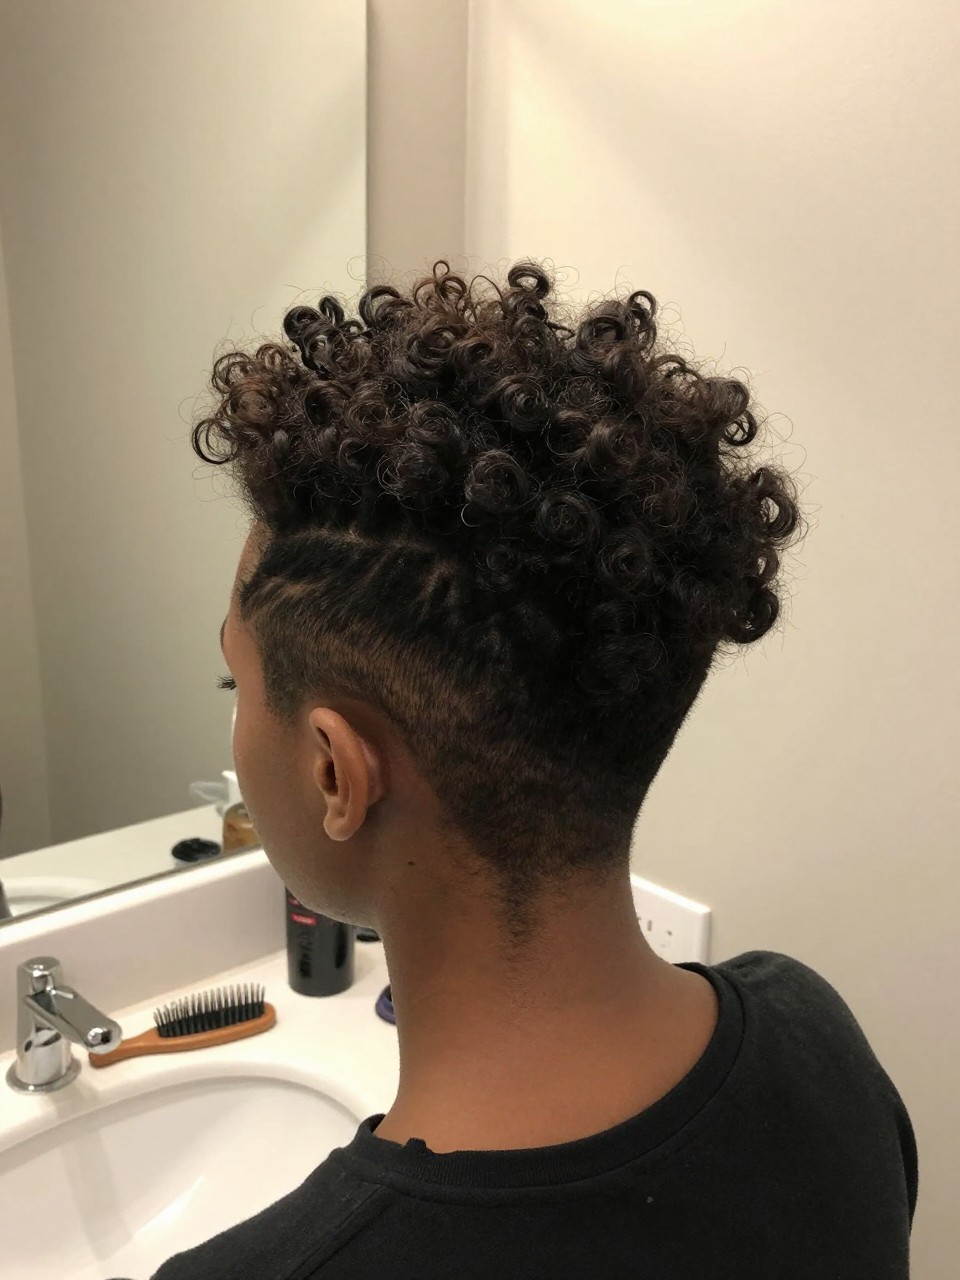
14. Sleek Sides with Curly Top
This is a great contrast style. You slick back the sides and front of your hair (like a sleek ponytail without the ponytail), but leave the top and back in their full, curly state. It’s modern, clean, and highlights your texture.
What you need:
- Strong-hold gel (for sleekness)
- Edge control brush (for a smooth finish)
- Hair clips (to hold sections while they dry)
- Shine spray (for a glass-like finish on the sleek parts)
How to style it:
- Step 1: Apply strong-hold gel generously to the hair around your hairline and the sides.
- Step 2: Use an edge control brush to smooth this hair back tightly away from your face.
- Step 3: Use clips to hold these sleek sections flat against your head while they dry.
- Step 4: Once dry, remove clips, arrange the curly top/back, and spray the sleek parts with shine spray.
15. Vintage Curly Finger Wave Updo
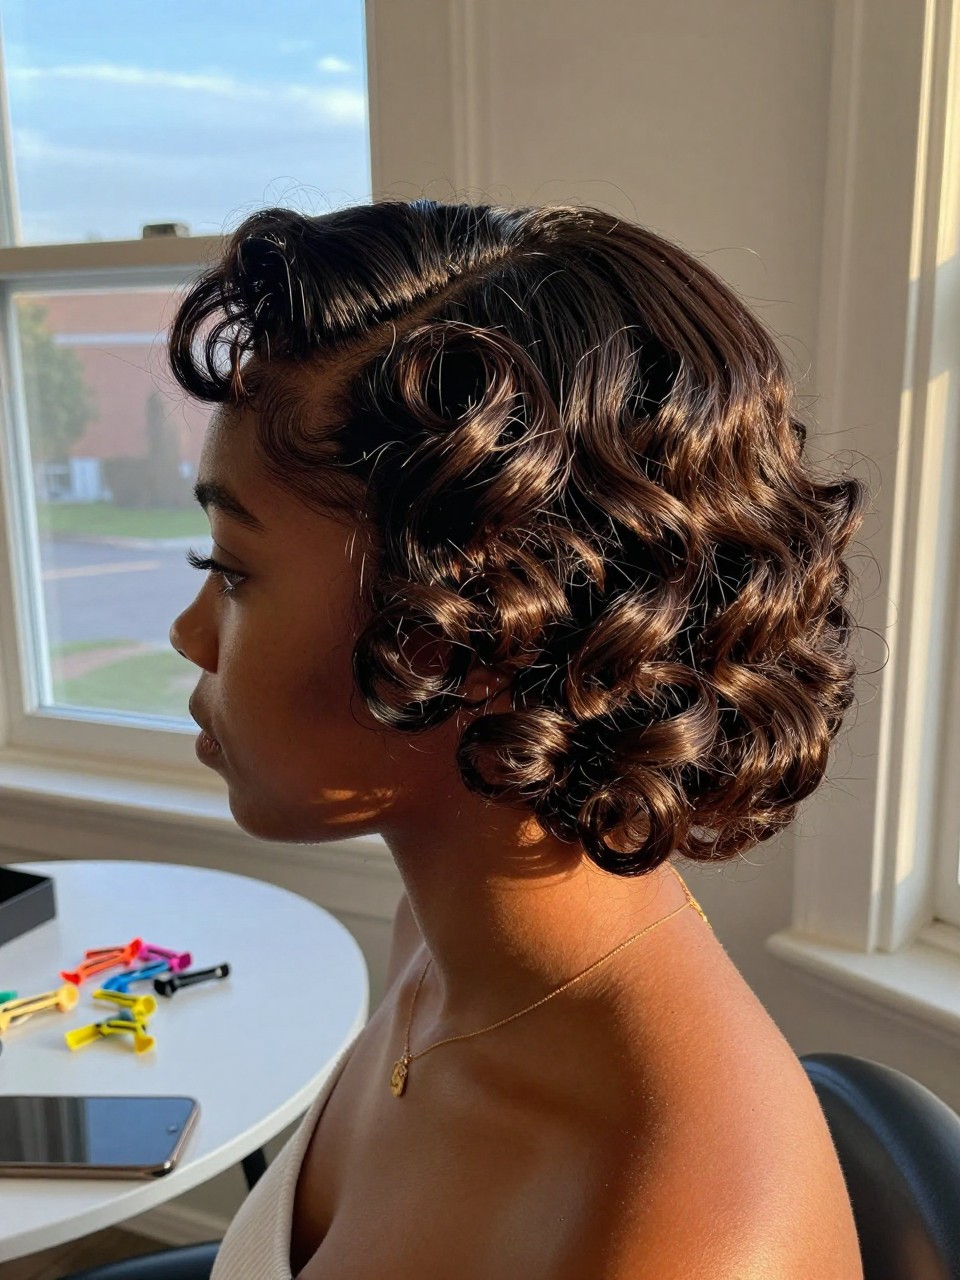
This is for the glamour lover. Finger waves aren’t just for straight hair—you can create soft, vintage-inspired waves on curly hair by setting defined sections against the head. It’s a statement piece.
What you need:
- Strong-hold setting lotion or gel (to mold the waves)
- Finger wave clips (to hold the shape)
- Rattail comb (to create the wave pattern)
- Hairspray (to set)
How to style it:
- Step 1: Apply setting lotion to damp hair. Use a rattail comb to create an S-shaped wave pattern close to your scalp on one side.
- Step 2: Use finger wave clips to hold each wave in place against the head.
- Step 3: Let the waves dry completely (this may take a while or you can use a hooded dryer).
- Step 4: Once dry, remove clips and gently arrange the rest of your hair into a low updo, leaving the vintage waves visible.
16. High Curly Pony with Face-Framing Tendrils
A high ponytail is always a winner. On curly hair, it’s full of life and bounce. The key to making it romantic is leaving out a few tendrils around the face to soften the look.
What you need:
- Strong elastic (to hold the height)
- Curl-defining cream (for the tendrils)
- Bobby pins (to secure any bulk)
- Shine serum (for the ends)
How to style it:
- Step 1: Flip your head upside down and gather all hair at the very top of your head, securing tightly.
- Step 2: Leave out a few small sections of hair around your face (temples, ears, nape).
- Step 3: Apply curl-defining cream to the tendrils and twist them around your finger to define them.
- Step 4: Smooth the ponytail with a little serum on the ends and let the tendrils frame your face naturally.
17. Twisted Halo Updo
This style involves taking two large sections from the front, twisting them, and pinning them around the back of your head like a halo. The rest of your curls can be left down or pinned into a low bun.
What you need:
- Rattail comb (for clean sections)
- Bobby pins (to secure the twists)
- Light-hold hairspray (to keep twists in place)
- Decorative flowers or pins (optional, to tuck into the twists)
How to style it:
- Step 1: Part your hair down the middle or slightly off-center.
- Step 2: Take a large section from the front on one side, twist it loosely away from your face, and pin it at the back of your head.
- Step 3: Repeat on the other side, crossing the twist over the first one or meeting it to form a continuous halo.
- Step 4: Tuck any flowers or decorative pins into the twists and spray lightly for hold.
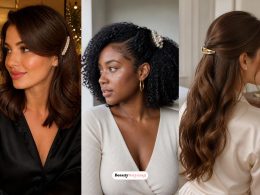
18. Big Volume Curls with Sparkly Headband
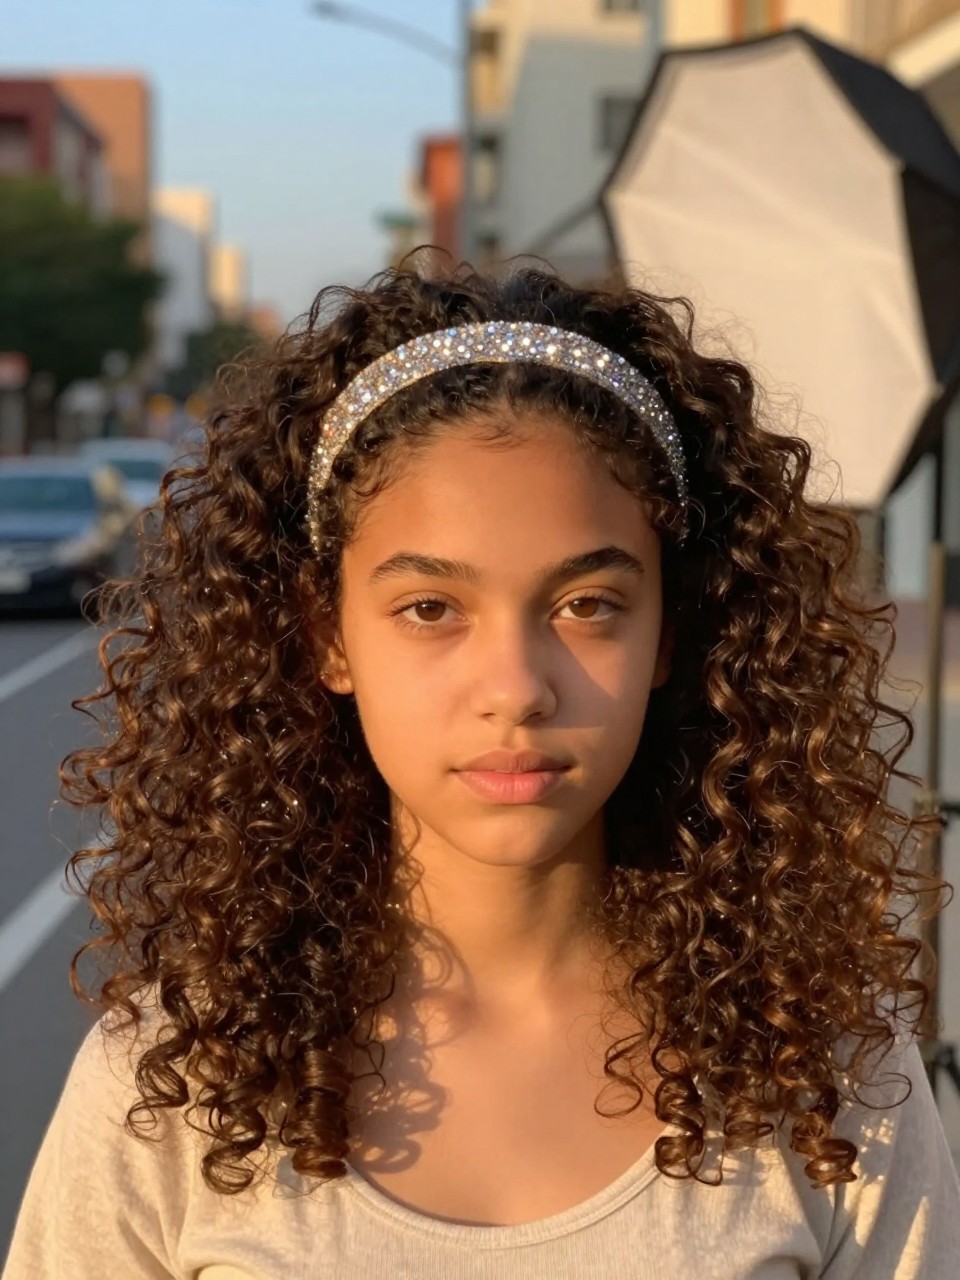
Sometimes you just want to let your hair down and be big. This style is all about maximum volume and definition. Add a sparkly headband to instantly dress it up and you’re ready to go.
What you need:
- Volumizing mousse (applied at the roots)
- Diffuser (to dry with volume)
- Curl refresher (to perfect the pattern)
- Sparkly headband (to add the glam)
How to style it:
- Step 1: Apply mousse to damp hair, focusing on the roots for lift.
- Step 2: Diffuse your hair upside down and side to side for maximum volume.
- Step 3: Once dry and cool, use a curl refresher on any sections that need more definition.
- Step 4: Place the sparkly headband over your hair, pushing it back slightly to create even more volume at the crown.