

Table of Contents Show
Let’s be real. Some days, washing and diffusing feels like a full workout, and the last thing you want to do is spend more time on your hair. You just want it to look presentable without a ton of effort. I’ve had plenty of those mornings where I stare at my reflection and need a solution that takes five minutes or less.

This list is for those exact days. These styles work with bedhead, second-day hair, or even hair that desperately needs a wash.
They’re simple, forgiving, and actually look like you tried—even when you really, really didn’t.
1. The Elevated Claw Clip

This is the ultimate lazy-girl move. It takes three seconds but looks polished because your curls add instant interest and texture.
How to style it:
- Step 1: Gather your hair loosely at the back as if making a low ponytail, but don’t pull it all the way through.
- Step 2: Twist the gathered section once and lift it upward.
- Step 3: Clip a large claw clip vertically over the twisted section, catching all the hair.
- Step 4: Let the ends fall naturally over the clip and pull a few pieces out near your ears.
2. The Quick Pineapple Refresh

You woke up with flattened curls on one side and chaos on the other. This fixes everything in one move.
How to style it:
- Step 1: Flip your head upside down and gently shake your roots with your fingertips.
- Step 2: Gather all hair to the very top of your head like a unicorn’s horn.
- Step 3: Secure with a large soft scrunchie, making sure it’s snug but not tight.
- Step 4: Mist with water or a refresher spray and let the curls plump up as they air dry.
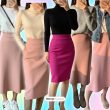
3. The Side-Swept Solution

When your hair is greasy on top, but the ends still look good, just move everything to one side. It hides the roots and looks effortlessly chic.
How to style it:
- Step 1: Use your fingers to push all your hair to one side, creating a deep side part.
- Step 2: Tuck the hair behind your ear on the heavier side.
- Step 3: On the lighter side, smooth down any flyaways with a dab of water or leave-in conditioner.
- Step 4: Fluff the ends on the shoulder side and go.
4. The Half-Up Scrunchie

This is the lazy version of a half-up style. No pins, no twists—just a scrunchie and two seconds of your time.
How to style it:
- Step 1: Take a 2-inch section from each temple and bring them to the back.
- Step 2: Hold them together like a ponytail at the back of your head.
- Step 3: Secure with a colorful or velvet scrunchie, leaving the ends loose.
- Step 4: Gently tug at the front sections to create a little volume at the crown.
5. The Low Messy Knot

This is the hair equivalent of sweatpants—comfortable, easy, and acceptable in public. It works best on second or third-day hair.
How to style it:
- Step 1: Gather hair at your nape as if making a low ponytail.
- Step 2: Twist the ponytail loosely until it starts to coil around itself.
- Step 3: Wrap the twisted length around the base to form a knot, tucking the ends underneath.
- Step 4: Secure with two bobby pins crossed over each other and let a few pieces fall naturally.
6. The Bedhead Tousle

Some days, you just have to lean into the chaos. This style embraces your hair exactly as it is with minimal interference.
How to style it:
- Step 1: Mist your entire head with a mix of water and leave-in conditioner until slightly damp.
- Step 2: Flip your head upside down and scrunch vigorously with your hands for 30 seconds.
- Step 3: Flip back and arrange your part however it falls naturally.
- Step 4: Apply a tiny drop of oil to your palms and smooth over the surface for shine.
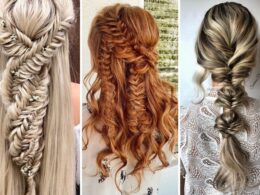
7. The Single Braid

One braid is faster than two, and it keeps your hair contained while creating heatless waves for tomorrow.
How to style it:
- Step 1: Brush or finger-comb your hair to the back, removing major tangles.
- Step 2: Start at the nape of your neck and create a simple three-strand braid all the way down.
- Step 3: Secure the end with a soft elastic, avoiding metal bands that snag.
- Step 4: Gently pull the edges of the braid to make it thicker and messier.
8. The Accessory Fix

When your hair is having a bad day, let an accessory do the heavy lifting. A headband or scarf distracts from everything.
How to style it:
- Step 1: Choose a wide fabric headband or fold a silk scarf into a strip.
- Step 2: Place it behind your ears and push it forward to your hairline.
- Step 3: Tuck any stray curls behind the band or let them frame your face.
- Step 4: Fluff the hair at the crown over the band for volume.
9. The Top Knot with Tendrils

This is the gym class hero of lazy hairstyles. It gets everything off your neck but looks intentionally undone.
How to style it:
- Step 1: Flip your head upside down and gather all hair at your crown.
- Step 2: Twist the hair and wrap it into a bun, but don’t worry about perfection.
- Step 3: Secure with a large scrunchie or spiral pins, leaving the ends sticking out.
- Step 4: Pull out wispy pieces around your face and ears to soften the look.
10. The Low Pony with a Scarf

A low ponytail is basic. A low ponytail with a scarf tied around it feels like you put thought into your outfit.
How to style it:
- Step 1: Gather your hair at the nape and secure with a clear elastic.
- Step 2: Take a thin silk scarf and tie it around the base of the ponytail, hiding the elastic.
- Step 3: Let the scarf ends hang down with your curls or tie them in a small bow.
- Step 4: Loosen the ponytail by gently pulling at the crown.
11. The Pulled-Back Half-Up
This is even lazier than a regular half-up because you don’t even secure it. You just pull it back and let it sit.
How to style it:
- Step 1: Take the two front sections and pull them straight back.
- Step 2: Hold them together at the back of your head with one hand.
- Step 3: Use the weight of your hair to hold them in place—no pin or elastic needed if your hair has grip.
- Step 4: If they fall, secure with a small bobby pin hidden underneath.
12. The Tucked-Behind-Ears Look

Sometimes the larest hairstyle is simply moving your hair out of the way. This works surprisingly well for heart-shaped or oval faces.
How to style it:
- Step 1: Tuck the hair on both sides behind your ears.
- Step 2: If it falls forward, use a tiny bobby pin behind each ear to hold it.
- Step 3: Smooth down the top with your palms if there’s frizz.
- Step 4: Let the back remain exactly as it is, curly and free.
13. The Bandana Push-Back

This takes two seconds and hides dirty roots while adding a retro vibe. It’s the ultimate lazy accessory hack.
How to style it:
- Step 1: Fold a bandana into a triangle, then keep folding until it’s a thick headband.
- Step 2: Place it at your hairline and tie at the nape of your neck.
- Step 3: Push the front slightly forward to create a little puff of curls at the forehead.
- Step 4: Adjust so all your roots are covered and curls spill out the back.
14. The Flipped Part

When your hair feels flat, just flip your part to the opposite side. It creates instant volume with zero products.
How to style it:
- Step 1: Use your fingers to push all your hair to the opposite side of your usual part.
- Step 2: Let it settle naturally for a minute to find its new shape.
- Step 3: Fluff the roots at the crown with your fingertips.
- Step 4: If one side keeps falling, use a single bobby pin behind your ear to hold it.
15. The Messy Pineapple Sleep-In

This is for when you’re truly lazy—you just don’t take your hair down from last night. With minor adjustments, it becomes a day look.
How to style it:
- Step 1: Wake up and assess your sleeping pineapple without removing the scrunchie.
- Step 2: Mist the ends with water and scrunch gently while still in the pineapple.
- Step 3: Take the scrunchie out, flip your head, and shake vigorously.
- Step 4: Flip back and arrange without brushing or combing.