
Table of Contents Show
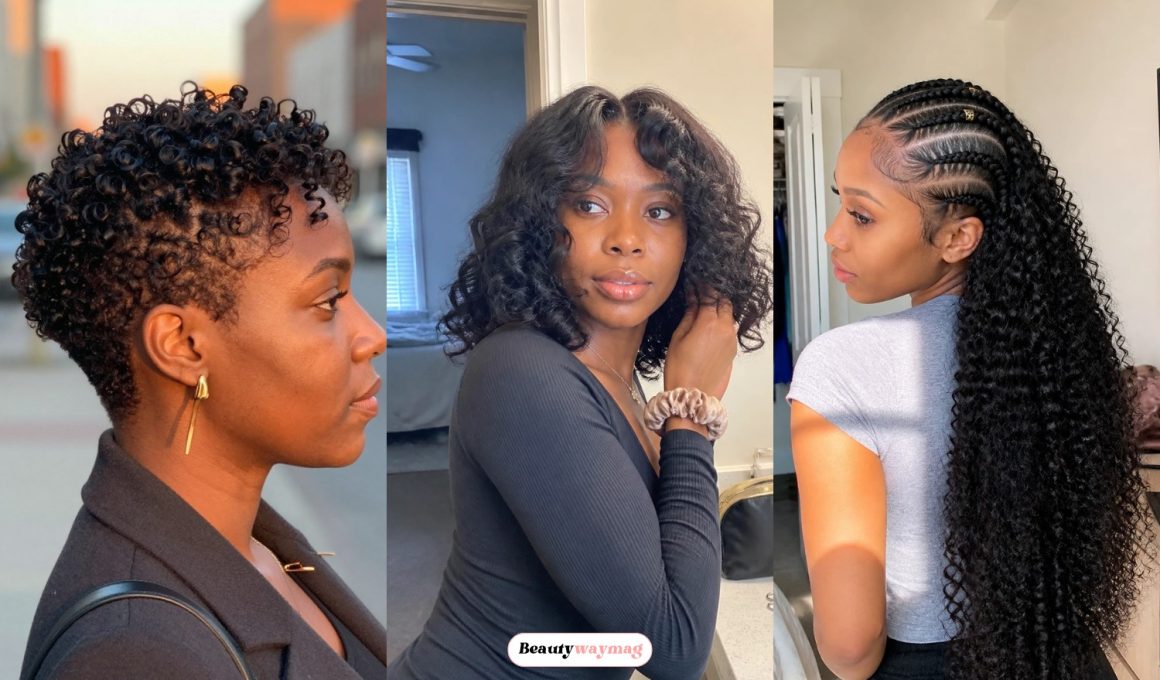
A curly sew-in can give you fullness, length, and a fresh new shape while keeping your natural hair tucked away underneath. The best styles should look soft, blend well around the hairline, and feel easy enough to maintain between salon visits.
These lovely curly sew-in hairstyles include polished bobs, layered lengths, half-up looks, and elegant styles you can wear for work, dates, weekends, or special occasions.
1. Shoulder-Length Layered Curly Sew-In
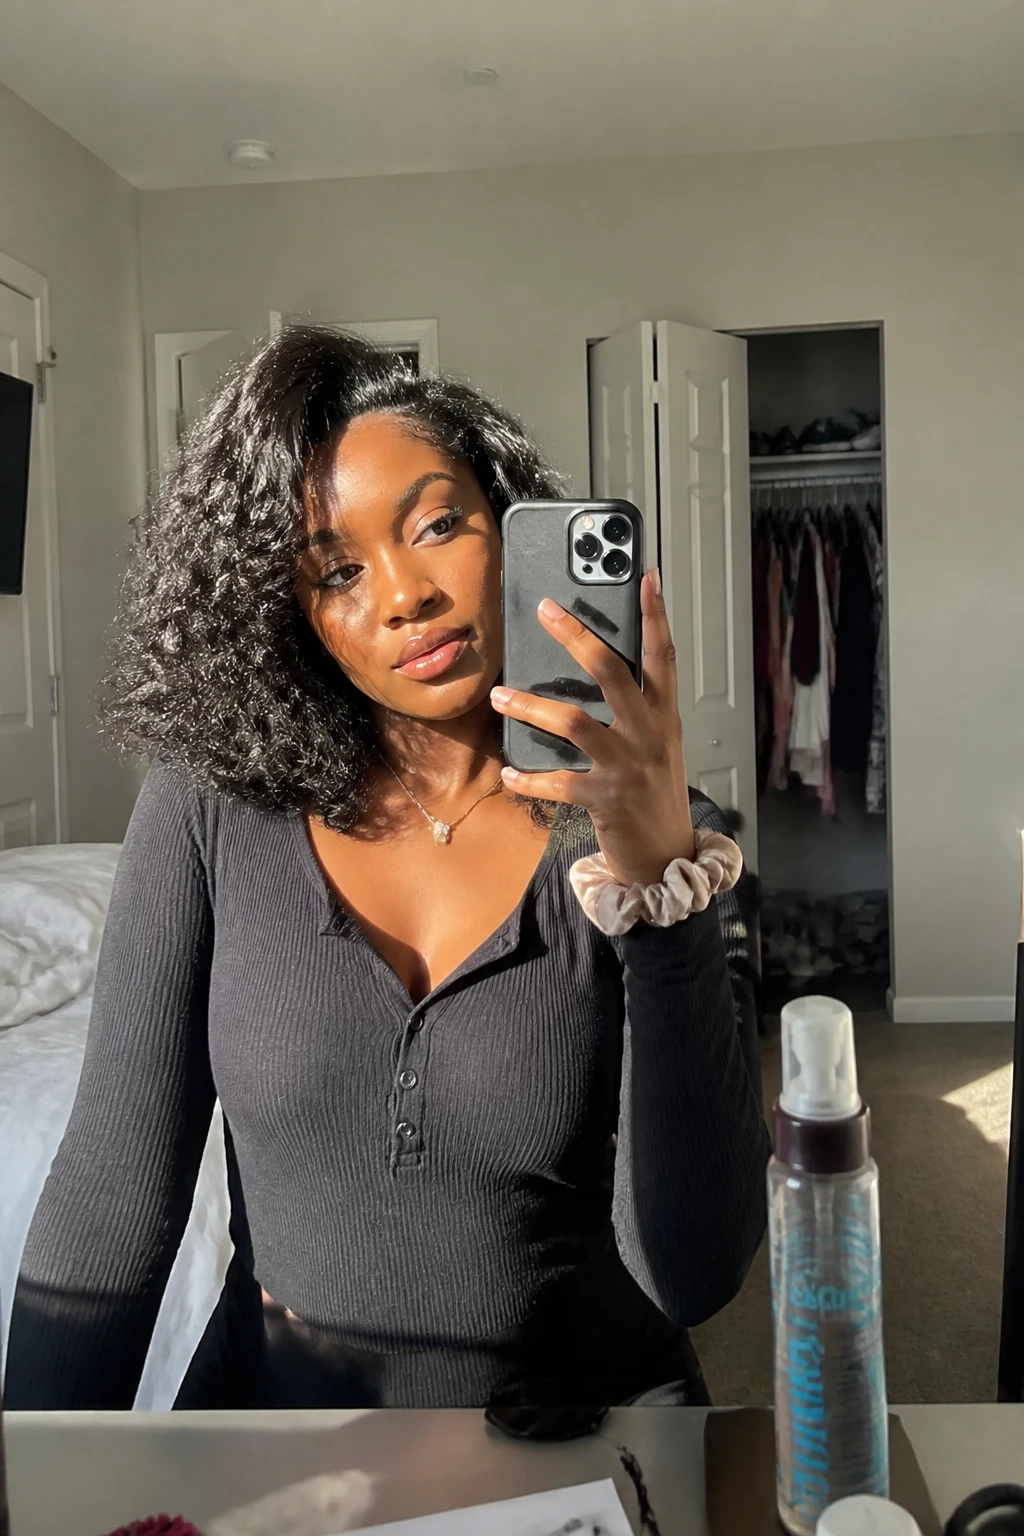
This shoulder-length sew-in has soft layers that help the curls sit evenly around the face and shoulders. It is a good choice for women who want fullness without the weight of very long extensions. The manageable length makes it practical for work, brunch, errands, and everyday wear.
How to style it
- Separate the curls gently with your fingers and decide where you want the part to sit.
- Apply a small amount of mousse from the middle lengths to the ends.
- Shape the front curls around the cheeks and lift the roots lightly for volume.
- Let the hair air-dry or diffuse on low heat before separating any larger curl clumps.
Quick tip
Avoid brushing through the curls when dry, as this can make the sew-in frizz faster.
2. Deep Side-Part Water Wave Sew-In
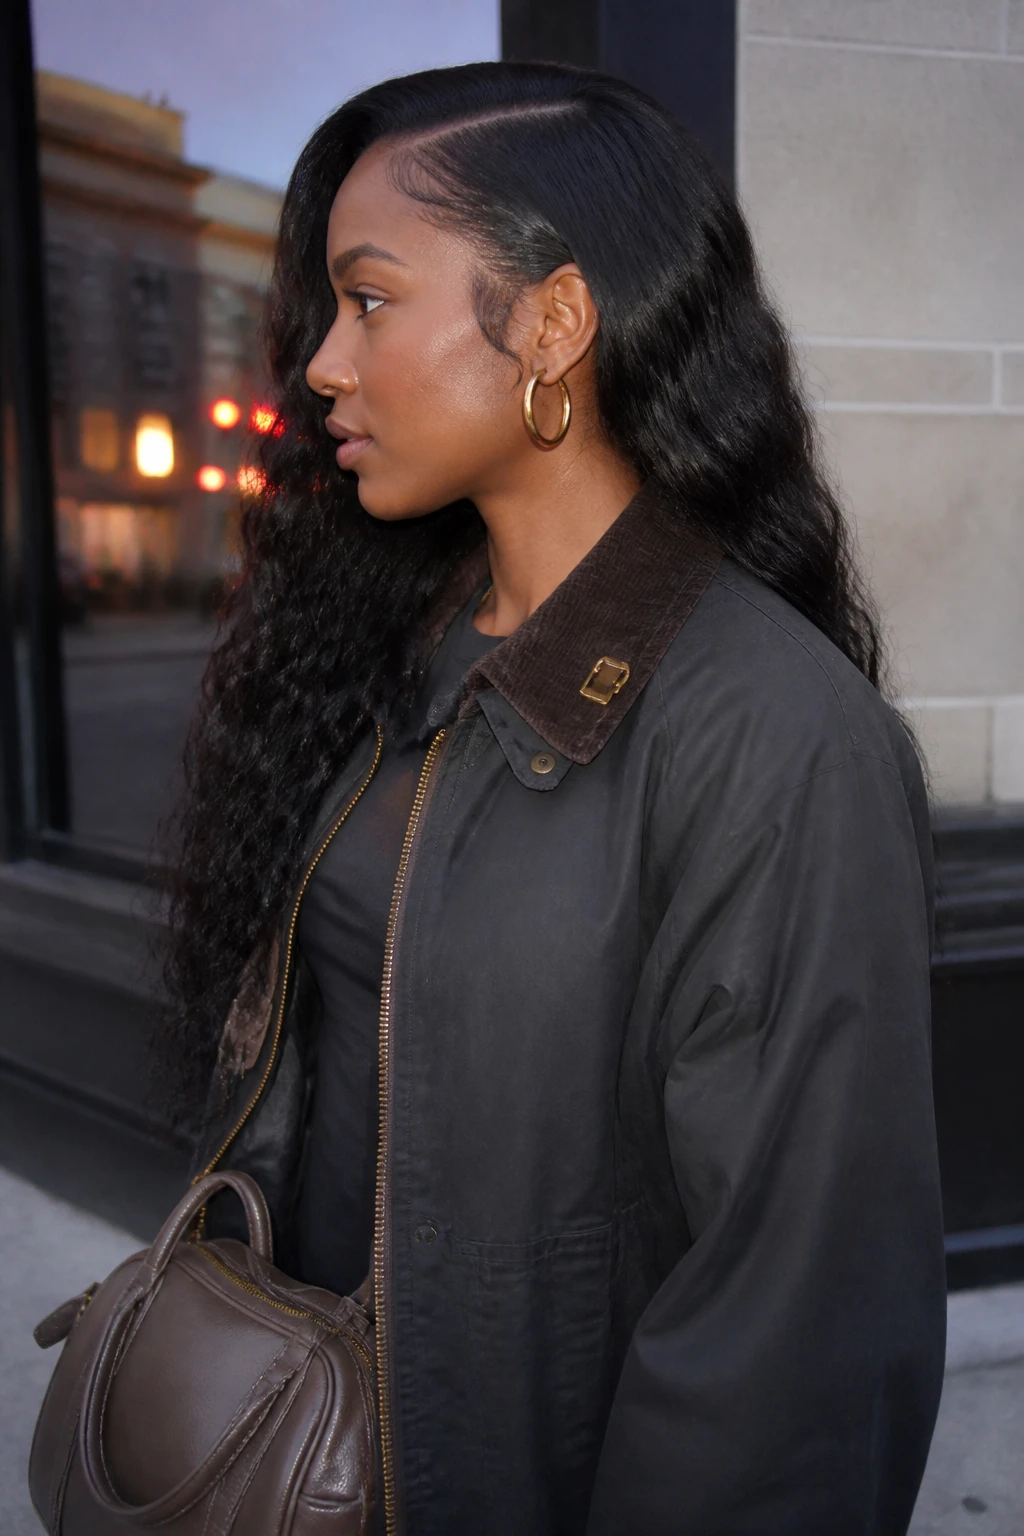
This deep side-part style gives loose water wave hair a soft, glamorous shape with plenty of movement. It works especially well for women who want length without choosing a tighter curl pattern. The look feels polished for dinners, dates, birthdays, weddings, and evening plans.
How to style it
- Create a deep side part and direct most of the hair toward the fuller side.
- Mist the curls lightly with water and apply a small amount of mousse.
- Tuck the lighter side behind the ear and secure it discreetly if needed.
- Separate only a few curl sections and let the fuller side fall over one shoulder.
Quick tip
Use very little product near the roots so the side part stays light and natural-looking.
3. Chin-Length Curly Sew-In Bob
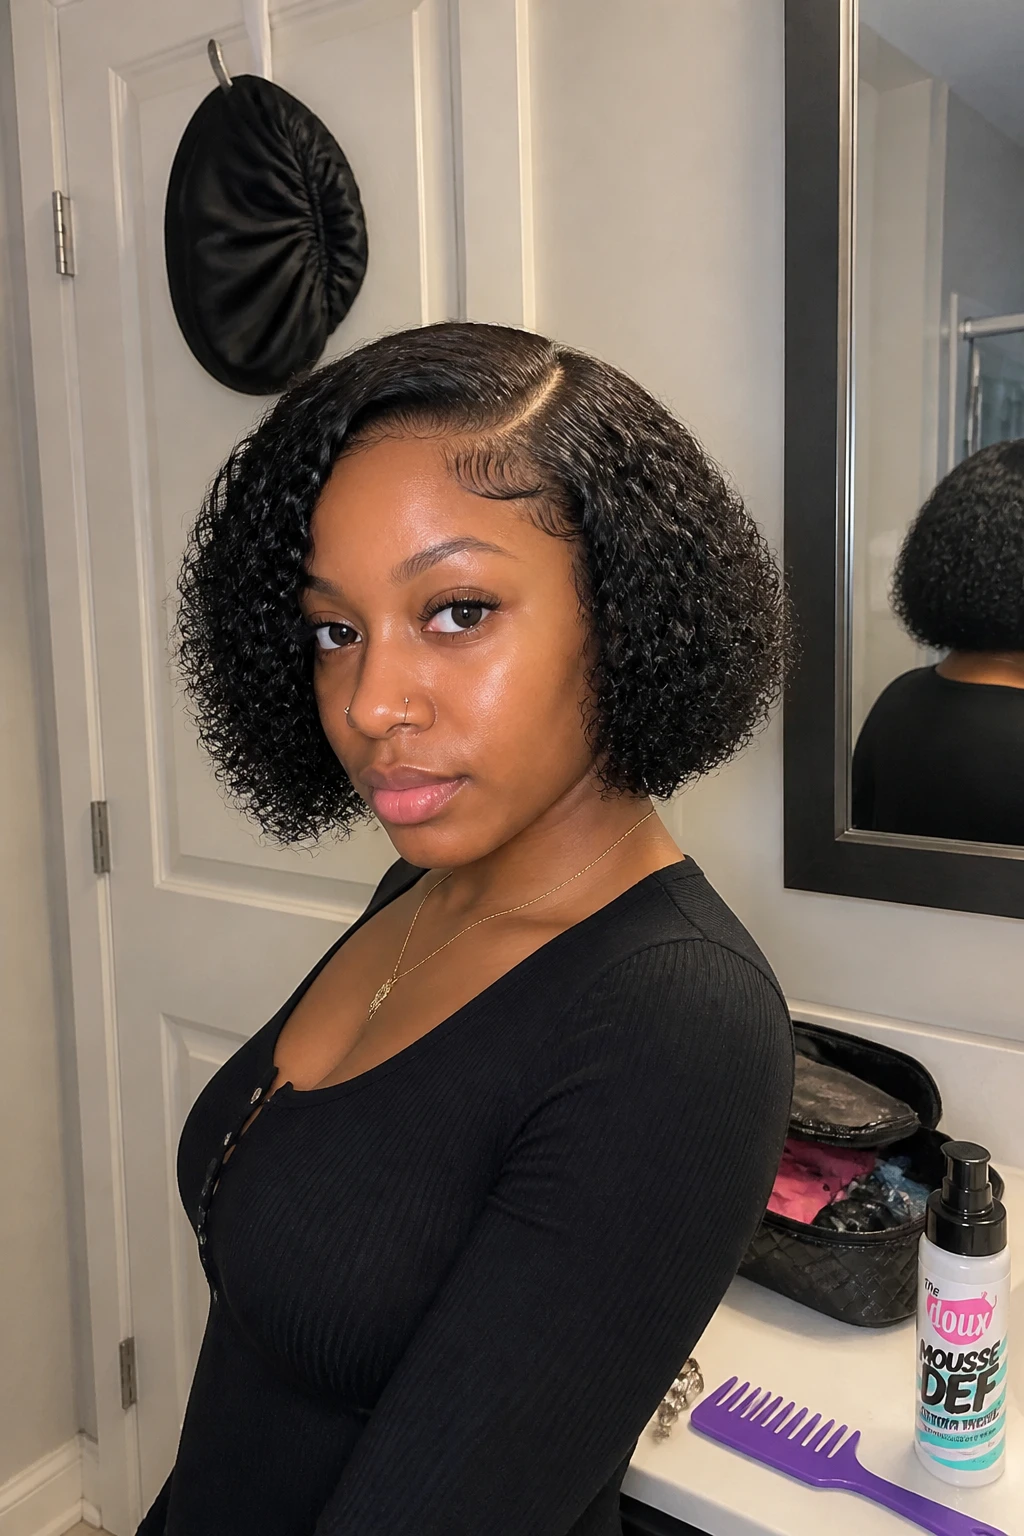
This chin-length sew-in bob feels light, neat, and easy to manage while still giving the hair plenty of bounce. It works well for women who want a shorter protective style that frames the face without covering the shoulders. The cut looks polished for work but still cute enough for dates and casual plans.
How to style it
- Refresh the curls with a light water mist and a small amount of curl foam.
- Scrunch the ends upward to restore the bob’s rounded shape.
- Separate a few front curls and direct them around the cheekbones.
- Diffuse briefly on low heat or allow the hair to dry naturally.
Quick tip
Keep the ends trimmed evenly so the bob stays full instead of looking thin or uneven.
4. Half-Up Curly Sew-In Ponytail
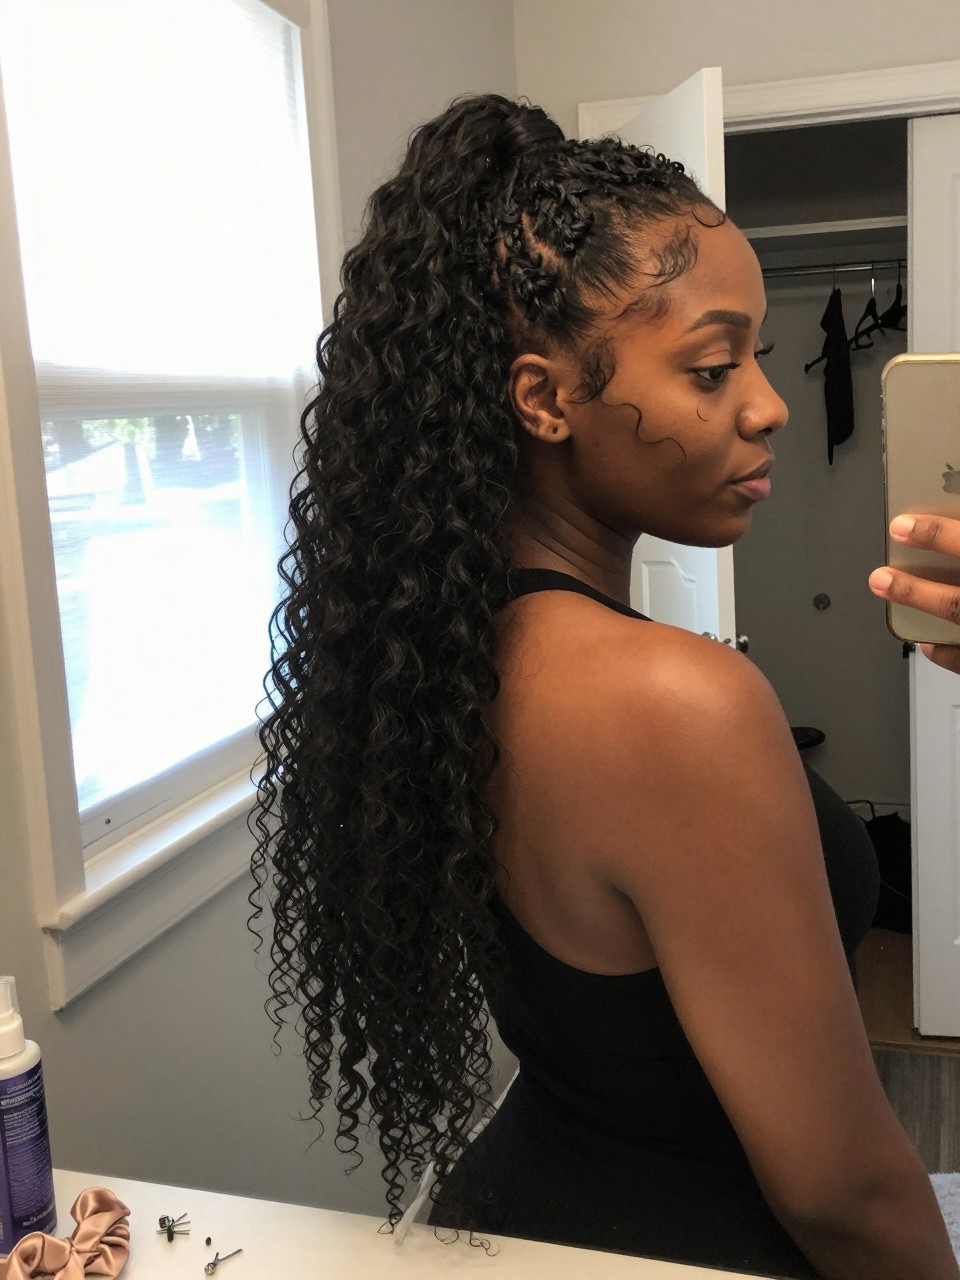
This half-up ponytail lifts the top section while leaving most of the curls loose and full. It is especially helpful when you want the hair away from your face without hiding the length of the sew-in. Wear it for birthdays, brunches, dates, or relaxed weekend plans.
How to style it
- Separate the top section from temple to temple without pulling tightly near the leave-out or closure.
- Gather the section toward the crown and secure it with a soft elastic.
- Wrap a narrow curl section around the base and pin it underneath.
- Fluff the ponytail and arrange the lower curls evenly around the shoulders.
Quick tip
Keep the ponytail slightly loose at the base to reduce pressure on the tracks.
5. Kinky Curly Sew-In With Middle Part
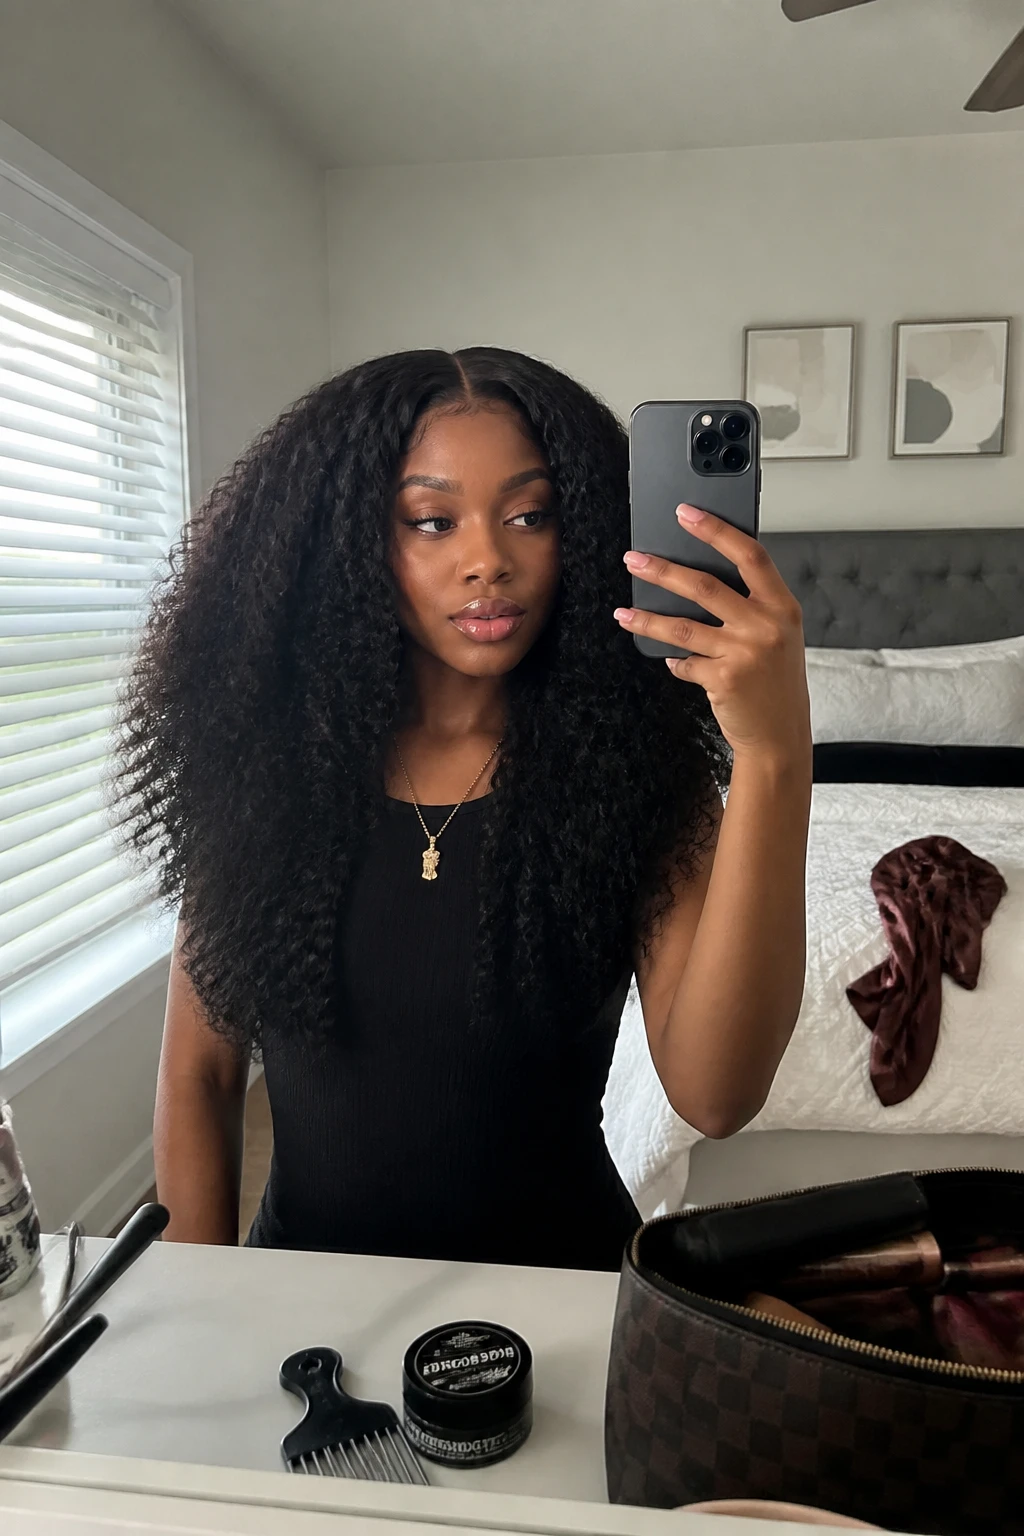
This kinky curly sew-in creates a full, natural-looking shape that blends beautifully with textured hair. It is a strong choice for women who want volume without the curls looking overly polished or uniform. The middle part keeps the style balanced and easy to wear for work, events, or everyday outfits.
How to style it
- Mist the hair lightly and work a small amount of leave-in foam through the curls.
- Separate selected coils with your fingers to create soft fullness.
- Use an afro pick only at the roots to lift flat areas.
- Shape both sides evenly and define a few curls around the face.
Quick tip
Avoid picking through the full length, as this can make the ends frizz faster.
6. Curly Sew-In With Soft Curtain Bangs
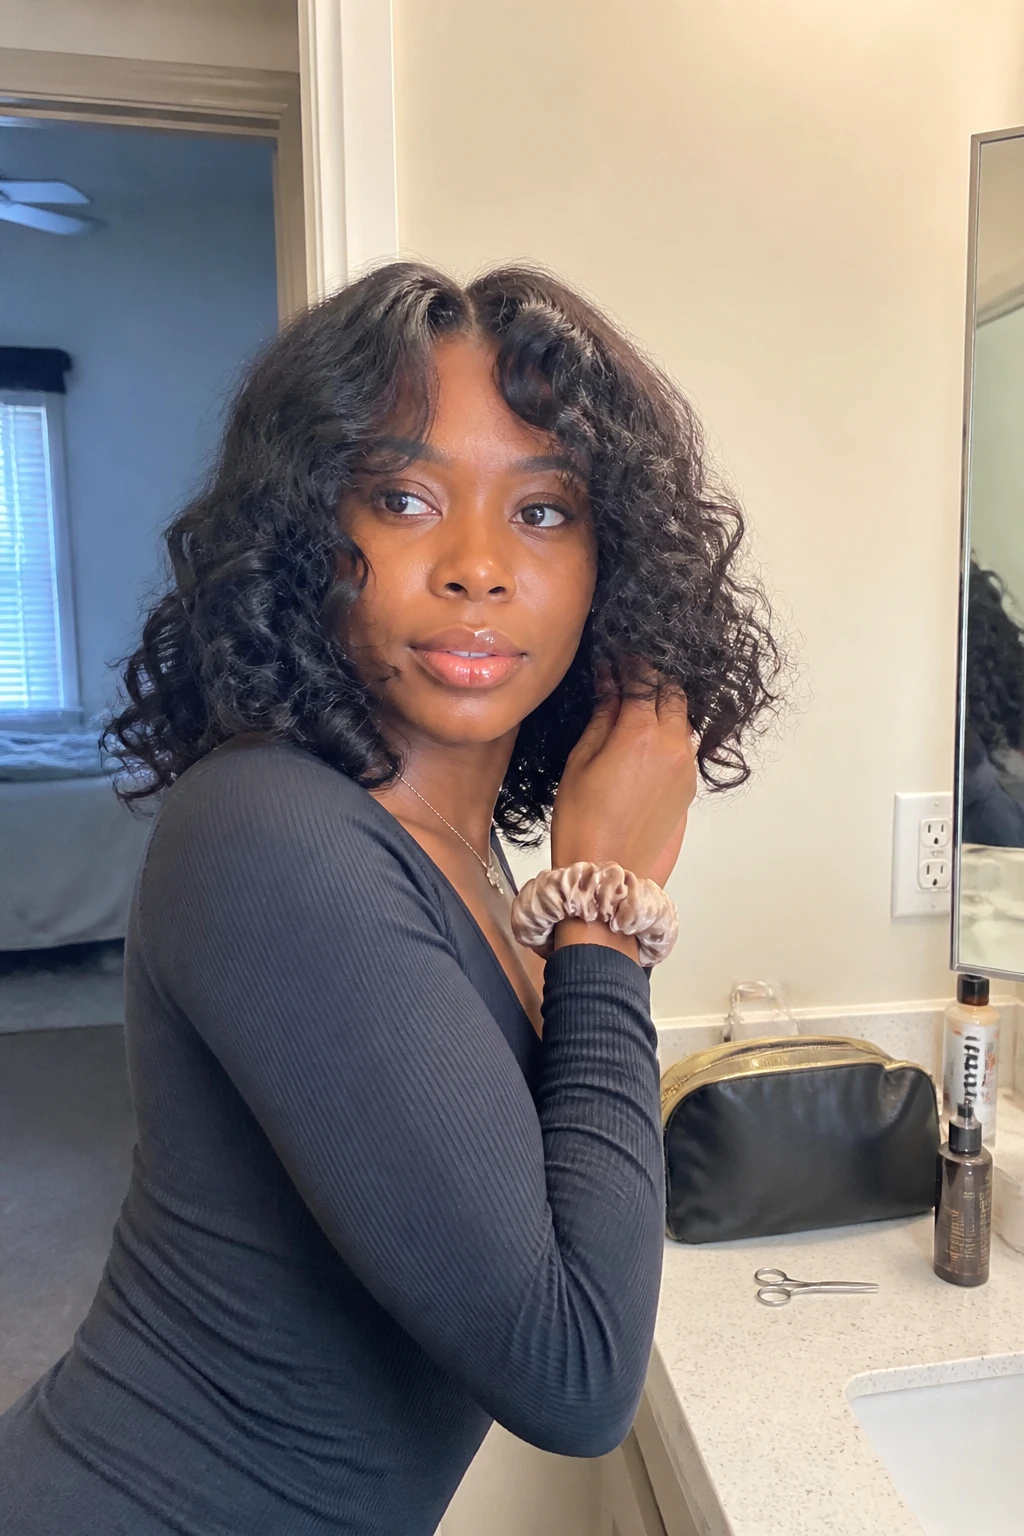
This style uses longer curly bangs that part softly through the centre and blend into the side layers. It is flattering for women who want face-framing detail without committing to a full fringe. The shape feels soft and modern for dates, workdays, brunches, or casual events.
How to style it
- Separate the curtain bang section while the hair is slightly damp.
- Twist the two front sections away from the centre of the forehead.
- Apply mousse and let the bangs dry in their curved shape.
- Separate them gently and blend the ends into the surrounding curls.
Quick tip
Keep the bangs longer than your intended finish because curly hair can shrink as it dries.
7. Low Curly Sew-In Ponytail
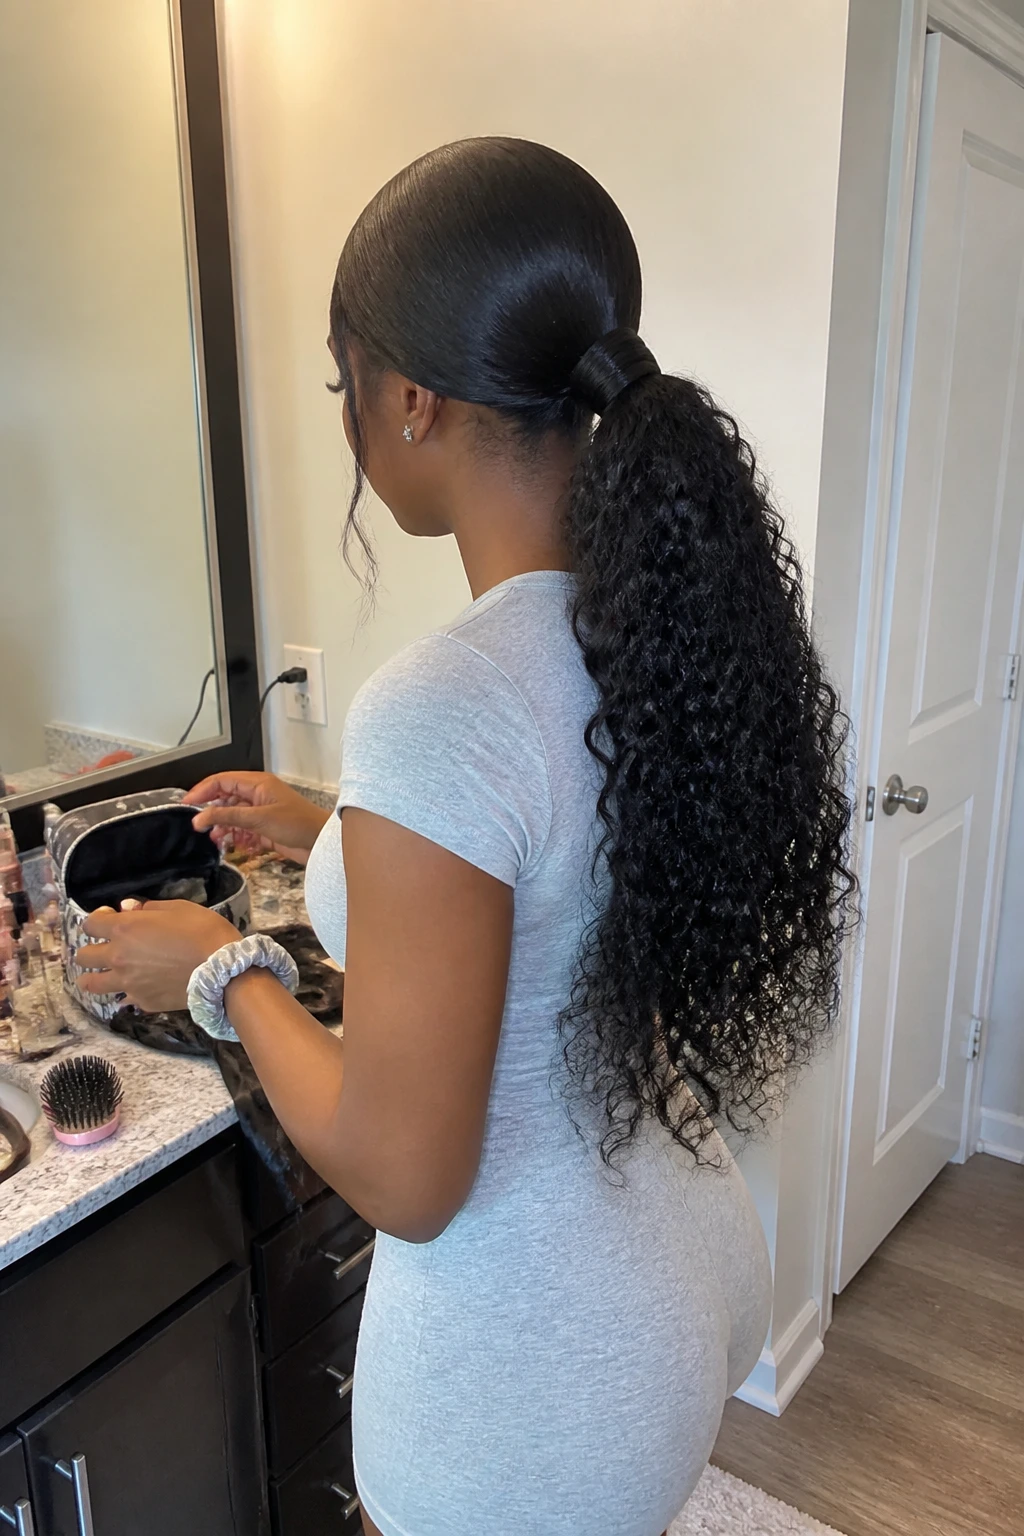
This low ponytail keeps the top neat while allowing the curls to remain full and textured through the length. It is a polished choice for work, church, dinners, or any day when you want your hair controlled without creating a bun. The wrapped base gives the simple style a more finished appearance.
How to style it
- Create a middle or side part and smooth the hair gently toward the nape.
- Secure the curls with a soft elastic, keeping the base slightly relaxed.
- Wrap a narrow curl section around the elastic and pin it underneath.
- Fluff the ponytail and pull out two face-framing curls if desired.
Quick tip
Do not pull tightly around the leave-out or closure, as this can make the style uncomfortable.
8. Curly Sew-In Pixie Cut
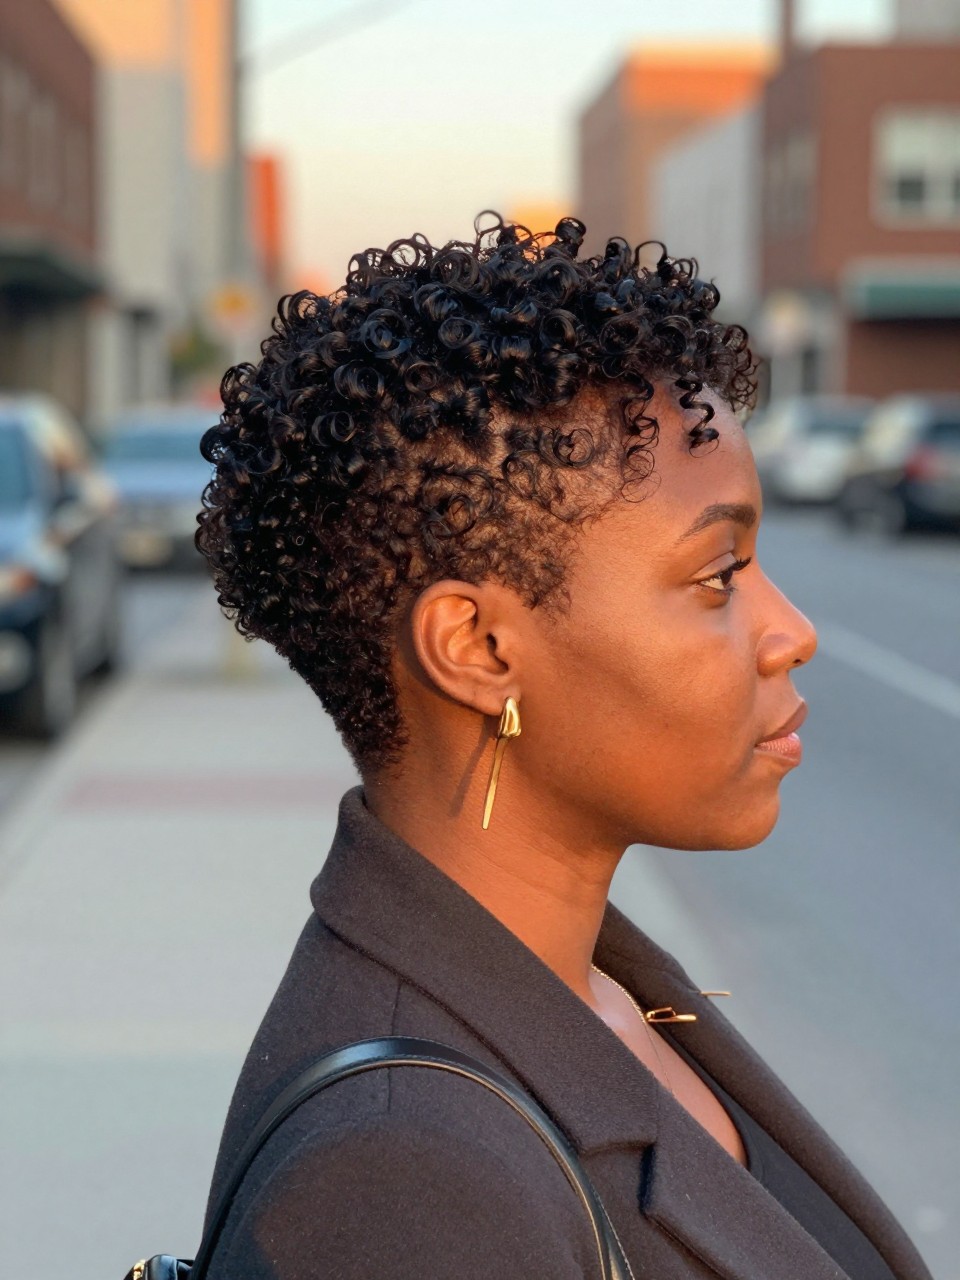
This short sew-in pixie keeps the sides neat while leaving soft curl volume through the top. It is a lightweight option for women who want a short protective style with very little daily work. The shape feels sharp enough for evenings out but simple enough for work and everyday wear.
How to style it
- Apply a small amount of curl mousse to the top and front sections.
- Finger-coil selected pieces for stronger definition.
- Smooth the sides gently and direct the top curls forward or to one side.
- Lift the crown slightly and allow the style to dry without heavy touching.
Quick tip
Use shorter extension lengths around the sides so the pixie shape looks natural rather than heavily trimmed.
9. Braided Front Curly Sew-In
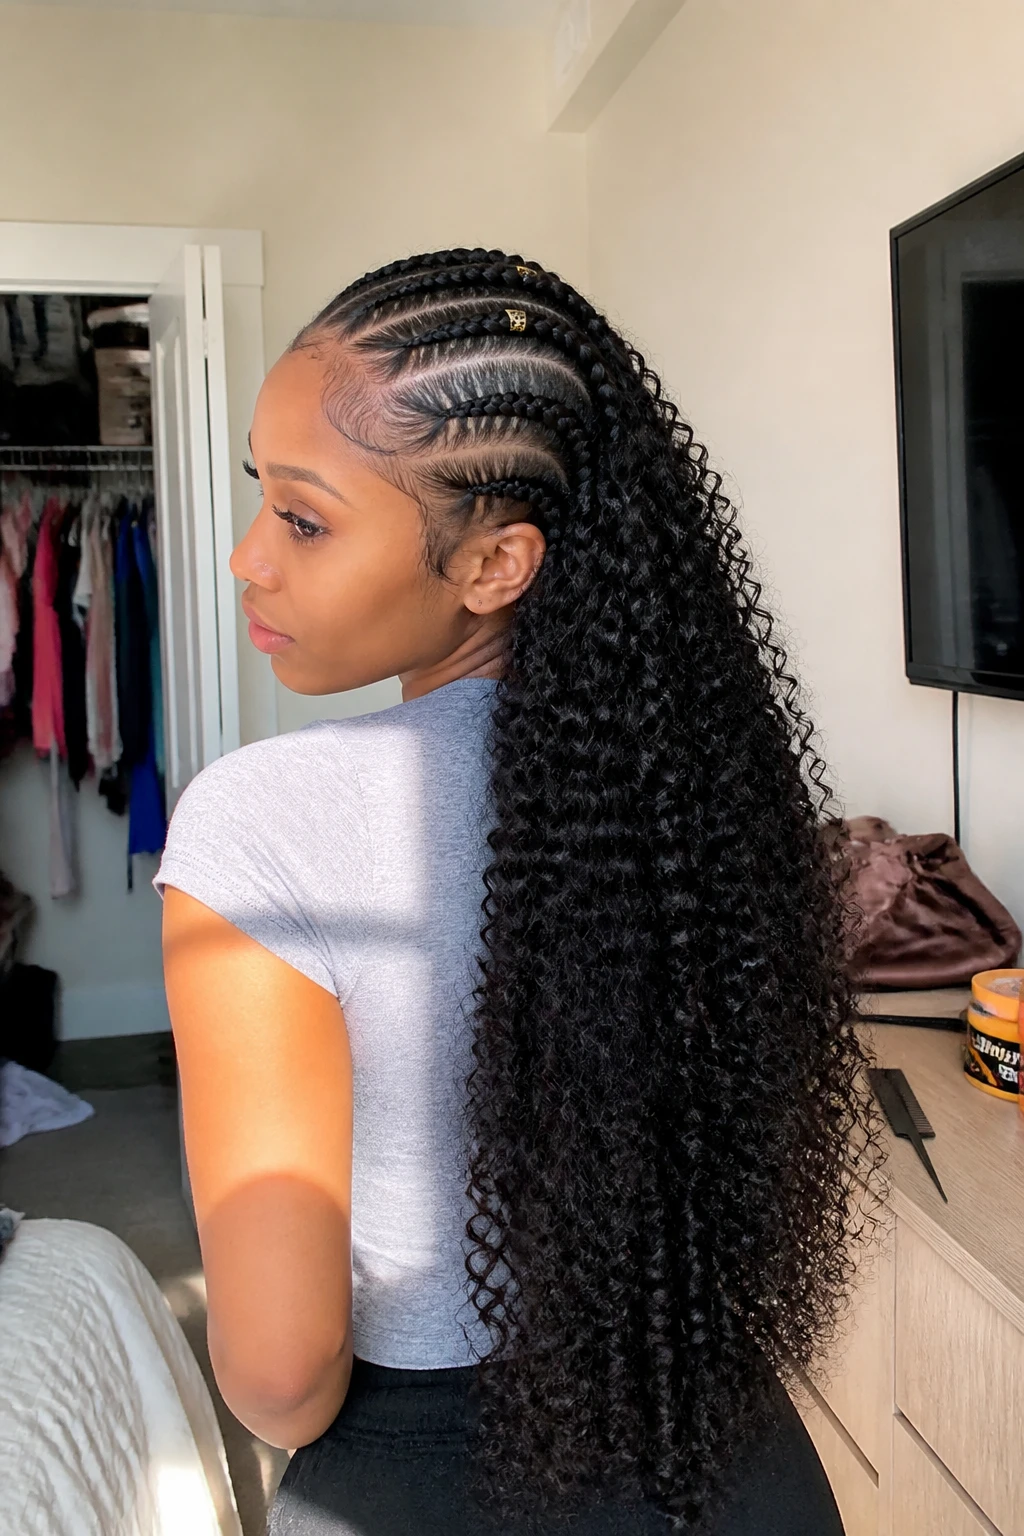
This style combines neat front braids with loose sew-in curls through the back. It is a lovely option for women who want the front secured while still enjoying a full curly look. The contrast makes it especially pretty for vacations, festivals, birthdays, or warm-weather plans.
How to style it
- Separate the front sections and braid them neatly toward the crown.
- Secure the braid ends beneath the loose curls.
- Add a few lightweight cuffs if desired.
- Fluff the back and shape the curls around the transition point.
Quick tip
Keep the front braids comfortable and avoid adding heavy accessories that may pull at the scalp.
10. Long Bohemian Curly Sew-In
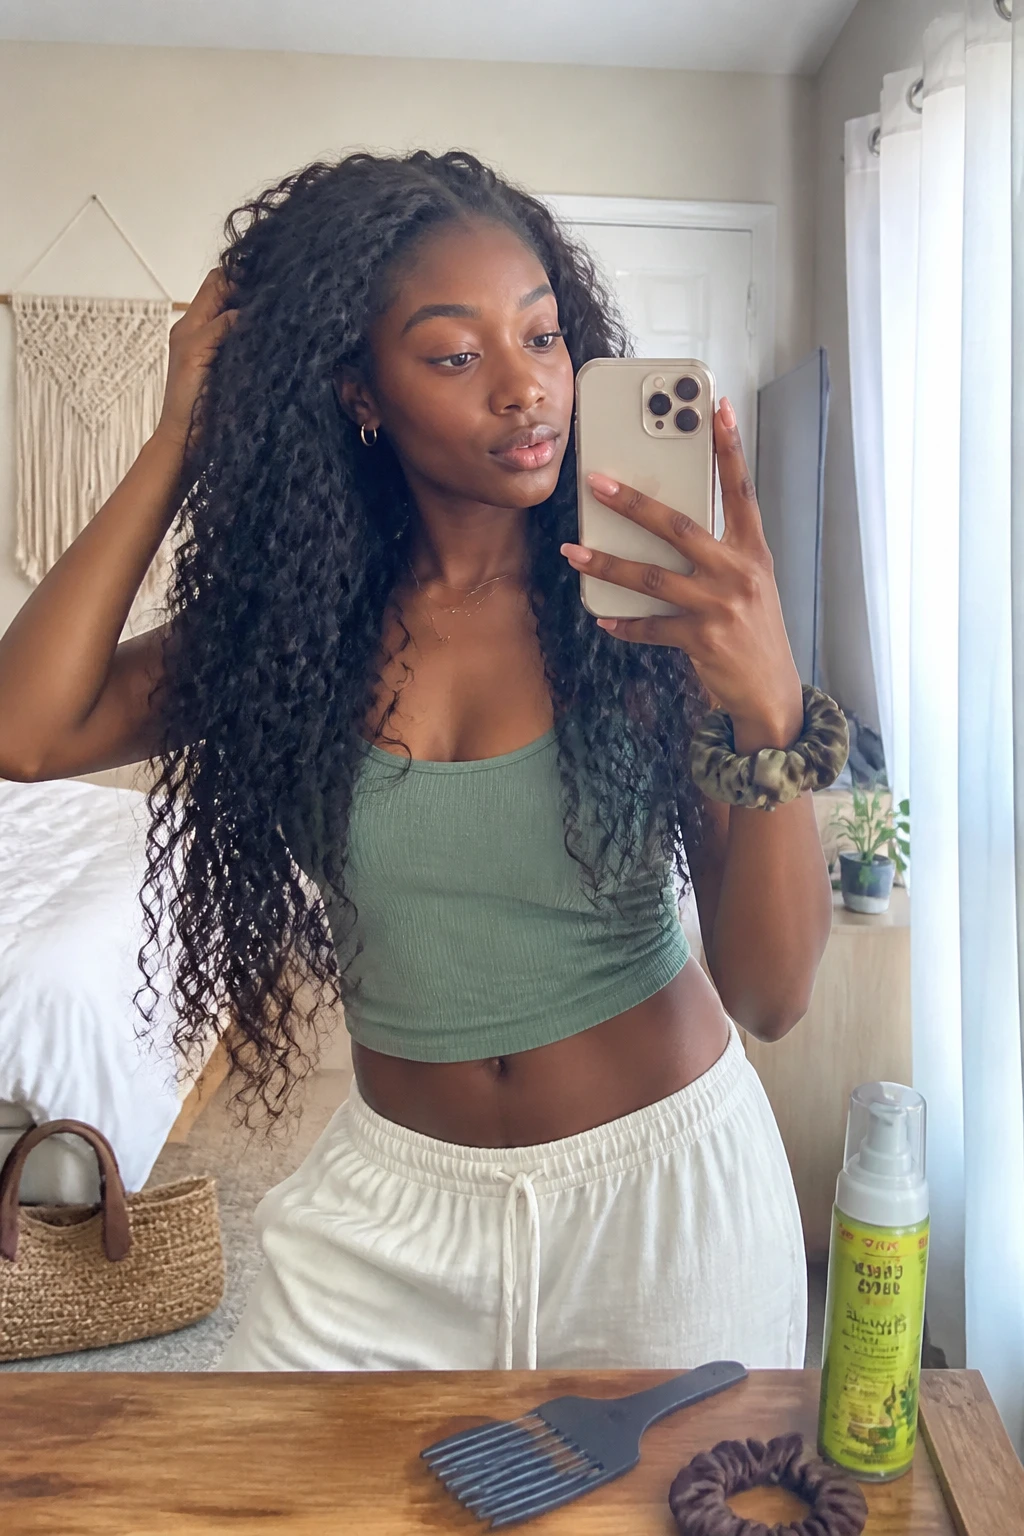
This long bohemian sew-in mixes curls and waves for a soft, less uniform finish. It is ideal for women who enjoy plenty of length and movement without wanting every section to look perfectly styled. The look works beautifully for holidays, festivals, dates, or casual summer outfits.
How to style it
- Mist the hair lightly and separate a mix of larger and smaller curl sections.
- Apply mousse through the ends and scrunch upward.
- Twist selected pieces around your fingers to restore definition.
- Leave a few sections slightly undone so the finish stays relaxed.
Quick tip
Detangle the ends gently before bed to keep long bohemian hair from matting.
11. Side-Swept Curly Sew-In Updo
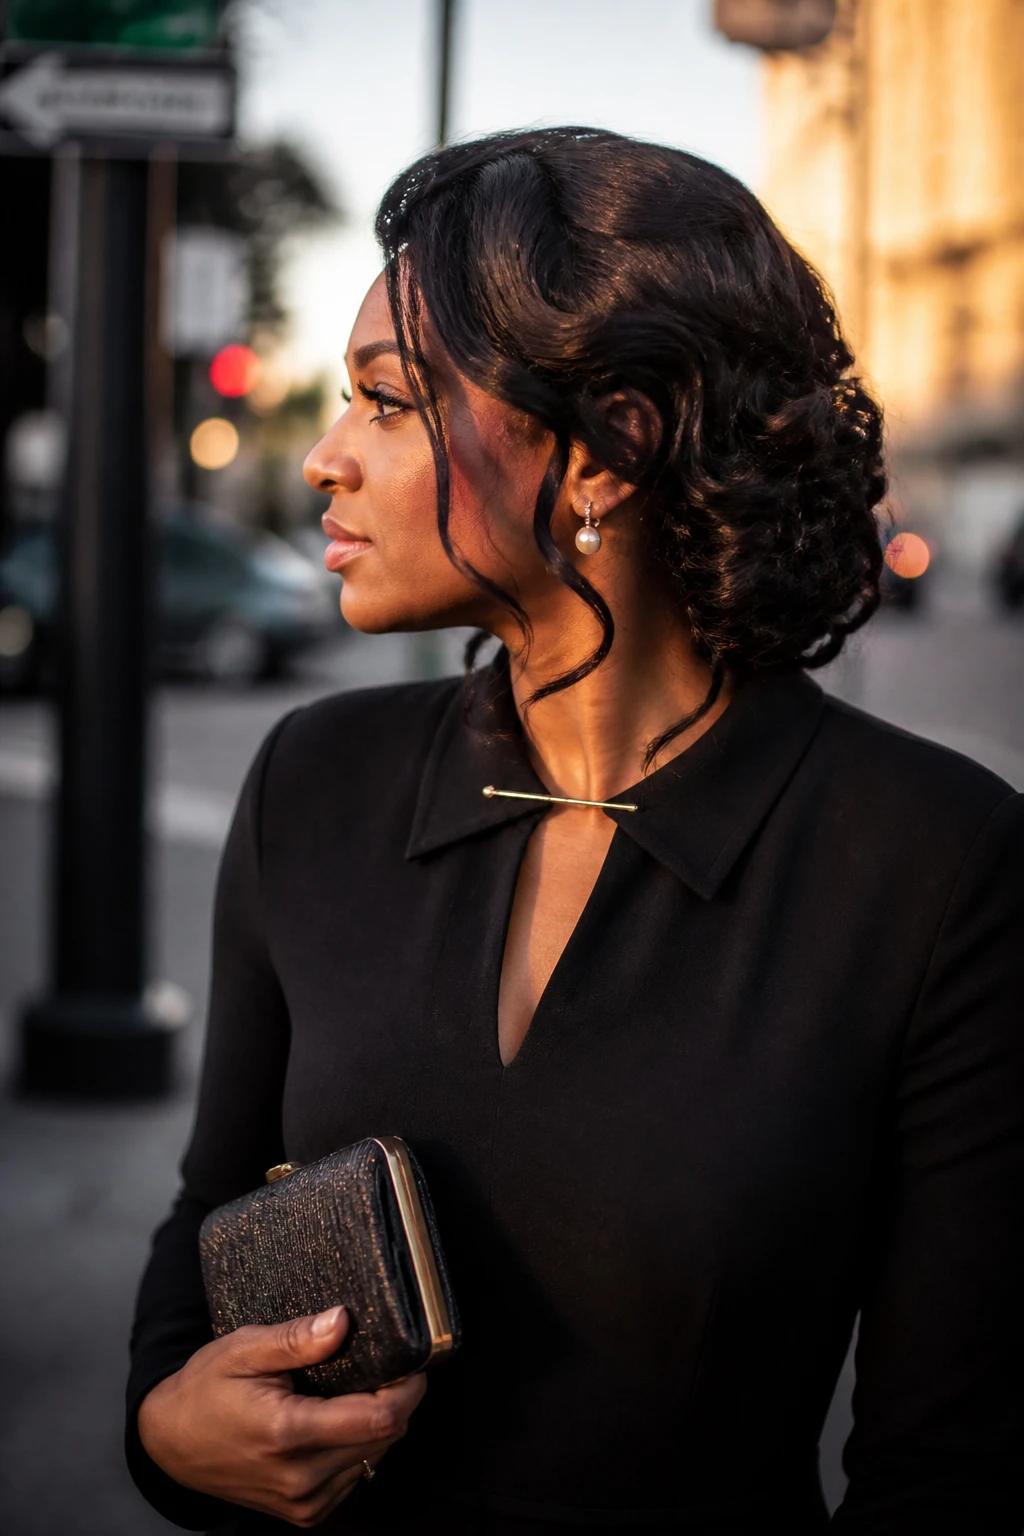
This side-swept updo gathers the curls into a soft shape behind one ear while leaving a little texture around the face. It is an elegant choice for weddings, formal dinners, birthdays, or special photographs. The curls give the updo natural fullness without needing much teasing.
How to style it
- Create a deep side part and leave two narrow curls loose around the face.
- Gather the remaining hair behind one ear into a low side ponytail.
- Loop and pin small curl sections around the base.
- Lift the crown slightly and finish with flexible-hold hairspray.
Quick tip
Pin the curls in different directions so the updo looks soft rather than tightly wrapped.
12. Wand Curl Sew-In With Long Layers
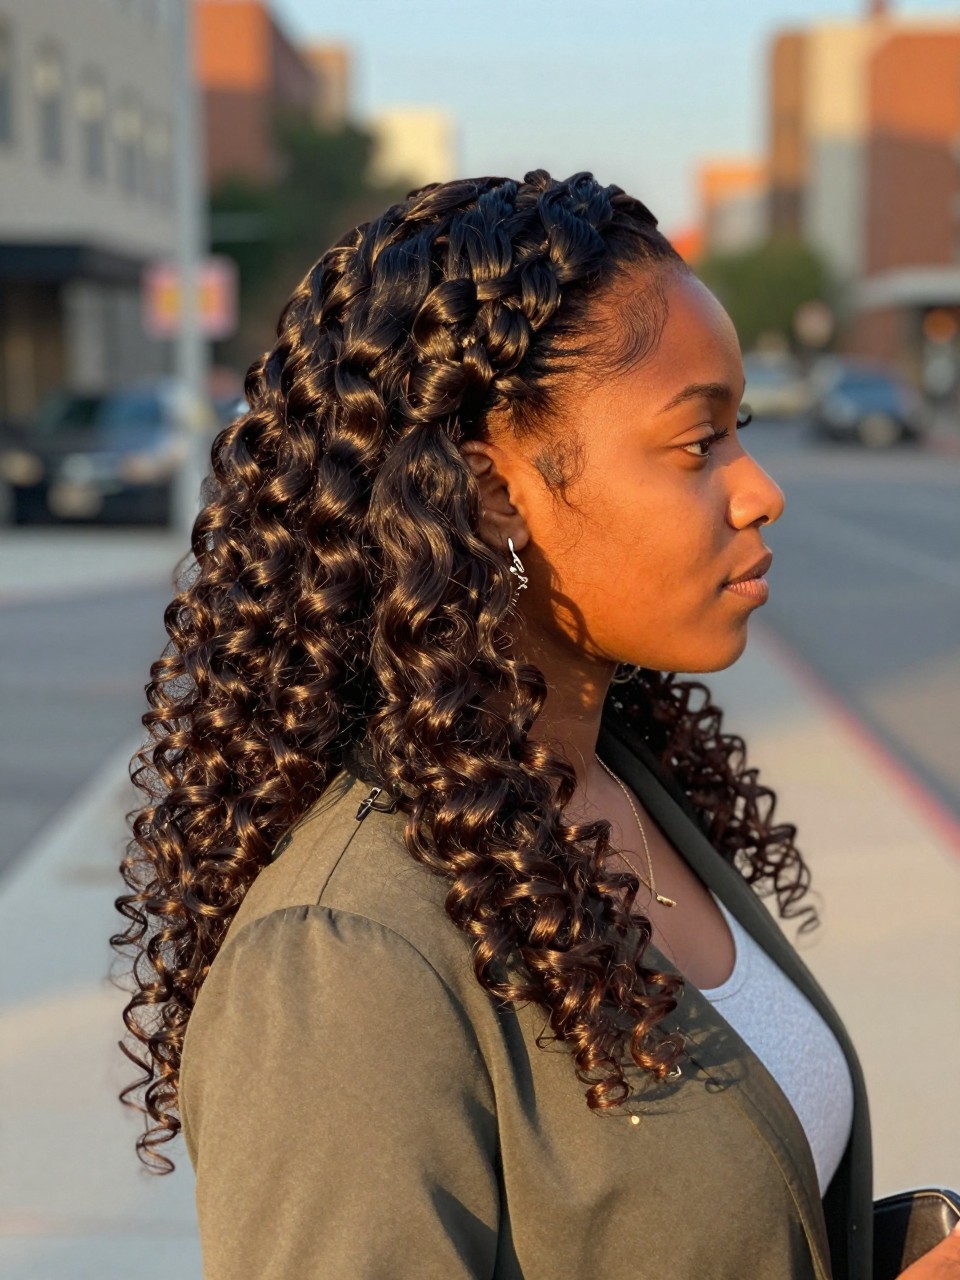
This wand curl sew-in has larger, polished spirals that create a glamorous but still wearable shape. It works well for women who want defined curls with more movement than a tightly coiled texture. The style is beautiful for weddings, dinners, birthdays, or formal events.
How to style it
- Separate the curls lightly while keeping each spiral mostly intact.
- Create a soft side or middle part.
- Shape the front layers around the cheeks and shoulders.
- Apply a small amount of mousse and reshape any loose spirals around your fingers.
Quick tip
Separate each wand curl only once or twice to keep the finish smooth and polished.
13. Half-Up Curly Sew-In Bun
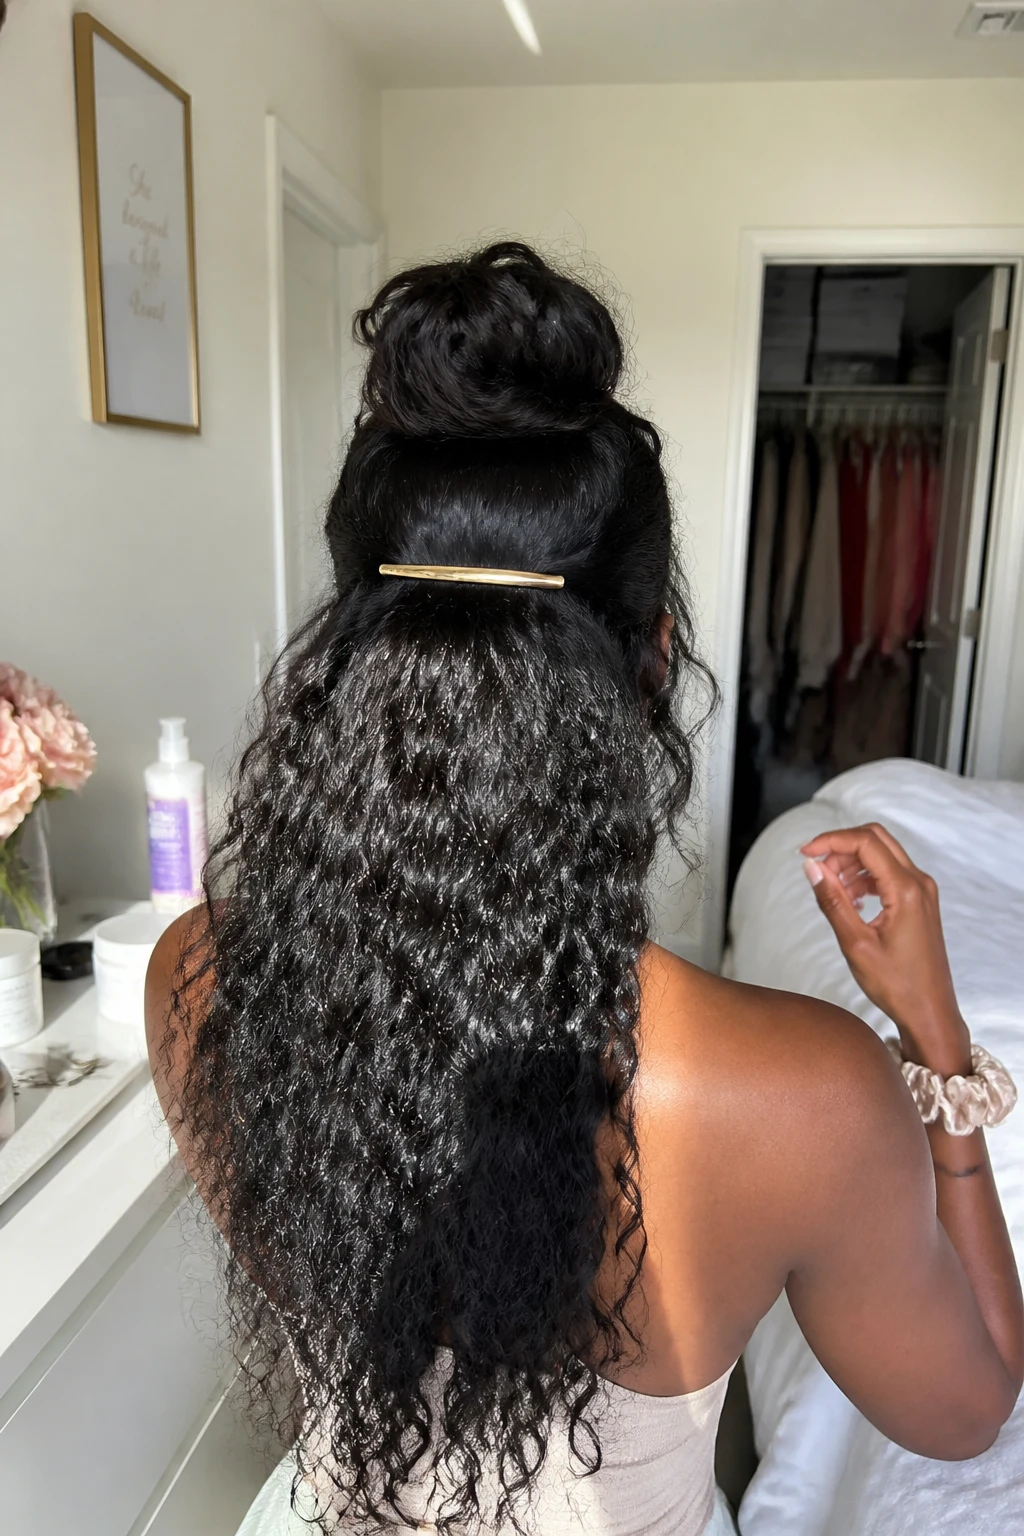
This half-up bun creates height through the crown while keeping most of the curls loose. It is a lovely option when you want the sew-in to feel dressed up without creating a full updo. The look works well for dinners, dates, birthdays, or polished daytime plans.
How to style it
- Separate the top section from both temples toward the crown.
- Gather it gently into a ponytail and twist it into a soft bun.
- Secure the bun with pins and add a slim barrette beneath it if desired.
- Fluff the lower curls and smooth any visible gaps around the crown.
Quick tip
Keep the bun small so it does not place too much pressure on the tracks.
14. Curly Sew-In Lob With Flipped Side
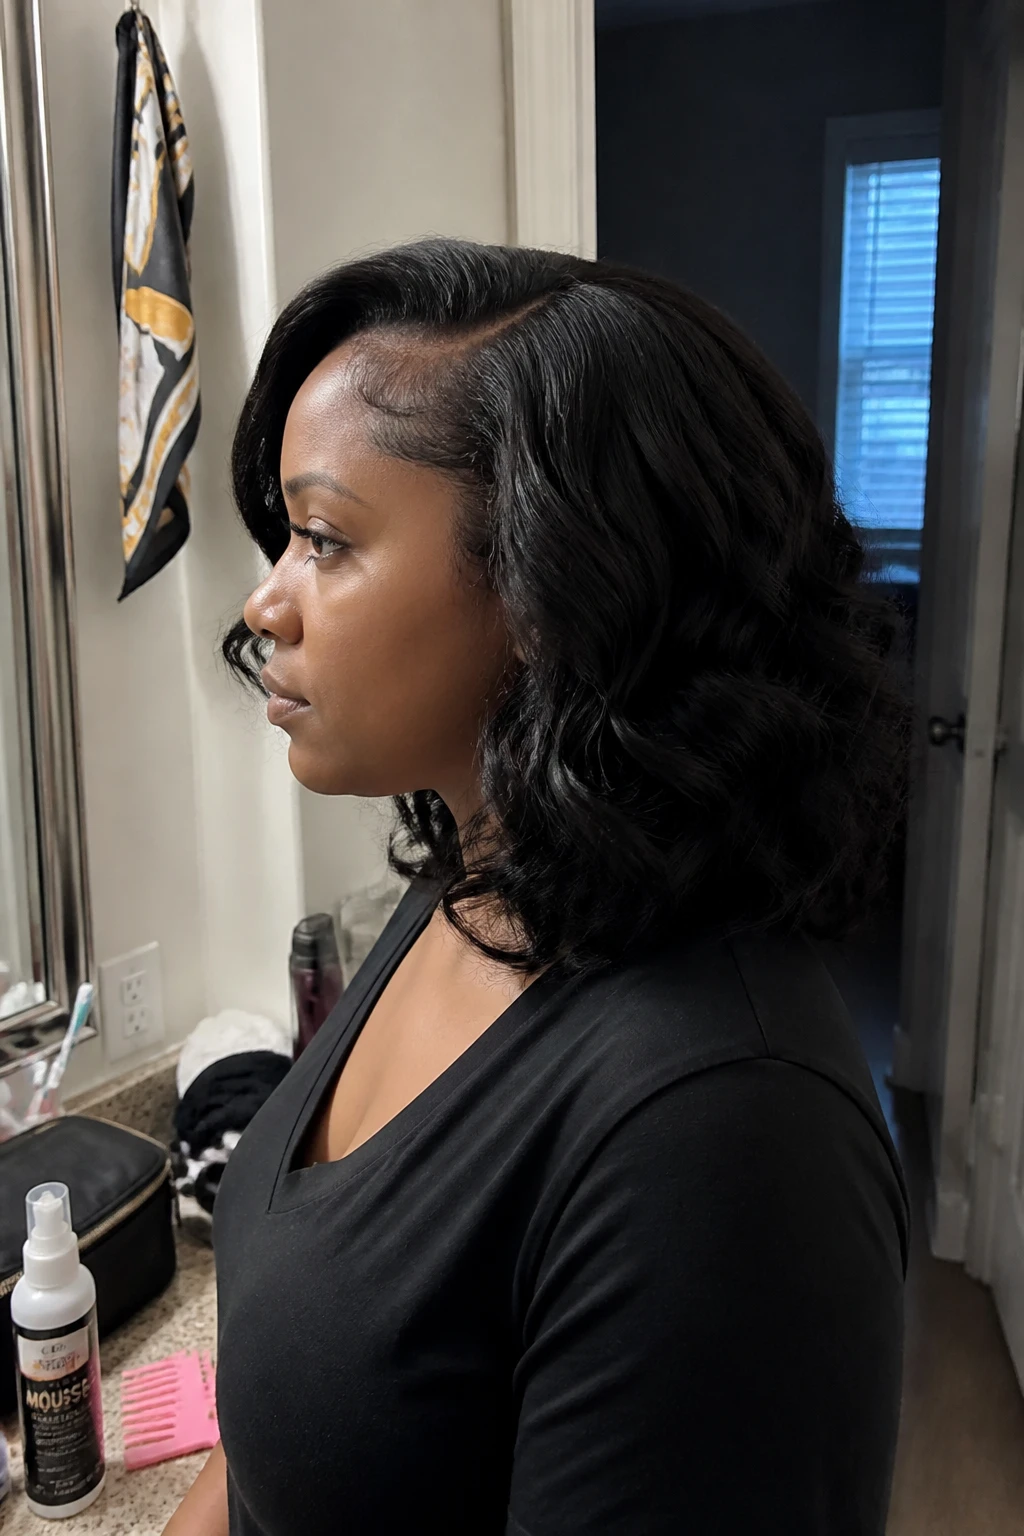
This collarbone-length lob uses a deep side part and a flipped front section to create a soft, polished shape. It is a flattering option for women who want medium-length sew-in hair that feels light but still offers several styling choices. Wear it for work, dinners, church, or everyday plans.
How to style it
- Create a deep side part and direct the fuller side away from the face.
- Shape the front curls into a soft outward sweep using your fingers.
- Apply mousse through the ends and scrunch lightly.
- Lift the roots on the fuller side and secure the flip with a hidden pin if needed.
Quick tip
Use a small hidden pin beneath the fuller side if the flipped section keeps falling forward.